
Metcalfe Garden Success: New Plant Spring Care Guide
Ready to get your hands dirty this spring? If you're planning new additions to your garden, ensure their success from the start! Need professional help planning or planting? Request a quote from Clean Yards today!
Quick Spring Care Tips for New Plants:
- Wait until after the last frost (late May in Ottawa) to plant tender items.
- Dig holes wider than the pot; plant at the same depth as the pot.
- Water deeply right after planting, then only when soil is dry 2 inches down.
- Apply 2-3 inches of organic mulch, keeping it away from stems.
- Wait 2-4 weeks before using gentle, slow-release fertilizer.
- Remove weeds promptly when small.
Let us handle the hard work! Explore our range of garden care solutions.
Explore Our ServicesIntroduction: Spring Has Sprung in Metcalfe! (Now What About Those New Plants?)
Well, hello there, Metcalfe! Doesn't it feel *fantastic* to finally see the snow melt away and feel that spring sunshine? Across the Ottawa region, from nearby neighbours in Greely and Osgoode all the way to Barrhaven, everyone's itching to get their hands dirty in the garden. You've probably already visited the garden center (maybe more than once – we don't judge!) and brought home some lovely new plants to brighten up your landscape. You might find great local options or explore reputable regional nurseries like Rideau Woodland Ramble.
That initial burst of spring gardening energy is wonderful! But let's be honest, after the excitement of picking out those perfect perennials or colourful annuals, comes the big question: "Okay, how do I keep these alive and happy?" Especially with our unique Ottawa climate, where spring can sometimes throw us a curveball. Don't fret! This guide is here to help you give those new additions the best start, covering the essentials from planting correctly to smart watering techniques, ensuring your garden thrives all season long. Let's get those roots settled!
Understanding Your Ottawa Area Garden Canvas: Climate & Soil Smarts
Okay, let's dig into the nitty-gritty of your garden's foundation: the climate and soil right here in the Ottawa area. Understanding this "canvas" is key before you even think about planting that prize-winning petunia! For general local gardening advice, the City of Ottawa's website offers helpful resources.
Our Unique Ottawa Climate: A Bit of Everything!
Anyone living from Metcalfe to Barrhaven knows our weather keeps us on our toes. Ottawa sits in a climate zone (usually 5a, sometimes dipping to 4b depending on your exact spot) known for chilly winters and lovely, warm summers. Spring, however, is the real rollercoaster! We can have beautiful sunny days perfect for gardening, only to be surprised by a late frost or even a dusting of snow. And let's not forget the potential for heavy spring rains.
What does this mean for your new plants? Patience is key! Don't rush tender annuals or vegetables into the ground too early. Keep an eye on the forecast, especially the overnight lows. Waiting until after the risk of frost has truly passed (usually late May) is the safest bet for most newcomers to your garden. This unpredictability also highlights the importance of good drainage in your soil – which brings us to our next topic!
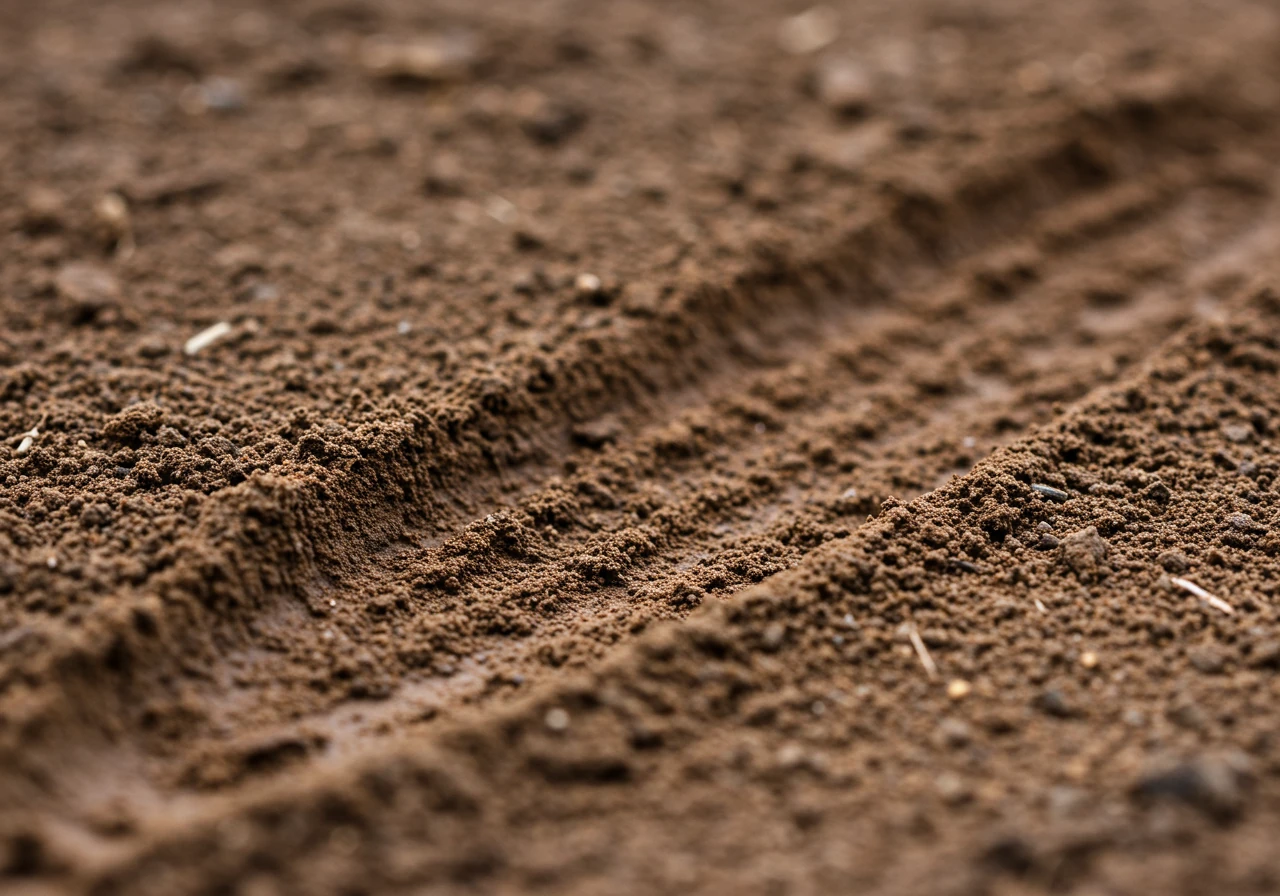
Getting Your Hands Dirty: Ottawa Soil Smarts
Much of the Ottawa region, including areas like Greely, Osgoode, and Nepean, is famous (or infamous?) for its clay soil, often called Leda clay. If you dig up a clump and it feels sticky, dense, and holds its shape when wet, you've likely got clay.
Clay Soil Challenges & Perks:
- The Challenge: It drains slowly (hello, puddles after rain!), can bake hard in summer, and can be tough to dig. Compaction is also a common issue.
- The Perk: Clay soil is actually very rich in nutrients! Plants *can* thrive in it, *if* you help improve its structure. Our team can assist with expert soil preparation techniques.
Other Soil Types: While clay is common, you might have pockets of loam (dark, crumbly, ideal!) or sandy soil (gritty, drains fast, needs more watering and nutrients).
How to Tell What You Have: A simple "feel test" works wonders. Grab a handful of moist (not soaking wet) soil:
- Clay: Feels sticky, forms a tight ball or ribbon.
- Loam: Feels slightly gritty but holds together, dark, crumbly.
- Sandy: Feels very gritty, falls apart easily.
Why Does Soil Type Matter?
Knowing your soil helps you choose the right plants and understand how to care for them. Clay soil needs help with drainage and aeration. Adding organic matter like compost is the best way to improve it over time. This not only helps break up the heavy clay but also feeds the soil life. Using the right equipment is also crucial; check out these suggestions for essential Metcalfe garden tools for working with clay soil, especially in the fall. Good soil structure also supports promoting Metcalfe garden beneficial insects for natural pest control, as healthy plants are less prone to pests. Adding a layer of organic mulch is another fantastic step, offering benefits you can read about in Metcalfe Mulch Magic: Expert Installation Tips.
Remember, improving soil is a marathon, not a sprint. Consistent effort, like adding compost each year and even thinking ahead to fall cleanup services to get your Metcalfe yard ready by incorporating leaves, makes a huge difference. If tackling tricky soil feels overwhelming, remember there are professionals who can help with amending soil and other garden tasks – check out our comprehensive landscaping services. Understanding your specific site – the sun exposure, the wind patterns, and the soil – sets you up for gardening success!
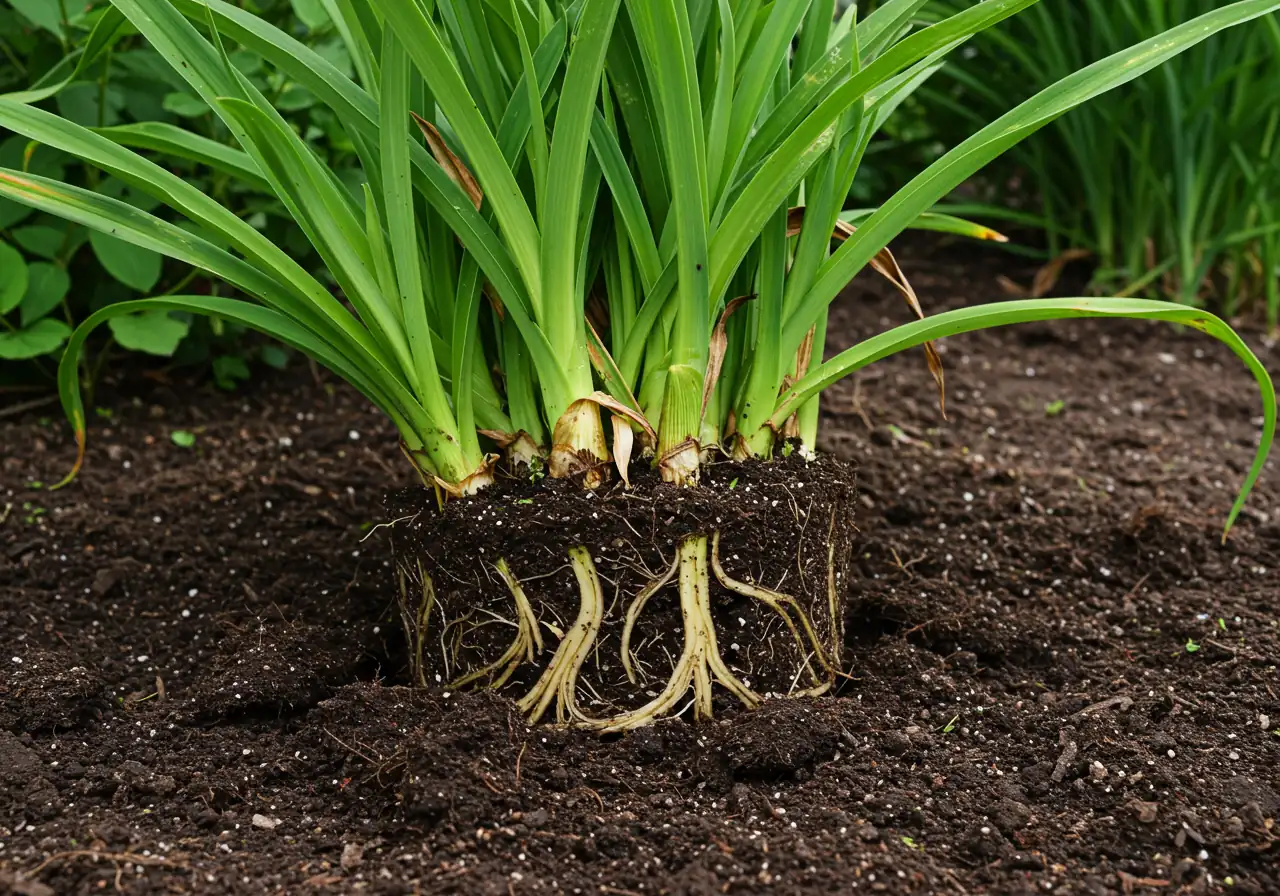
Planting Power: Giving Your New Green Friends the Best Start
Okay, garden superheroes! You’ve navigated the aisles, chosen your leafy champions, and now it’s time for the main event: planting! Giving your new green friends the best possible start is like giving them a comfy bed and a welcome-home meal – it sets them up for success. Let’s get those roots settled in their new Ottawa home, whether you're gardening in Manotick, Nepean, or anywhere in between.
Step-by-Step Planting Guide:
Step 1: Dig That Hole (But Make it Wide!)
First things first, grab your trusty shovel. You want to dig a hole that's roughly the same depth as the plant's root ball (the clump of soil and roots it came in) but at least twice as wide. Think wide, not necessarily deep! Why wider? This loosens up the surrounding soil, making it much easier for those new roots to spread out and explore their new neighborhood. If you hit that familiar heavy Ottawa clay, really break it up around the edges of the hole. Give those roots room to breathe! Getting the garden bed ready *before* you start digging is also smart; a good tidy-up makes everything smoother. If you've got leftover leaves or debris from winter, consider using an Ottawa yard cleanup service to get a clean slate. Residents in Metcalfe facing the same can check out specific local options like our Metcalfe yard cleanup service.
Step 2: Give the Soil Some Oomph!
Remember that soil you just dug out? Don't just dump it back in as-is! This is your golden opportunity to improve it. Mix the soil you removed with a generous amount of compost or other quality organic matter. Think of it like adding booster rockets to your plant's lunchbox. This step is *super* important, especially in areas with heavy clay or sandy soil. Adding organic matter improves drainage (goodbye, soggy roots!), aeration (hello, oxygen!), and adds vital nutrients. Don't skip this – your plants will thank you later! Excellent soil preparation is key.
Step 3: Handle with Care – No Yanking Allowed!
Time to introduce your plant to its new home. Gently slide (don't pull!) the plant out of its pot. Tip the pot sideways and support the base of the plant as you ease it out. Take a peek at the roots. Are they circling tightly around the root ball (called being root-bound)? If so, gently tease them apart with your fingers or make a few vertical cuts with clean snips. This encourages the roots to grow outwards into your lovely amended soil, not just keep going in circles.
Step 4: Level Up! (Planting Depth is Key)
This might be the most crucial step: place the plant in the center of the hole, making sure the top of its root ball is level with the surrounding ground. Do not plant it deeper than it was in its original pot! Planting too deep is a common mistake that can suffocate the plant's crown (where the stem meets the roots). If you plant too high, the roots might dry out. Aim for that "just right" level.
Step 5: Backfill and Gently Tuck In
Now, gently backfill the hole around the root ball using that amended soil mixture you prepared. Lightly firm the soil with your hands as you go to remove any large air pockets. Resist the urge to stomp it down like you're packing for a long trip! Over-compacting the soil makes it hard for water and air to reach the roots. Gentle firming is all you need.
Step 6: The Welcome Drink – Water Thoroughly!
Immediately after planting, give your new addition a deep, slow watering. This helps settle the soil around the roots, eliminating remaining air pockets, and gives your plant much-needed hydration after the move. Water until the entire root zone is thoroughly soaked. Keep an eye on watering for the next few weeks, ensuring the soil stays consistently moist (but not waterlogged) as the plant establishes. Consistent garden maintenance includes proper watering.
Planting might seem simple, but getting these steps right makes a world of difference. If you're tackling a big landscaping project or just feeling a bit overwhelmed, remember professional help is available. Many companies offer planting as part of their comprehensive landscaping services, including garden installations. You can always contact us if you have specific questions about your Ottawa garden needs, or check out our estimate and feedback page to see what other happy gardeners are saying!
Need help with planting or entire garden makeovers?
Get Professional Planting HelpWatering Wonders (Not Blunders!) for Thirsty Newcomers
Alright, your new plants are nestled snugly in their beds – high five! But hold on, don't put that hose away just yet. Giving your green recruits the *right* amount of water, especially in their first few weeks, is like offering a comforting drink after a big move. It's crucial for helping them establish strong roots and thrive in our sometimes surprising Ottawa weather, whether you're in Manotick, Richmond, or right here in Metcalfe. Let's turn potential watering woes into wins!
Think Deep, Not Shallow Sips
New plants need consistent moisture around their roots as they settle in. The golden rule? Water *deeply* and *less frequently*, rather than giving little sips every day. Shallow watering encourages shallow roots, making plants weaker in the long run. Aim to soak the entire root zone each time you water. How do you know if you've watered enough?
- The Finger Test: Stick your finger about two inches into the soil near the plant's base. If it feels dry at that depth, it's time to water. If it's still moist, hold off. Simple!
When and How to Quench Their Thirst
- Morning Glory: The best time to water is early morning. This gives the foliage time to dry before the evening, reducing the risk of fungal diseases. Watering in the midday heat means more water evaporates before it even reaches the roots – not very efficient!
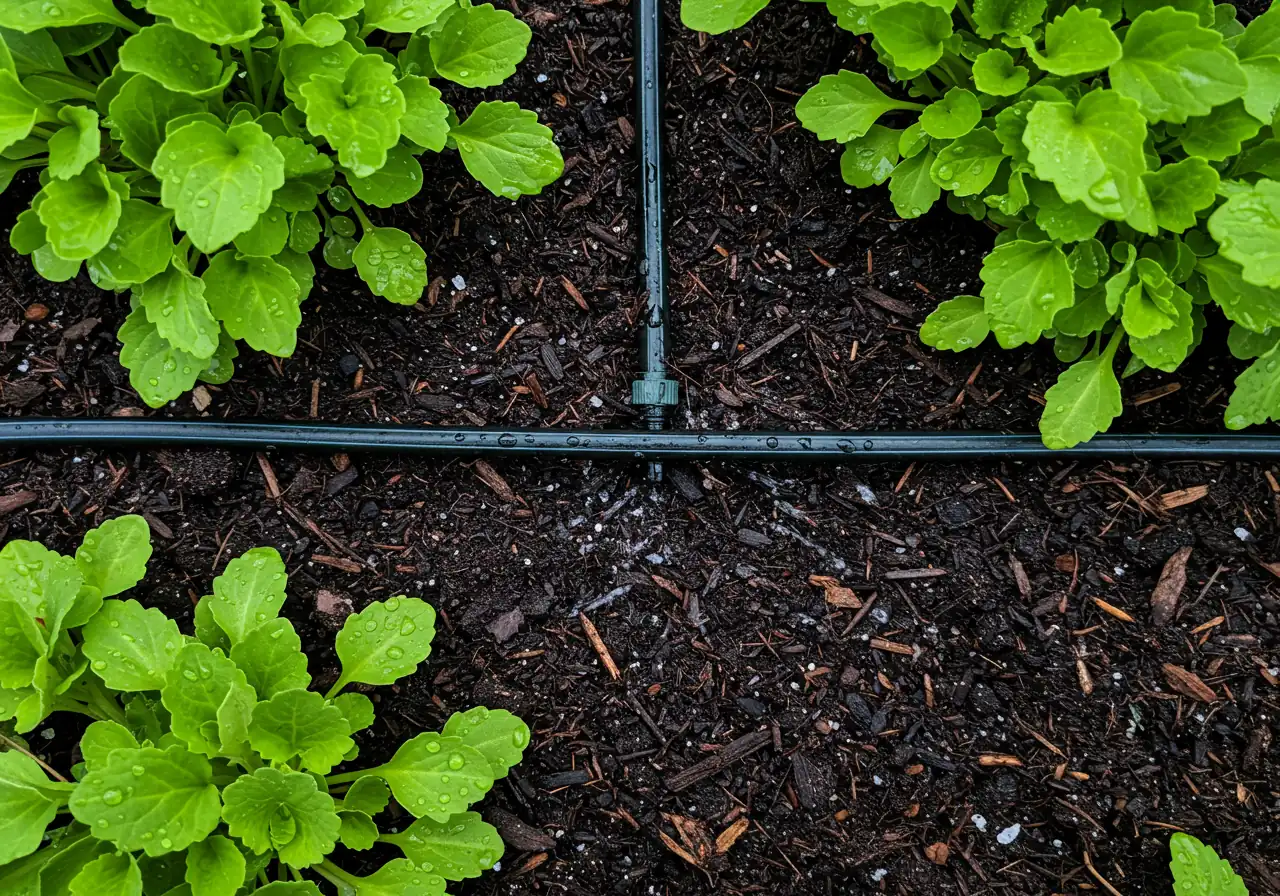
- Aim Low: Water the *soil* at the base of the plant, not the leaves. Use a watering can with a rosette, a gentle hose setting, or even better, a soaker hose snaked through your garden bed. This delivers water directly where it's needed most.
- Slow and Steady: Apply water slowly enough that it can soak in, rather than running off the surface, especially important in our common clay soils. Ensure the base of your plants is clear of excessive debris - something a quick tidy up helps with, and if you need a hand, consider a Metcalfe garden clean up service to set the stage for success. Similar services are available for neighbours, such as our city garden clean up service.
Uh-Oh Signals: Too Much or Too Little?
Plants will often tell you if they're unhappy:
- Under-Watered: Wilting, drooping leaves (especially during the cooler parts of the day), dry and crumbly soil, sometimes yellowing leaves starting from the bottom.
- Over-Watered: Yellowing leaves (often starting from the bottom too, confusing, right?), droopy but *soft* stems, mushy soil, possibly mold or fungus growing on the soil surface. Finding the right balance takes practice! Getting watering right isn't about strict rules (we save those for our official Terms and Conditions), but rather understanding your plant's specific needs and observing carefully. Check our local GMB page for tips and reviews: Clean Yards on Google.
Water-Wise Habits for Ottawa Gardens
Conserving water is always smart. Applying a good layer of organic mulch is a fantastic water-saving tip. Check out ideas for smart material selection for your garden beds that look great and help the soil. Proper mulching and edging techniques not only define your garden beautifully but dramatically reduce water evaporation from the soil surface, keeping roots cool and moist for longer. Happy watering!
Understanding Plant Needs: A Quick Guide
Sunlight Needs
Most new plants come with tags indicating their light requirements. Pay attention!
- Full Sun: 6+ hours of direct sunlight per day. Essential for most vegetables and many flowering perennials.
- Part Sun/Part Shade: 4-6 hours of sun, ideally morning sun and afternoon shade. Many woodland plants and some perennials prefer this.
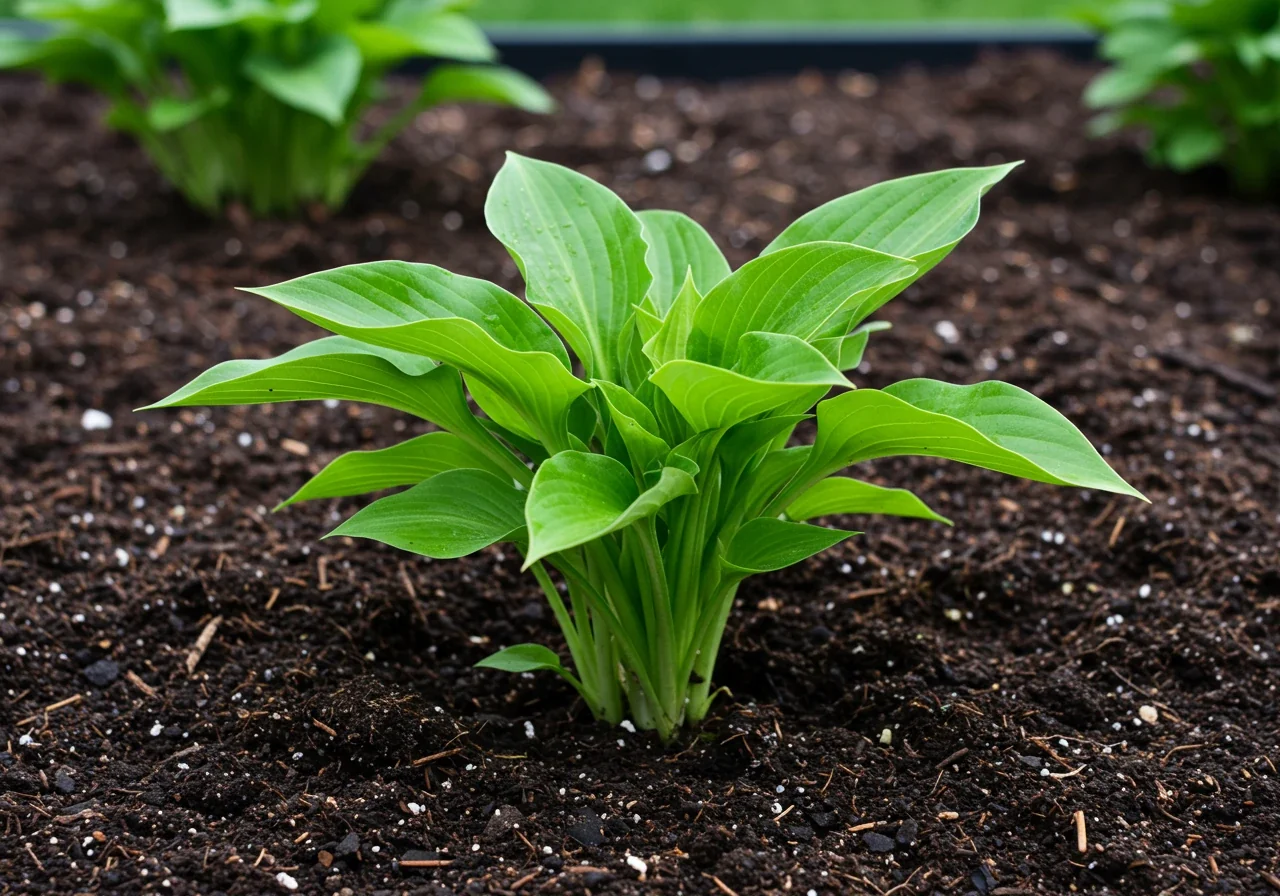
- Full Shade: Less than 4 hours of direct sun, or bright, indirect light. Hostas, ferns, and impatiens often thrive here.
Matching plants to your available light is critical for success. Observe your garden throughout the day before planting.
Water Requirements
While newly planted items need consistent moisture initially, their long-term needs vary:
- Drought-Tolerant: Once established, these plants (like sedum, lavender, coneflowers) need infrequent watering. Perfect for water-wise gardens.
- Average Water Needs: Most common perennials and shrubs fall here. Water when the top inch or two of soil is dry.
- Moisture-Loving: Plants like Astilbe, Ligularia, or Cardinal Flower prefer consistently moist (but not soggy) soil.
Clay soil retains moisture longer than sandy soil, so adjust watering frequency accordingly. Our garden maintenance services can help manage watering schedules.
Soil Preferences
Most plants prefer well-drained soil rich in organic matter. However, some have specific needs:
- Acid-Loving: Rhododendrons, Azaleas, and Blueberries need acidic soil (lower pH). Amending with peat moss or specific acidifying fertilizers might be necessary.
- Alkaline Tolerant: Some plants, like lilacs or certain ornamental grasses, tolerate higher pH soils better.
- Clay Tolerant: While amending clay is best, some tough plants like Daylilies, Rudbeckia, and some ornamental grasses can handle heavier soils once established.
Improving soil structure with compost benefits almost all plants. Explore our soil preparation services for optimal results.
Visualizing Water Needs (Example)
Typical Weekly Water Needs (Established Plants)
Note: Actual needs vary based on weather, soil, and plant type. This is a general illustration.
To Feed or Not to Feed? Fertilizing New Plants in Spring
Ah, the big question! You've just planted your lovely new green babies, and you want to give them everything they need. So, should you immediately reach for the fertilizer? Hold your horses (or should we say, hold your hose-end sprayer?).
Common Fertilizing Questions:
Question: Do my brand-new plants need fertilizer right away?
Answer: Generally, *no*. Think of it like bringing someone home after a long trip – you let them settle in before offering a giant feast! New plants are often dealing with a bit of transplant shock. Their main job right now is putting out new roots, not pumping out tons of leafy growth. Plus, if you followed our planting advice and amended the soil with compost when you put them in the ground, they likely have a decent starting pantry of nutrients already. A clean and well-prepped garden bed, perhaps even tidied up by professionals like those offering a Marionville garden clean up service, often has a good nutrient base from organic matter. If your whole yard needed prepping, a Marionville yard cleanup service or even broader Marionville property cleanup service can also ensure the surrounding area supports healthy growth.
Question: Okay, so when *should* I fertilize them?
Answer: Give them a few weeks – maybe 2 to 4 – to get established. Once you see signs of new growth (not just the leaves they came with), that’s a good signal they’ve settled in and might appreciate a gentle boost.
Question: What kind of fertilizer is best? And what's this N-P-K thing?
Answer: Avoid harsh, fast-acting chemical fertilizers right away, as these can sometimes "burn" tender new roots.
- N-P-K Basics: Those letters stand for Nitrogen (N - for leafy green growth), Phosphorus (P - for roots, flowers, fruit), and Potassium (K - for overall plant health and hardiness).
- Starter Fertilizer: Sometimes these have a higher 'P' number to encourage root growth. Use sparingly and only if your soil is known to be poor.
- Slow-Release & Organic: This is usually your best bet! Options like compost tea, fish emulsion, worm castings, or granular organic fertilizers release nutrients slowly and gently. They also feed the beneficial microbes in the soil, improving its structure over time – it’s a win-win! Adding a layer of organic mulch after feeding helps too; explore good mulching and edging practices to retain moisture and nutrients.
Question: Any eco-friendly tips for gardeners in Kars or Winchester?
Answer: Absolutely! Being mindful is key, especially near our local waterways.
- Don't Overdo It: Excess fertilizer washes away, potentially harming rivers and streams. More is *not* always better. Community resources like Just Food Ottawa often promote sustainable practices.
- Compost is King: Regularly adding compost reduces the need for other fertilizers.
- Feed the Soil, Not Just the Plant: Organic options improve long-term soil health.
If you're ever unsure about the best approach for your specific garden, don't hesitate to consult professionals – you can learn more about us and our commitment to healthy landscapes. Get the feeding right, and your happy plants might just make you feel like you deserve a visit to a gardening success thank you page!
Mulch Mania & Weeding Wisdom: Protecting Your Investment
Okay, team garden! You’ve planted your beautiful new flowers and shrubs. High five! Now, let’s talk about protecting that lovely investment of time, money, and maybe a little bit of sweat. Think of this next step as tucking your new green friends into bed with a cozy blanket and making sure no pesky party crashers ruin their welcome. Welcome to Mulch Mania and Weeding Wisdom!
Mulch: Your Garden's Best Friend (Seriously!)
Mulch isn't just about making your garden beds look tidy (though it definitely does that!). Applying a layer of organic mulch is one of the *best* things you can do for your new plants, especially here in the Ottawa region. Why?
- Moisture Master: Mulch acts like a sponge lid, slowing down water evaporation from the soil. This means you water less, and your plant roots stay consistently moist – crucial during those hot summer stretches we sometimes get from Russell to Embrun.
- Weed Warrior: A good layer of mulch blocks sunlight, making it much harder for annoying weed seeds to sprout. Hallelujah!
- Temperature Tamer: It insulates the soil, keeping roots cooler in summer and warmer during those surprise cold snaps spring can throw at us. Consistent soil temperature = happy roots.
- Soil Booster (Over Time): Organic mulches (like shredded bark, wood chips, or compost) slowly break down, adding valuable organic matter to your soil. Explore our material selection guide for mulch options.
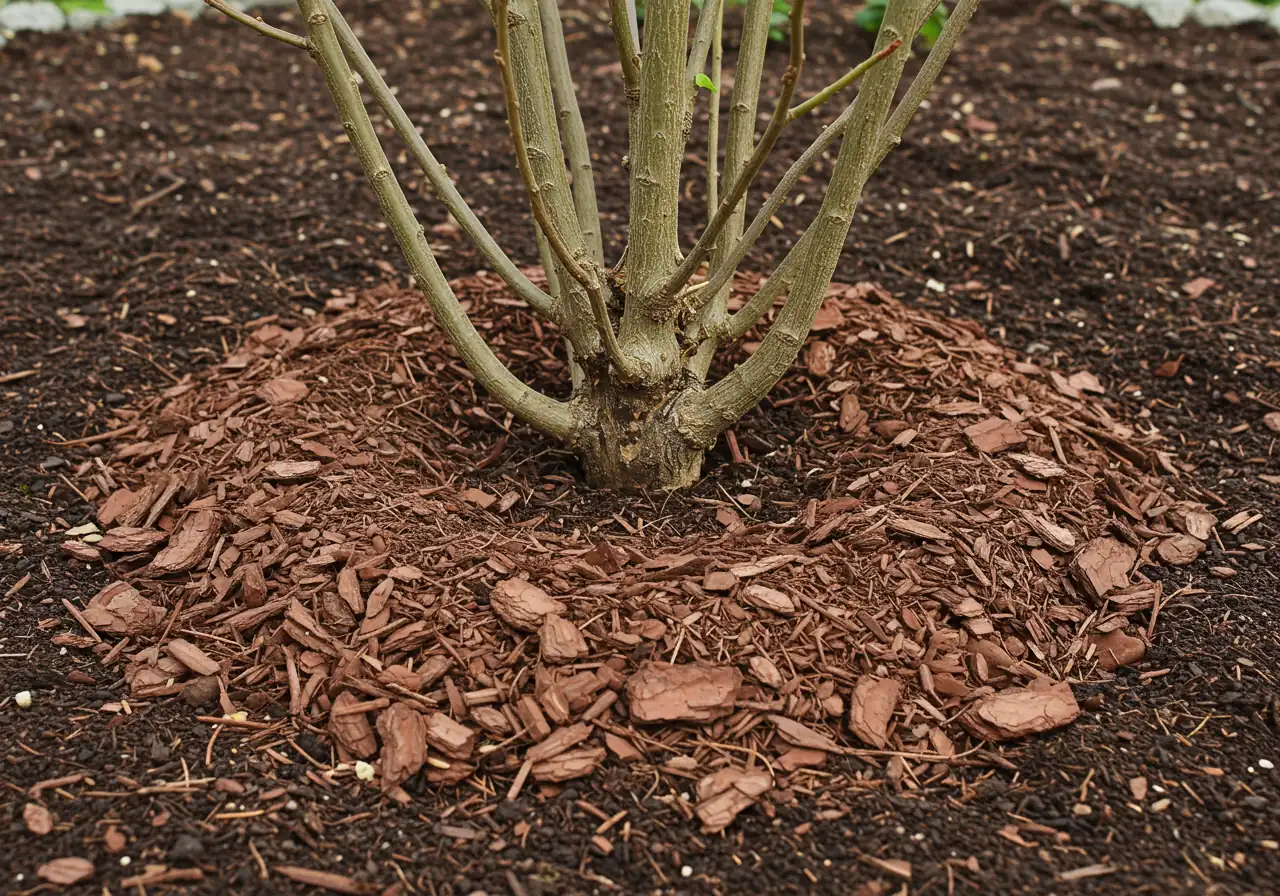
How to Mulch Like a Pro:
Applying mulch isn't rocket science, but there's a right way! Aim for a layer about 2-3 inches deep. Crucially, pull the mulch back slightly from the base of your plants. Don't pile it up against the stems or trunks like a volcano – think more like a donut. This prevents moisture buildup right against the plant, which can lead to rot or disease. Getting the area ready is key; removing existing weeds and debris first makes mulching much more effective. If the task seems daunting, professional help like an Ottawa garden clean up service can prep the beds perfectly. For larger properties needing a refresh before mulching, consider a comprehensive Metcalfe property cleanup service or even a full Ottawa property cleanup service.
Weeding Wisdom: Nip 'Em in the Bud!
Even with mulch, some determined weeds might poke through. The *wisdom* part? Get 'em while they're small! Young weeds are much easier to pull, roots and all. Letting them get established means they steal water, nutrients, and sunlight from your precious new plants. Think of them as uninvited guests hogging all the snacks.
Common spring invaders around Vernon and Kenmore include dandelions (their seeds travel everywhere!) and chickweed. The best defence?
- Hand-Pulling: The most eco-friendly method, especially effective after rain when the soil is soft. Get the whole root!
- Mulch (Again!): Yes, it’s that important for prevention! Effective mulching and edging is key.
- Vigilance: A quick patrol every few days makes a huge difference. Don't let things get out of hand until you need a major intervention like a full city property cleanup service. Even starting with a thorough spring tidy using a city yard cleanup service can remove countless weed seeds before they sprout.
Remember, weeds don't respect property lines, so keeping adjacent areas tidy helps too. While we focus on garden beds here, maintaining a healthy lawn through good lawn care practices (perhaps including sod installation for bare patches) can also reduce the weed pressure migrating into your flower beds.
By combining the magic of mulch with a little weeding wisdom, you'll give your new plants the best chance to settle in, grow strong, and bring you joy all season long!
Spring Garden Task Timeline (Example)
Early Spring (Late March - April)
Clean up debris, prune dormant shrubs (except spring bloomers), edge beds, gently rake lawn.
Mid-Spring (Late April - Mid May)
Amend soil with compost, plant cool-season veggies & hardy perennials, divide established perennials.
Late Spring (Late May - Early June)
Plant tender annuals & veggies (after frost risk), apply mulch, monitor watering for new plants.
Ongoing Spring Tasks
Consistent weeding, monitoring for pests/diseases, start fertilizing established plants.
Metcalfe Gardener's Spring Cheat Sheet: Quick Tips for New Plants!
Feeling overwhelmed? Totally understandable! Gardening in our lovely Ottawa region has its quirks. Keep this cheat sheet handy for those first crucial weeks with your new green friends. Think of it as your quick-reference guide to happy planting! Check with resources like the Master Gardeners of Ottawa-Carleton for expert local advice.
- Frost First, Plant Later: Patience, grasshopper! Our Ottawa spring can be sneaky. Wait until the risk of frost has *truly* passed (usually late May) before planting tender annuals and veggies. Keep an eye on those overnight lows in Metcalfe and surrounding areas like Greely!
- Dig Wide, Plant Right: Remember that Ottawa clay? Dig planting holes *wider*, not necessarily deeper, than the pot. Loosen that soil! Plant your newcomer so the top of its root ball is *level* with the surrounding ground – not buried too deep or sitting too high.
- Water Deeply, Not Daily: Give new plants a good, long drink right after planting. Then, water deeply only when the top couple of inches of soil feel dry (use the finger test!). Morning watering is best. If consistent watering feels like a chore, consider a regular city garden maintenance service to keep things on track.
- Mulch is Your BFF: Apply a 2-3 inch layer of organic mulch (like shredded bark) around your plants, leaving a small gap around the stems (think donut, not volcano!). This saves water, smothers weeds, and keeps roots happy. Ensure beds are clear of winter debris first; a thorough Ottawa garden clean up service can make this task much easier.
- Easy Does It On Fertilizer: Hold off on feeding brand-new plants for 2-4 weeks. Let them settle in first! When you do feed, use gentle, slow-release organic options or compost – harsh chemicals can burn new roots.
- Weed Early, Weed Often: Pull those pesky weeds *as soon* as you spot them, especially when they're small and the soil is moist. Don't let them steal resources from your new investments! Consistent care prevents small issues from becoming big problems, leading to beautiful garden transformations you can be proud of.
- Observe Your Plant Pals: Check your plants regularly. Are the leaves wilting, yellowing, or looking stressed? Adjust your watering or care as needed. If you're ever unsure and reach out for advice, rest assured we value your information; you can learn how we handle data by reading our website privacy policy.
Your Ottawa Spring Gardening Questions Answered (FAQ)
Got questions buzzing around your head like happy little bees in your new blossoms? You're not alone! Spring gardening in the Ottawa area brings its own set of head-scratchers. Here are answers to some common queries we hear from gardeners just like you, from Metcalfe to Barrhaven and beyond.
Great question! For *most* shrubs that bloom on *new* wood (growth from the current spring), like potentilla or some spireas, pruning in early spring *before* they leaf out is perfect. This encourages vigorous new growth. However, for spring-flowering shrubs that bloom on *old* wood (like lilacs, forsythia), wait until *after* they finish blooming. Pruning them early cuts off the flower buds! For trees, removing dead, damaged, or crossing branches can generally be done in late winter or early spring before leaves emerge. Clearing away the pruned branches is key; it's all part of a good general spring property clean up to keep things tidy and healthy.
Absolutely! Spring is a fantastic time to divide many perennials, especially those summer and fall bloomers like hostas, daylilies, and Siberian iris. The cool, moist weather helps them recover quickly. Wait until you see the first signs of new growth emerging. Carefully dig up the entire clump, trying to keep the root ball intact. Then, use a sharp spade or garden knife to slice the clump into smaller sections, ensuring each section has several healthy shoots (eyes) and a good portion of roots. Replant them promptly at the same depth they were growing before, water well, and voila! It’s like getting free plants, perfect if you’re planning a new garden bed installation.
Don't panic! Early spring can bring out a few usual suspects. Keep an eye out for aphids – tiny pear-shaped insects often clustered on new growth. A strong spray of water can often dislodge them. Slugs and snails might also appear as things warm up, munching on tender leaves, especially hostas. Fungal spots can appear on leaves if conditions stay damp and cool. Good air circulation is key, so avoid overcrowding plants. Keeping garden beds free of old debris helps immensely; sometimes a thorough city garden clean up service can remove overwintering pests and disease spores before they become a problem. Remember that healthy soil can support beneficial insects that help with pest control.
Before you think about fertilizers or seed, give your lawn a good, gentle *rake*. After the snow melts and the ground isn't soggy, use a flexible leaf rake (not a stiff garden rake) to lightly fluff up matted grass blades and remove any lingering leaves, twigs, or winter debris. This helps air and sunlight reach the soil surface, encourages new growth, and can even help prevent snow mold disease. It’s often the first step in a comprehensive Ottawa property cleanup service and makes a surprising difference in helping your lawn wake up on the right side of the bed! Consider professional lawn care for ongoing health.
Not necessarily, but you'll want to choose your varieties carefully! Starting tomatoes indoors typically happens 6-8 weeks before the last frost date (around late May for us). If you're starting now (say, mid-to-late April), look for *fast-maturing* varieties, often labeled with fewer "days to maturity" (maybe 50-65 days). You might get a later harvest than your early-bird neighbours, but you can still enjoy homegrown tomatoes! Alternatively, save yourself the stress and simply buy healthy starter plants from a local nursery once the weather is reliably warm. It’s a perfectly good shortcut!
Conclusion: Cultivating Your Dream Garden in Metcalfe and Beyond
Well, there you have it! From understanding our unique Ottawa climate and sometimes stubborn clay soil to the nitty-gritty of proper planting techniques, smart watering, gentle feeding, and the wonders of mulching, you're now armed with the know-how to give those new plants a fantastic start. Creating your dream garden, whether you're in Metcalfe, neighbouring Greely, or anywhere across the region like those needing a Marionville garden clean up service or a Metcalfe garden clean up service, is absolutely within reach. It just takes a little patience, attention, and maybe getting your hands a bit dirty (which is half the fun, right?).
Remember, gardening is a journey, not a destination. Enjoy watching your landscape transform and those healthy plants thrive! Don't be afraid to experiment and learn as you go.
Ready to take your garden to the next level or need a hand getting started? Our team offers comprehensive landscaping and garden care services to bring your vision to life.
Have questions or want a personalized plan for your yard? Contact Clean Yards today for friendly advice and a free estimate! Visit us online at CleanYards.ca or give us a call.
Get Your Free EstimateHappy gardening!
