
Nepean Garden Recovery: Soil Rehab After Blight Outbreaks
Dealing with blight aftermath in your Nepean garden? Let us help restore your soil's health. Request a free quote today!
Quick Guide to Blight Recovery:
- Remove and trash (don't compost!) all infected plant material immediately.
- Improve soil health by adding plenty of compost or aged manure.
- Practice crop rotation: avoid planting related crops in the same spot for 3-4 years.
- Water soil directly, avoid wetting leaves, and ensure good air circulation.
- Use organic mulch to protect soil and prevent splash-back.
- Consider planting blight-resistant varieties next season.
Introduction: Blight Ruined the Veggies? Let's Fix That Nepean Soil!
Okay, Nepean gardeners, let's have a real chat. Did you walk out to your veggie patch this year, dreaming of perfect tomatoes or potatoes, only to find… blight? Ugh. Those nasty spots, the sad wilting leaves – it’s like garden heartbreak! It feels particularly frustrating when you’ve put so much effort in, right? It happens to the best of us, even in lovely spots like Nepean or nearby Barrhaven.
Here's the tricky part: those pesky blight pathogens (usually tiny fungi or bacteria) don't just disappear with the frost. They can actually stick around in your *soil*, lying in wait to cause trouble next planting season. Trying to plant the same things in the same spot next year without doing anything? That can feel like rolling the dice with your harvest.
But hold on, don't bulldoze the backyard just yet! Whether you're tending a plot here or elsewhere across the Ottawa area, there *is* a solution. We're talking about soil rehabilitation – giving your garden bed the TLC it needs to recover. Think of it as fixing the foundation for future gardening success. It takes a bit of know-how and some elbow grease, but restoring your soil health is absolutely achievable. Ready to fight back against blight? Let's dive into the practical steps to fix that soil and aim for a much happier, healthier harvest next year!
Meet the Enemy: Understanding Blight and Its Soil Grudge
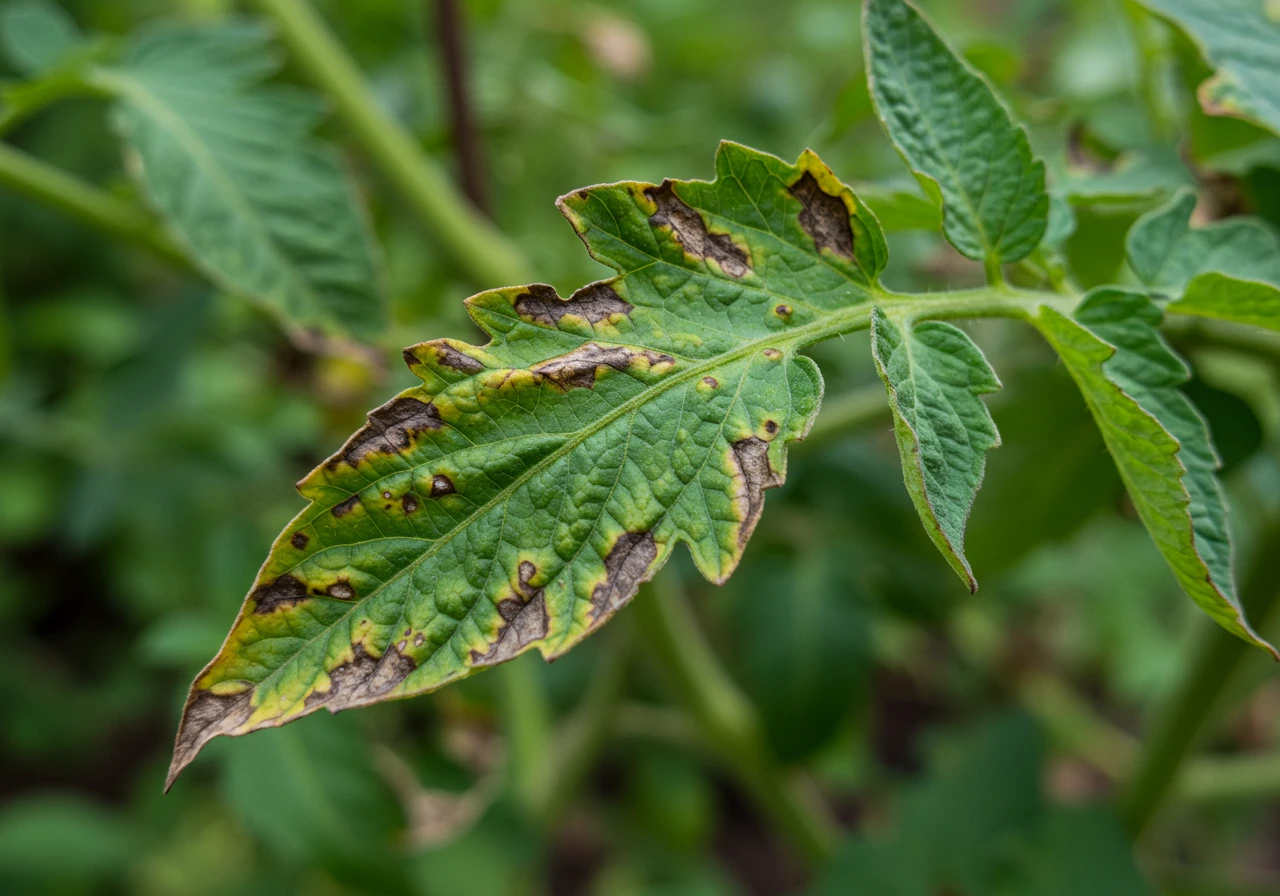
Alright, let's get up close and personal with the garden villain: blight. Think of blight not as one single bad guy, but more like a gang of tiny troublemakers – usually microscopic fungi or bacteria. These pathogens are the culprits behind those sad, spotted leaves, mushy stems, and ruined fruits or veggies that make gardeners sigh (or maybe yell a little). They're opportunistic little things, latching onto stressed or susceptible plants, especially favorites like tomatoes and potatoes.
So, how does this garden party crasher spread? Easily! Blight spores can travel on the wind, get splashed around by rain or your watering efforts, hitch a ride on dirty garden tools, or even arrive on already infected seedlings. Our sometimes humid Ottawa summers can actually help them thrive, creating the damp conditions they love. If you’ve noticed problems in your Nepean garden, you're definitely not alone! For local guidance, check out resources like the Master Gardeners of Ottawa-Carleton advice line.
Now, here’s the really sneaky part – the "soil grudge." Blight doesn't just pack up and leave when the growing season ends. Oh no. Those fungal spores or bacterial cells can settle into your garden soil and plant debris like unwelcome house guests who refuse to leave. They can hang out *all winter long*, surviving even our chilly Ottawa freezes, just waiting for you to plant susceptible crops nearby next spring. This is why just hoping it goes away rarely works. Dealing with that leftover residue is crucial, much like conducting thorough Fall Garden Health Checks for Nepean Yards helps spot lingering issues before winter. Proper fall cleanup is key; failing to remove infected plant matter is like leaving a welcome mat out for next year's infection. For tips on getting your garden ready, check out our guide on Nepean Fall Garden Prep: Colour & Winter Tips.
Understanding how blight spreads and persists helps us fight back effectively. Managing water is also part of the strategy; blight loves prolonged wetness on leaves, so thinking about *how* you water matters. Even preparing your systems correctly, like completing Nepean Irrigation Winterization to Avoid Pipe Damage, is part of responsible water management in the garden cycle. And just like your lawn might need specific treatments such as Nepean Spring Lawn Aeration for Healthier Grass to thrive, your garden soil needs targeted care after a blight battle. If tackling this soil grudge feels overwhelming, remember there are professional Yard Care Services Available to help restore your garden's health.
Operation Garden Cleanup: Getting Rid of Blight's Hangout
Alright team, let's roll up our sleeves for "Operation Garden Cleanup"! Blight might have won a battle this season, but we're not letting it win the war for next year's garden. It’s time to evict those lingering pathogens from their cozy soil hideout. Think of it as tidying up the villain's lair after the showdown.
Here’s your mission, should you choose to accept it:
- Gentle But Firm Removal: Carefully pull out *all* the infected plant material. We're talking leaves, stems, fallen bits, and as much of the root system as you can manage without shaking spores everywhere. Be gentle! The goal is to remove the infected stuff, not accidentally spread it further around your garden beds or neighbouring properties in, say, Greely or Barrhaven. Take your time and be thorough.
- Bag It, Don't Bin It (The Green One!): This is super important! *Do not* put blighted plant material in your compost bin or Ottawa green bin (yard waste). Those pesky spores can survive the composting process and come back to haunt you. Instead, securely bag the infected debris in garbage bags and put it out with your regular household trash. This ensures it’s properly handled and removed from your property. Handling this disposal correctly is a core part of our city garden clean-up service, because we know how critical it is.
- Tool Time Tune-Up: Your shovels, trowels, pruners, and even your gloves can become getaway cars for blight pathogens. After you finish removing the infected plants, *clean your tools thoroughly*. Wipe off any soil or plant bits. Then, disinfect them using a solution like 1 part bleach to 9 parts water, or rubbing alcohol. Let them air dry before storing. Don’t skip this step – it prevents you from accidentally re-infecting other areas! Proper tool hygiene is essential for garden maintenance.
Key Cleanup Action: Proper Disposal
Remember: Infected plant material goes in sealed garbage bags for regular trash pickup, *not* the green bin or compost. This is crucial for preventing the spread of blight pathogens.
This cleanup operation is your best defence against a repeat blight performance next year. It might feel like a bit of work, especially if you had a widespread issue. If the cleanup feels overwhelming, or if you want to ensure every last bit of problematic debris is gone, remember that professional help is available. Whether you need a dedicated professional Nepean yard cleanup service or a broader Ottawa property cleanup service, getting experts involved can save you time and future heartache. Explore our full range of comprehensive yard care services to see how we can help. Learn more about us and our commitment to quality.
Once the infected material is completely gone and the area is clean, you can breathe a sigh of relief. It’s a fresh slate! You might even start thinking about a fresh garden install with perhaps more blight-resistant varieties for next season. Mission accomplished!
Soil Sleuthing: What's Really Going On Down There?
Okay, so you’ve bravely tackled Operation Garden Cleanup and removed the blighted plant evidence. High five! But hold on, Sherlock, our investigation isn’t quite over yet. Just because the *visible* signs of blight are gone doesn't mean the soil itself is back to its happy, healthy self. Think of it like cleaning up after a wild party – the mess is gone, but the carpet might still be sticky, and the furniture might be rearranged! We need to do a little soil sleuthing to see what’s really happening beneath the surface.
Why bother? Because healthy soil is your *best* defence against future problems. Blight, and the stress it causes plants, can deplete nutrients and even impact the soil's structure. Trying to grow new plants in worn-out, unbalanced soil is like asking them to run a marathon without any training or proper food – it’s setting them up for failure.
First, let's use our eyes. How does the soil *look* and *feel*?
- Drainage Detective: After a good rain (or watering), does water pool on the surface for a long time? That could mean compaction, especially common in the heavy clay soils found across much of Ottawa, including areas like Greely or even near Marionville.
- Compaction Clues: Try digging a bit. Is it super hard work? Compacted soil makes it tough for roots to grow and find water or air.
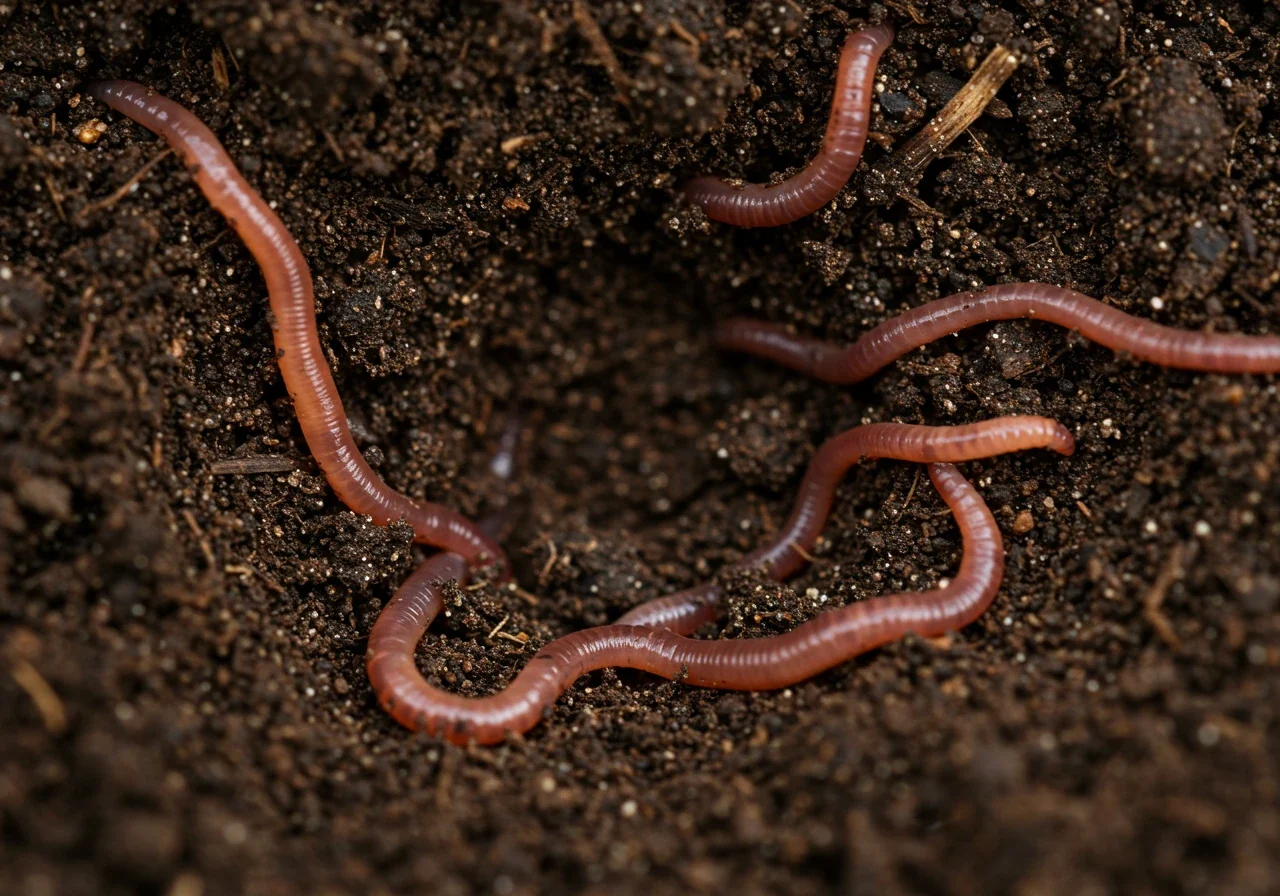
- Worm Watch: Are there earthworms wiggling around? These guys are soil superstars! A lack of worms can suggest poor soil health. Sandy patches, sometimes found closer to the river in places like Manotick, might drain *too* well and lack organic matter, which also impacts worm populations.
Visual checks give you clues, but for the real inside scoop, nothing beats a soil test. It’s like getting a blood test for your garden! A soil test can tell you:
- pH Level: Is your soil too acidic or too alkaline? This drastically affects how well plants can absorb nutrients.
- Nutrient Levels: Are essential nutrients like nitrogen (N), phosphorus (P), and potassium (K) present in the right amounts? Blight-stressed plants can really drain these.
- Organic Matter Content: This is the good stuff – decomposed plant and animal material that improves structure, water retention, and nutrient availability.
You can find DIY soil test kits at garden centers, or for a more detailed analysis, you can send a sample to a professional lab (search online for "Ontario accredited soil testing labs" for options). Understanding your soil's specific needs helps you amend it correctly, rather than just guessing. The process often starts with good soil preparation. Adding amendments like compost can significantly boost soil health, often best topped off with protective mulching and edging for garden beds to retain moisture and suppress weeds. A comprehensive approach, sometimes starting with a professional Ottawa yard cleanup service to clear the way, ensures you're building on a solid foundation. And if, after all this, you decide that particular spot is just cursed for veggies, ensuring the soil is healthy is *still* vital before considering other options, like calling in experts for professional sod installation for a lush lawn. A full recovery might involve several steps, from the initial cleanup handled by a city garden clean-up service to the final soil enrichment. Just remember, as with any significant yard project, it's always a good idea to understand the scope and details involved, much like reviewing terms and conditions before committing. Now, let's talk about how to fix what we find!
The Rehab Roadmap: Building Resilient Soil Organically
Okay, deep breaths, everyone! We’ve cleaned up the blight battlefield and done our soil detective work. Now comes the fun part – the rebuilding phase! Think of it as sending your garden soil to a spa retreat, designed to make it strong, healthy, and much less welcoming to future troublemakers like blight. Our goal isn't just to *fix* the soil, but to build *resilience* using nature's best tools. Let's map out this rehab journey for your Ottawa garden, whether you're in Nepean or closer to Metcalfe.
Why Organic Matter is Your Soil's Superfood
If there's one magic ingredient in soil rehab, it's *organic matter*. This is the decomposed goodness from plants and other formerly living things. Adding it generously is like giving your soil a super-healthy smoothie packed with everything it needs. Here’s why it's awesome:
- Structure Superstar: Got heavy clay soil like in many parts of Ottawa, maybe out towards Osgoode? Organic matter helps break it up, improving drainage and aeration. Got sandy soil that drains too fast? Organic matter acts like a sponge, helping it hold onto water and nutrients. It’s a win-win!
- Water Wise: Healthy soil holds water better, meaning you might not need to water quite as often during those dry Ottawa summers, and your plants are less stressed.
- Nutrient Bank: Organic matter slowly releases nutrients that plants need to grow strong and healthy, reducing the need for synthetic fertilizers.
- Microbe Mansion: It provides food and habitat for the billions of beneficial bacteria, fungi, and earthworms living in your soil. These microscopic critters are the unsung heroes – they help break down nutrients, fight off diseases, and create that lovely, crumbly soil structure. Feed them well!
Explore Organic Matter Options:
Compost: The All-Rounder
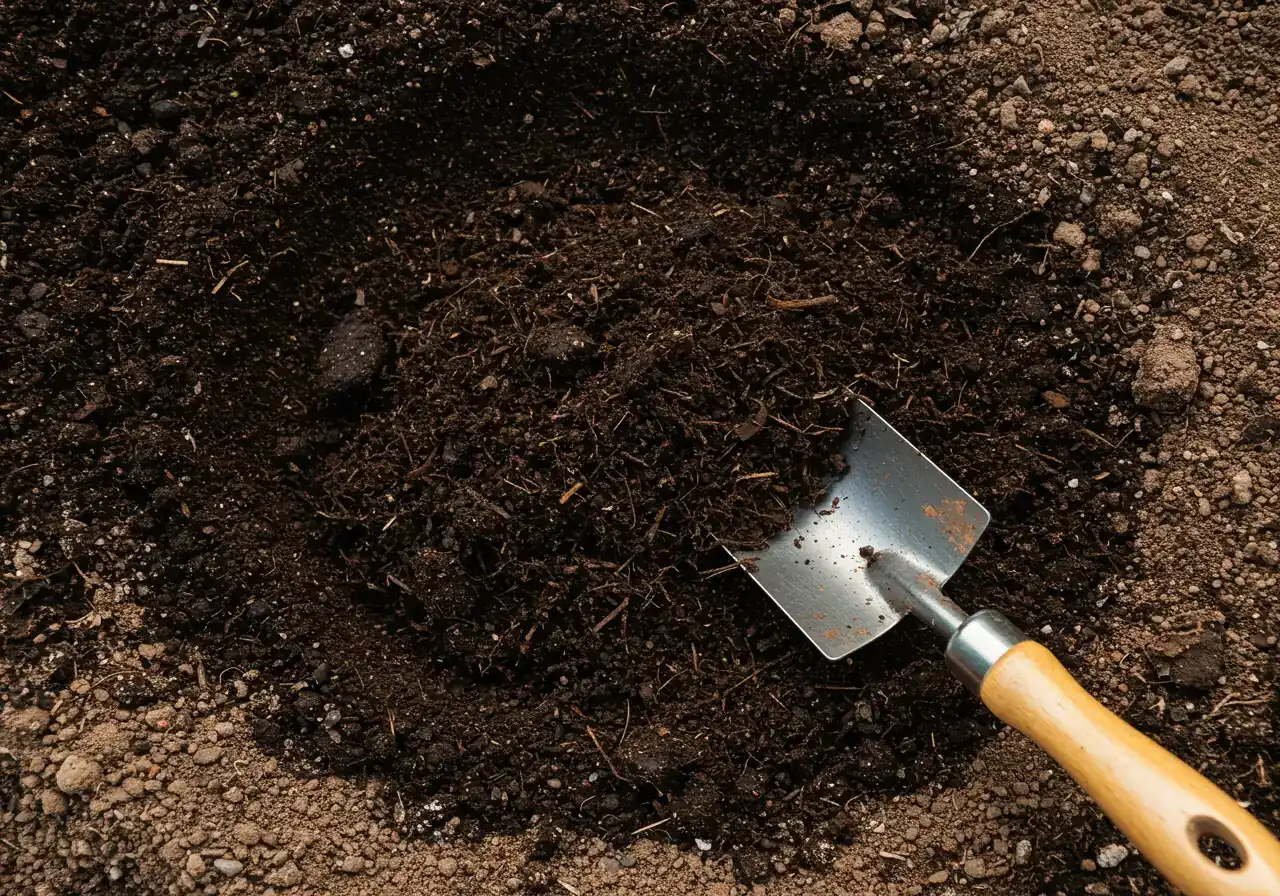
Finished compost (dark, crumbly, earthy smell) is the gold standard. It improves structure, adds nutrients slowly, and boosts microbial life. Use generously (2-4 inches) mixed into the topsoil or as a top dressing. Great for all soil types. Consider quality material selection for best results.
Aged Manure: Nutrient Powerhouse
Well-rotted (aged at least 6 months) animal manure (cow, horse, sheep, poultry) adds significant nutrients, especially nitrogen, along with organic matter. *Never use fresh manure*, as it can burn plants. Apply 1-2 inches and incorporate lightly. Best used in fall to allow further mellowing over winter.
Leaf Mold: The Fungal Friend
Shredded leaves, especially when composted separately for a year or two (creating leaf mold), make an excellent soil conditioner. It's particularly good at improving water retention and encouraging beneficial fungi. Use as a mulch or incorporate like compost.
Your Action Plan: Getting Down and Dirty (Organically!)
- Compost is King (or Queen!): This is your go-to amendment. Spread a generous layer (think 2-4 inches) of finished compost over the affected garden bed. You can gently mix it into the top few inches of soil or just leave it as a top dressing, letting worms and weather work it in over time. Bagged compost from the store works, or look into bulk deliveries if you have a large area. Good compost is the foundation of healthy soil, crucial whether you're growing veggies or aiming for stellar lawn care.
- Consider Aged Manure: Well-rotted manure (cow, sheep, chicken – *never* fresh, as it can burn plants!) is another fantastic source of organic matter and nutrients. Add it like compost, maybe slightly less thickly (1-2 inches). Ensure it's truly "aged" – it shouldn't smell strongly ammoniac or look fresh.
- Mulch, Mulch, Mulch!: After adding your amendments, apply a layer of organic mulch like shredded bark, straw, or chopped leaves. Why? Mulch suppresses weeds (less competition for your plants!), conserves precious soil moisture, regulates soil temperature, AND slowly breaks down, adding *even more* organic matter over time. Proper mulching and edging for garden beds is a simple step with huge benefits for soil health.
Nature's Band-Aid: Introducing Cover Crops
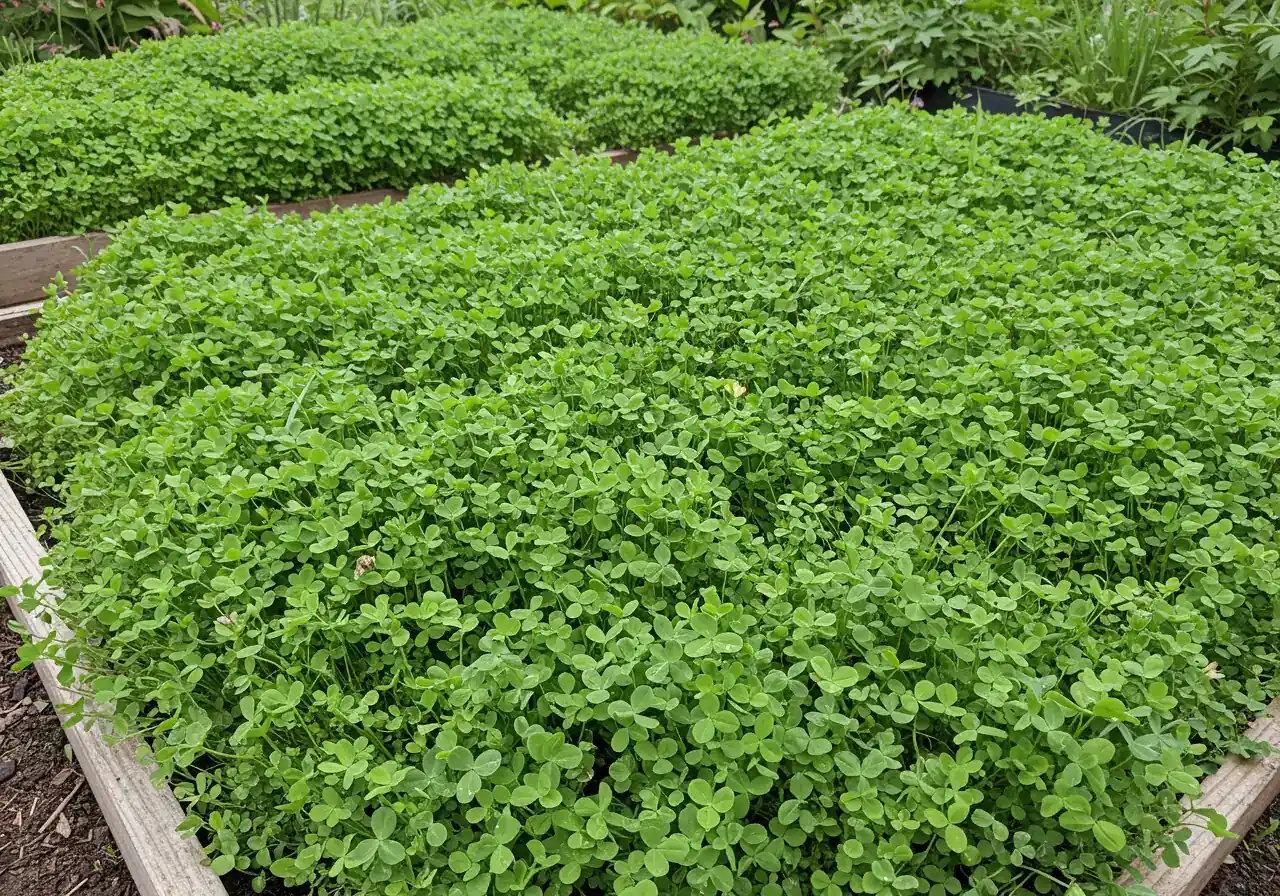
Want to take your soil rehab to the next level? Try cover cropping! Think of these as temporary plantings designed to protect and improve your soil, especially over winter. After clearing out blighted plants in late summer or fall, planting a cover crop can:
- Prevent Erosion: Bare soil can wash or blow away, especially after you've just cleared everything out. Cover crops hold it in place.
- Suppress Weeds: They outcompete weeds for space and light.
- Add Organic Matter: When you till them into the soil in the spring (or cut them down and leave them as mulch – often called "chop and drop"), they decompose and enrich the soil. This is like growing your own fertilizer!
- Potentially Disrupt Disease Cycles: Some cover crops can help reduce the populations of soil-borne pathogens.
Good choices for fall planting in Ottawa:
- Winter Rye or Oats: These grow quickly in cool weather, protect the soil over winter, and are easy to kill and incorporate in spring.
- Hairy Vetch or Crimson Clover: These are legumes, meaning they can actually pull nitrogen from the air and add it to your soil – bonus! They might need slightly earlier planting than rye.
How-to: Lightly rake the seeds into your amended soil in late summer/early fall. In spring, before they set seed, either till them into the soil or cut them down at the soil surface, leaving the cuttings as mulch and planting directly through the residue.
A Rough Rehab Timeline:
Late Summer / Early Fall
Clean up all blight debris meticulously. Amend soil with a generous layer of compost and/or aged manure. Plant chosen cover crops according to recommended timing for Ottawa.
Winter
Let cover crops protect the soil. Avoid walking on beds when frozen or saturated. Plan your crop rotation for next season, avoiding susceptible plants in this area. Dream of a healthy harvest!
Early Spring
Manage cover crops: either till them into the soil 2-3 weeks before planting or use the "chop and drop" method (cut at soil level, leave residue as mulch). Let the soil rest briefly.
Planting Time
Add another light layer of compost if desired. Plant your *new*, ideally blight-resistant, crops following your rotation plan. Apply organic mulch around new plants.
Building healthy soil is an ongoing process, a key part of sustainable garden maintenance. It might seem like a lot initially, especially if you're dealing with the aftermath of blight across a large area. Sometimes, rehabilitating soil is the first step in larger landscape transformations aimed at creating a healthier, more resilient yard. If the scope feels daunting, remember professional help is available, whether it's for a big job needing something like a Marionville property cleanup service or just needing an extra hand closer to home like a city garden maintenance service.
By focusing on feeding your soil with organic matter and protecting it with mulch and cover crops, you're not just recovering from blight – you're building a foundation for a thriving, productive garden for years to come!
Potential Impact of Soil Amendments (Illustrative)
*Relative improvement index. Actual results vary based on soil type and amendments used.
Fortifying Your Future Garden: Blight Prevention Strategies
Alright, garden warriors, we've dealt with the blight aftermath, and now it's time to build our defenses! Preventing blight is way less stressful (and heartbreaking) than dealing with it once it arrives. Think of these strategies as your garden's personal security system, designed to keep those pesky pathogens from crashing the party again next year, whether you're gardening in Nepean, out near Osgoode, or enjoying the space in Kars or Marionville.
Here’s how to fortify your future garden:
- Master the Art of Crop Rotation: This is HUGE. Blight pathogens can hang out in the soil, waiting for their favorite meal. Don't give it to them! Crop rotation simply means *not* planting the same type of vegetable (or closely related ones) in the *exact same spot* for at least 3-4 years. For example, if you had tomato blight (tomatoes are nightshades), avoid planting potatoes, peppers, or eggplants (also nightshades) in that bed next year. Rotate in something completely different, like beans (legumes), lettuce (leafy greens), or squash (cucurbits). This breaks the disease cycle and confuses the pathogens. It's like changing the locks on the blight motel! Check out local resources like Just Food Ottawa for potential workshops on crop rotation.
- Water Wisely: Blight fungi *love* wet leaves. Avoid overhead watering that soaks the foliage, especially in the evening. Instead:
- Water the *base* of the plants, directly onto the soil. Soaker hoses or drip irrigation are fantastic for this.
- Water early in the morning. This gives the sun plenty of time to dry off any leaves that do get splashed before nightfall.
- Give 'Em Space, Man!: Don't overcrowd your plants! Good air circulation around each plant is critical. It helps leaves dry quickly after rain or morning dew, making it harder for fungal spores to take hold. Check the spacing recommendations on your seed packets or plant tags and *actually follow them*. Resist the urge to squeeze just one more tomato plant in! Proper spacing is a simple landscaping trick with big results. Considering a full garden rethink? Check out our property clean up services.
- Mulch is Your Friend: We talked about mulch for soil health, but it's also a key player in prevention. A good layer (2-3 inches) of organic mulch (like straw, shredded bark, or compost) creates a barrier between the soil and the plant's lower leaves. This helps prevent soil-borne spores from splashing up onto the plant during rain or watering. Plus, it keeps weeds down – bonus! Ensuring you use quality materials is part of smart gardening; you can explore options with our guide on Material Selection.
- Choose Your Champions (Resistant Varieties): Plant breeders have worked hard to develop varieties of common vegetables (especially tomatoes and potatoes) that have built-in resistance to certain types of blight. Look for descriptions like "blight resistant," "early blight resistant," or "late blight resistant" when buying seeds or seedlings. While not foolproof (no variety is immune to everything!), it gives your plants a significant head start. If you need advice finding suitable varieties for the Ottawa climate, feel free to get in touch with us – we're happy to share insights. When you reach out, rest assured we handle your information carefully, as detailed in our Privacy Policy.
- Stay Vigilant & Clean: Keep an eye on your plants throughout the season. If you spot suspicious leaves early, remove and dispose of them properly (bagged in the trash, not compost). Keep your garden tools clean, especially if moving between different plant beds. Maintaining a clean garden environment is crucial, similar to the thoroughness provided by an Ottawa garden clean up service. Sometimes prevention requires managing larger areas, akin to needing a comprehensive Metcalfe property cleanup service to truly reset the environment. Check our Google Business Profile for reviews!
By implementing these strategies, you're not just hoping for a blight-free season; you're actively stacking the odds in your favour for a healthier, happier garden!
Soil Rehab Quick Wins: Key Takeaways
Feeling a bit overwhelmed after that deep dive into soil recovery? No worries! Sometimes you just need the highlights reel. Think of this as the cheat sheet for giving your garden soil a new lease on life after a blight battle. Here are the must-do moves for happy, healthy soil and future gardening success:
Must-Do Actions:
- Trash Blight Remnants Ruthlessly: Seriously, don't be nice to blight leftovers! *Never* compost infected plants or roots. Bag them securely and put them out with your regular household garbage. This stops those pesky spores from surviving and causing trouble next year. Proper disposal is job number one, whether it's a small patch or a larger area needing something like a thorough city property cleanup service.
- Feed Your Soil Generously: Your soil worked hard (even if blight crashed the party), so replenish it! After cleaning up, mix in plenty of organic matter like finished compost or well-rotted manure. Healthy, nutrient-rich soil grows stronger plants that can fight off problems – it's the secret sauce for great gardening right here in Ottawa.
- Rotate Crops & Water Wisely: Don't give blight an easy target! Avoid planting susceptible crops (like tomatoes, potatoes, peppers) in the *same* spot for at least 3-4 years. Switch it up! Also, water the soil at the base of your plants, not the leaves, and try to do it in the morning so things dry out quickly.
- Create Space & Mulch Like Crazy: Plants need personal space too! Ensure good air circulation by spacing plants properly according to their needs. Then, apply a lovely 2-3 inch layer of organic mulch (shredded bark, straw, etc.). This magic blanket helps keep soil moist, smothers weeds, and stops soil-borne diseases from splashing onto leaves.
- Choose Resistant Plants & Get Help if Needed: Give yourself a head start by selecting plant varieties labelled as "blight resistant" when possible. And hey, if the cleanup or soil amendment feels like too much heavy lifting, especially if you're in an area like Metcalfe, don't hesitate to call in the pros. A focused Metcalfe garden clean up service can make a world of difference. Good companies appreciate hearing about your experience, so providing estimate feedback helps them serve you better.
- Stay Vigilant & Value Trust: Keep scouting your garden next season, removing any suspicious leaves early. Prevention is ongoing! And when you entrust your yard care needs to a service, make sure they value your information – it’s always wise to review their Privacy Policy to understand how your data is handled. Follow these steps, and you’ll soon be giving a big thank you to your thriving, productive garden space!
Nepean Gardener FAQs: Blight Recovery Q&A
Unfortunately, your neighbour is being a bit optimistic! While frost kills the *active* blight on the plant leaves, the pesky fungal spores or bacteria can definitely survive the winter hiding out in infected plant debris (leaves, stems, roots) and in the soil itself. That's why a thorough fall cleanup and proper disposal are so critical – don't give them a cozy winter hideaway!
Nope, please don't do that! Those blight pathogens can often survive the municipal composting process, meaning they could potentially spread further. The safest bet is to bag up all the infected plant material securely in regular garbage bags and put it out with your household trash for landfill disposal. It feels wrong, but it's the best way to contain the problem. If the volume is huge, consider looking into a thorough city yard cleanup service as they handle disposal correctly.
Great question! The hero ingredient for soil recovery is *organic matter*. Adding a generous layer (a few inches) of good quality compost is your best first step. Compost helps improve soil structure (breaking up clay, helping sandy soil hold water), feeds beneficial soil microbes, and slowly releases nutrients. It’s the foundation of good expert soil preparation and gives your next round of plants a fighting chance.
Absolutely! Dealing with the aftermath of severe blight *can* be overwhelming. Professional help is available for both the cleanup and soil rehabilitation stages. Many companies offer services across the Ottawa region. For instance, if you need assistance further afield, you could look for a dedicated Metcalfe yard cleanup service. When getting quotes for this kind of work, reputable companies value your input; sharing your thoughts via something like an online estimate feedback form helps ensure the plan meets your needs. Don't hesitate to reach out for help!
Conclusion: Bouncing Back for a Beautiful Nepean Garden
Well, there you have it! Blight might feel like a knockout punch to your gardening dreams, but it definitely doesn't have to be the end of the story for your Nepean yard. With a solid game plan – careful cleanup (bye-bye, blight trash!), feeding your soil with yummy compost, playing musical chairs with your crops (rotation is key!), and watering wisely – you can absolutely stage a comeback. Think of it as giving your garden soil a spa day after a tough year, prepping it for future glory right here in Ottawa.
Building that resilient, healthy soil is your *best* defence against future problems and the secret to those beautiful, productive gardens we all admire, whether in Nepean, nearby Barrhaven, or anywhere else our climate throws challenges our way. It takes a bit of effort, but healthy soil means happy plants!
Feeling like the cleanup or soil amending is a bit much to tackle alone? *We're here to help!* Check out our professional garden cleanup and soil rehabilitation services to get your garden beds back in top shape.
And hey, we love hearing from fellow gardeners! *What are your go-to tips for keeping Nepean gardens healthy after a tough season?* Share your successes (or commiserate about your struggles!) in the comments below. Here's to bouncing back and enjoying a beautiful, bountiful garden next season!
