
Embrun New Plant Care: Ensuring Strong Establishment
Ready to transform your yard but need expert help? Request Your Free Estimate Today!
Quick Guide to New Plant Success in Embrun:
- Amend Clay Soil: Mix compost generously into planting areas.
- Plant at Correct Depth: Keep the root flare at or slightly above soil level.
- Water Deeply: Soak the root zone thoroughly, then let the top dry slightly before watering again.
- Mulch Properly: Apply 2-3 inches, keeping it away from stems/trunks.
- Choose Hardy Plants: Select varieties rated for Zone 5a or colder.
Introduction: Welcome Your New Plants to Embrun!
Hey Embrun! So, you've brought home some gorgeous new green additions for your yard? Fantastic choice! Bringing new plants home is always a thrill, isn't it? It’s that wonderful mix of excitement, imagining your perfect landscaping vision come to life, and maybe just a *tiny* bit of worry (we've all whispered "please survive!" to a new perennial, right?). We totally get it.
Here in Embrun, much like our neighbours in Russell or even Greely, our plants need a warm welcome to handle our unique conditions. We’ve got those character-building Ottawa-area winters and summers that keep us guessing, plus soil that often has a bit more clay than sand – good for structure, but sometimes needs a little help!
But fear not, fellow gardening enthusiast! This guide is your friendly nudge in the right direction. Think of it as rolling out the green carpet for your leafy newcomers. We're here to help your new shrubs, flowers, or trees settle in, feel comfortable, and ultimately *thrive*. Let's turn those planting day jitters into long-term garden joy and get these roots established!
Getting Grounded: Understanding Your Embrun Soil & Climate
Alright, let's talk dirt! Before your new plants can truly feel at home in Embrun, we need to understand the ground they're putting their roots into and the weather they'll be living through. Think of it like checking out the neighbourhood before moving in – essential stuff for happy gardening and landscaping!
The Dirt on Embrun Soil: Mostly Clay, Folks!
Here in Embrun, and in nearby spots like Greely and Metcalfe, the most common soil type you'll likely encounter is clay. Now, clay isn't bad, it's just… particular. Imagine soil particles packed together tighter than folks trying to get onto the Queensway during rush hour in Ottawa. It’s dense!
What does this mean for your garden?
- Poor Drainage: Water tends to sit on top or drain very slowly after a good rain. This can lead to soggy roots, which most plants really dislike. Think "soggy socks" after stepping in a puddle – pretty uncomfortable, right?
- Compaction: Clay soil easily gets packed down (compacted) by foot traffic, lawn mowers, or even heavy rain. Compacted soil makes it tough for roots to spread out and breathe, limiting access to air and water. It’s like trying to grow through pavement.
- Hard When Dry, Sticky When Wet: In the heat of summer, clay can bake into something resembling a brick. When it's wet (like during spring melt), it's heavy, mucky, and sticky. Neither extreme is ideal for delicate new roots trying to find their way.
But don't despair! Knowing you have clay soil is the first important step. One fantastic way to combat compaction and improve how water moves through your clay is regular lawn aeration, crucial for soil health. Punching holes in the lawn breaks up that dense layer, allowing precious air, water, and nutrients to get down to the roots where they're needed most. For insights on overall lawn health, check out our approach to lawn care.
Testing, Testing... Is This Soil On?
How do you know for sure what kind of soil texture you're working with? A simple soil test is a great starting point.
- The Feel Test: Grab a handful of moist (not soaking wet) soil from your garden bed. Does it feel gritty like sand? Smooth and powdery like flour (silty)? Or does it feel sticky and easily roll into a ball or even a ribbon between your fingers? That stickiness is the hallmark of clay.
- The Jar Test: Find a clear jar with a lid. Fill it about 1/3 full with soil from your yard, then add water until it's almost full. Put the lid on, shake it like crazy for a minute, and then let it sit undisturbed for a day or two. You'll see distinct layers form: sand (the heaviest particles) will settle on the bottom, silt will be in the middle, and clay (the finest particles) will form the top layer. A thick clay layer tells you what you’re dealing with.
- Lab Test: For the most detailed information, including your soil's pH level (acidity/alkalinity) and nutrient content, you can send a sample to a soil testing lab (like the University of Guelph Agri-Food Laboratories or find local options). This gives you a precise roadmap for improvement.
Giving Your Soil a Makeover: Amendments are Key!
Okay, so you've probably confirmed you have clay soil. Now what? The magic word is amendment. This just means adding beneficial materials to your existing soil to improve its structure and fertility. The absolute champion for making clay soil more plant-friendly is organic matter. Our team emphasizes proper soil preparation as a foundation.
- Compost: Finished compost is like black gold for gardeners. It's decomposed organic material teeming with microbial life. Mix generous amounts into your planting holes when installing new shrubs or perennials, and work it into your garden beds annually. Compost helps break up heavy clay particles, improves drainage and water retention (it’s magic!), adds essential nutrients, and feeds the beneficial microbes that help plants thrive.
- Aged Manure: Another fantastic organic amendment, rich in nutrients. Just make sure it's well-rotted ("aged"), as fresh manure can be too strong and burn plant roots.
- Peat Moss or Coconut Coir: These can help lighten heavy soil and improve its ability to hold water. They work best when used with compost, not usually as a standalone solution for clay.
Consistently adding organic matter is the secret sauce to improving clay soil over time. It's a cornerstone of sustainable gardening and essential for any successful Embrun organic lawn care plan focused on healthy grass. Transforming heavy clay takes patience and persistence. If you're looking for more ideas, especially as the seasons change, explore these fall plant care and clay soil solutions for Embrun yards.
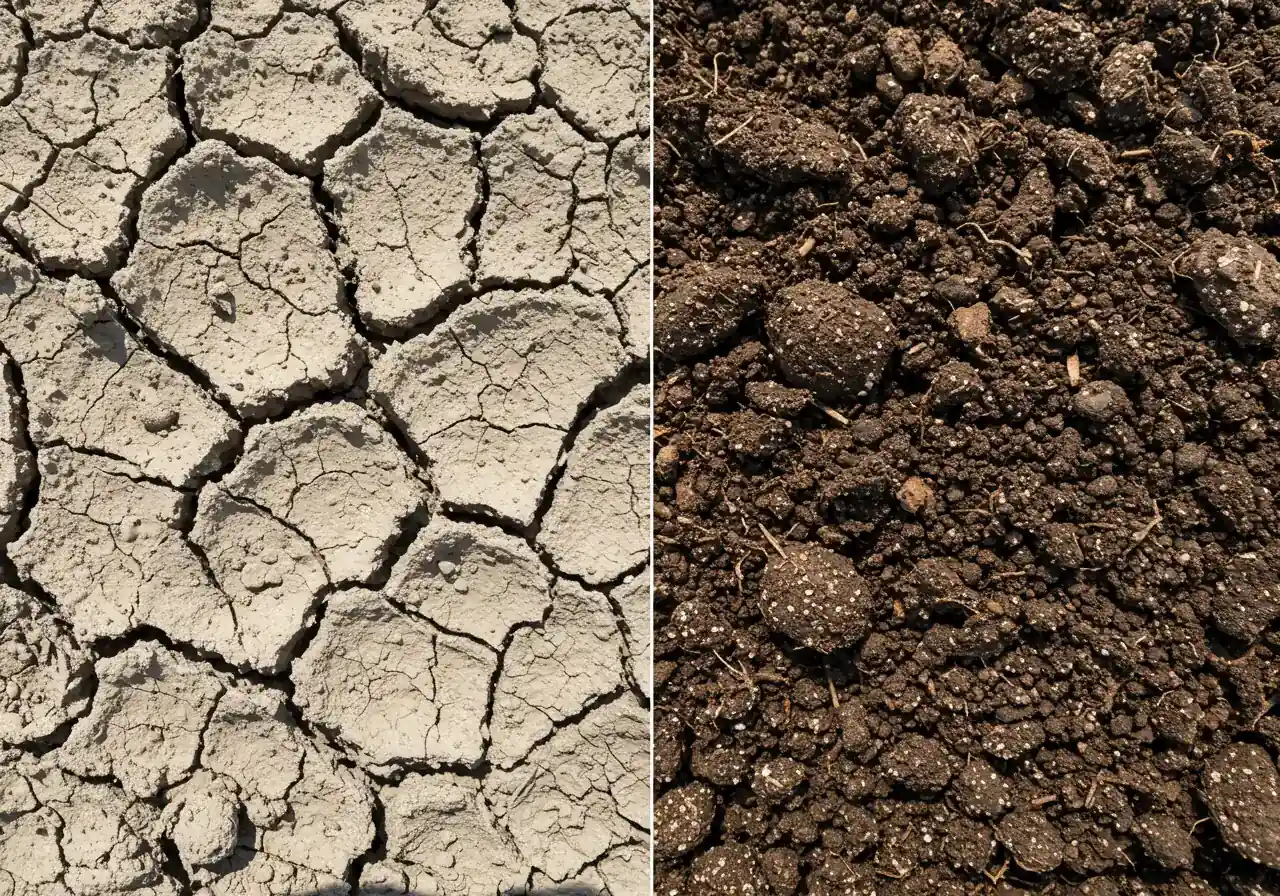
Here’s a quick comparison to visualize the goal:
| Feature | Heavy Clay Soil (Unamended) | Ideal Loam Soil (Amended Clay Goal) |
|---|---|---|
| Texture | Sticky when wet, hard when dry | Crumbly, moist, and soft |
| Drainage | Poor (can lead to root rot) | Good (drains well, avoids pooling) |
| Aeration | Poor (roots struggle for air) | Good (plenty of air pockets) |
| Workability | Hard to dig, especially when dry | Easy to dig and cultivate |
| Root Growth | Often slow and restricted | Vigorous and extensive |
Clay Soil Characteristics
Clay soil is made of very fine mineral particles. It holds water well (sometimes too well!) and is rich in nutrients, but can compact easily, hindering root growth and drainage.
Best Amendments for Clay
- Compost: Improves structure, drainage, and adds nutrients. The #1 choice!
- Aged Manure: Adds nutrients and organic matter.
- Cover Crops (Green Manure): Plants grown and tilled in to add organic material.
Embrun's Climate: Living Life in Zone 5a/4b
Our wild Ottawa-area climate adds another layer to your planting strategy. Embrun is generally considered Plant Hardiness Zone 5a. In some colder pockets or during particularly harsh winters, we might lean closer to Zone 4b. This number basically tells you how cold it might get in winter, indicating which perennial plants, shrubs, and trees are likely to survive year after year. Zone 5a suggests minimum winter temperatures can dip down to around -29°C (-20°F). Yikes!
What this means for your *new* plants:
- Choose Hardy Heroes: When you're buying plants, especially long-term investments like trees and shrubs, look for ones rated for Zone 5a or even colder (Zone 4, 3, etc.). Plants rated for warmer zones (like Zone 6) are a gamble here. Smart material selection is key.
- Baby Steps for Newbies: New plants haven't established deep roots yet, making them more vulnerable during their first year. Proper planting techniques, consistent watering until the ground freezes, and maybe a protective layer of mulch over the root zone for the first winter can significantly boost their survival chances.
- Watch for Weather Whims: Our region is known for surprises! We can get frosts late in spring (after you've excitedly planted tender flowers) or freezes early in the fall. Keep an eye on the forecast, especially during transition seasons. Environment Canada is a reliable source for local Ottawa forecasts.
- Microclimates are Your Secret Weapon: Your yard isn't uniformly one zone! A sheltered spot right next to your house foundation, especially on the south side, might stay a bit warmer than an exposed, windy corner. Use these microclimates! That slightly protected nook could be the perfect place for a plant that’s just on the edge of hardiness for our zone.
Getting your soil improved and choosing plants suited to our climate are the foundational steps for a beautiful, thriving landscape. Remember that healthy soil also supports a healthier lawn – which can often be made even better by overseeding your Embrun lawn for thicker grass.
Understanding these local Embrun conditions – our lovely (but challenging) clay soil and our distinct four-season climate – is absolutely key to gardening success. It takes a little know-how and effort, but giving your plants the right start makes all the difference! If digging into soil science or figuring out plant zones feels like a bit much, remember that help is available. Check out the range of professional landscaping services available that can help you create the yard of your dreams.
Planting Perfection: Setting Your New Green Friends Up for Success

So, you've wrestled with the soil situation, picked out plants tough enough for our Ottawa climate, and now it's time for the main event: planting! This is where the trowel meets the turf (or, more likely in Embrun, the shovel meets the stubborn clay). Getting your new trees, shrubs, or perennials settled in properly is crucial for their long-term health and happiness. Think of it as tucking them into bed just right – comfy, supported, and ready for sweet dreams (and strong root growth!).
Let's face it, digging in our local soil, whether you're in Embrun, Metcalfe, or many surrounding areas, can sometimes feel like an archaeological expedition. You might hit rocks, dense clay that laughs at your shovel, or roots from that maple tree fifty feet away. But don't let that discourage you! With the right technique, you can give your plants the five-star welcome they deserve.
Here's your step-by-step guide to planting perfection:
Step 1: Hydration Station
Before you even think about digging, give your new plant a good drink *while it's still in its pot*. Let it soak for 15-30 minutes. Planting a thirsty plant is like sending someone on a marathon without water – stressful and sets them up for a rough start.
Step 2: The Hole Truth (Size Matters!)
This is where many well-intentioned gardeners go wrong, especially in clay soil. Dig your planting hole *two to three times wider* than the plant's root ball, but *no deeper* than the root ball itself. Why wide? It gives the roots room to spread out into loosened soil as they get established. Why not deeper? Planting too deep is a major cause of plant failure! We want the base of the plant sitting slightly above or exactly at the level of the surrounding soil. Digging too deep in clay can create a 'bathtub effect' where water collects in the nicely dug hole and drowns the roots because it can't easily drain into the dense surrounding clay. Think less 'hole', more 'shallow, wide saucer'.
Humor break: Wrestling with heavy clay? Take breaks! Maybe pretend you're searching for buried treasure. Finding a really big rock totally counts as treasure, right? If the digging gets *really* tough, remember there are professional landscaping services available who have the tools (and muscles!) for the job.
Step 3: Gentle Introduction - Preparing the Plant
Carefully remove the plant from its container. Check the roots. Are they tightly circling the pot (root-bound)? If so, gently tease them apart with your fingers or make a few vertical cuts with a clean knife. This encourages the roots to grow *outward* into their new home, not just keep spinning in circles. Don't go crazy hacking away, just loosen things up a bit.
Step 4: Finding the Flare! (Super Important!)
For trees and shrubs, locate the root flare (also called the trunk flare). This is the point where the main trunk widens out and transitions into the root system. It should look like a gentle outward curve right at the base. This flare must sit at or slightly above the final soil level. Burying the root flare is a common mistake that can lead to rot, disease, and eventually, a very unhappy (or dead) plant. Scrape away any excess soil packed on top of the root ball by the nursery until you clearly see this flare.
Step 5: Position and Backfill
Place your plant in the center of the hole, checking that the top of the root ball (and the root flare!) is level with or just slightly higher than the surrounding ground. Now, start backfilling with the soil you removed. Here’s where amending comes in: it's generally best to mix *some* compost or good quality garden soil (maybe 25%) with the native clay soil you dug out (about 75%) for backfilling. Don't replace all the soil with rich compost. While it sounds nice, it can discourage roots from venturing out into the tougher native soil and worsen that 'bathtub effect'. We want to *improve* the soil structure slightly, not create a luxurious pot buried in the ground. Gently firm the soil around the roots as you go to eliminate large air pockets, but don't stomp it down like you're packing for a long trip – roots need air too!
Step 6: Water Wisely
Once the hole is filled, water thoroughly and slowly, allowing the water to soak deep down. This settles the soil around the roots and eliminates remaining air pockets. Build a small berm, or ridge of soil, around the edge of the planting hole (like a little moat) to help hold water over the root zone for the first few weeks. For new plantings, consistent watering is key, especially during dry spells in their first growing season. Check the soil moisture a few inches down before watering again – you want it moist, not constantly waterlogged.
Step 7: Mulch is Your Friend
Apply a 2-3 inch layer of organic mulch (like shredded bark or wood chips) over the planting area, extending out to the edges of the original hole (or even a bit wider). Crucially, keep the mulch a few inches away from the base of the trunk or plant stems. Don't create a 'mulch volcano'! Mulch helps conserve moisture, suppress weeds, regulate soil temperature, and gradually improves the soil as it breaks down. It's like a cozy blanket for your plant's roots. Keeping the garden beds tidy makes mulching much easier; consider a Metcalfe garden clean up service if things have gotten a bit wild. A clean slate helps new plants shine (and reduces weed competition!). Consistent upkeep, perhaps like the yard cleanup in nearby Marionville, ensures your whole yard looks its best.
Step 8: Ongoing Care
Keep an eye on your new green friends! Water as needed, especially during their first year. Ensure the area around them is kept relatively weed-free. If you're establishing a new garden bed or area, making sure the surrounding lawn is healthy complements the look. Sometimes, starting fresh with fresh sod installation around new beds provides that perfect finishing touch. Remember, a tidy garden is a happy garden – regular maintenance, like the Embrun yard cleanup services provide, helps prevent problems before they start.
Planting properly takes a bit more effort than just digging a hole and plopping a plant in, particularly in our challenging Ottawa-area soils. But trust us, taking these extra steps sets your new plants up for years of beautiful growth and enjoyment. Happy planting!
Watering Wisdom: Keeping Your New Plants Hydrated (Not Drowned!)
Alright, let's talk about water! You've successfully planted your new green buddies, following all the steps for planting perfection. High five! Now comes the equally crucial part: keeping them properly watered. It sounds simple, right? Just add water! But finding that sweet spot between "parched desert" and "muddy swamp" can feel a bit tricky, especially for new plants whose roots are just getting settled. Don't worry, we're here to demystify watering and help your plants thrive, not just survive, here in the Ottawa area. Think of this as your guide to becoming a plant hydration hero, preventing any accidental drowning in your enthusiasm!
The Golden Rule: Water Deeply and Infrequently
If there’s one takeaway about watering established plants (and encouraging new ones to get established), it's this: water deeply and infrequently. Forget those quick, shallow sprinkles every day. That only encourages shallow roots that stay near the surface, making plants more vulnerable to drying out during hot spells or drought.
Instead, we want to encourage roots to grow down deep into the soil where moisture is more consistent. The way to do that? Give your plants a good, long soak when you do water. Let the water penetrate deep into the root zone (at least 6-8 inches down for perennials and shrubs). Then, let the top inch or two of soil dry out before you water again. This deep soaking followed by a slight drying period encourages roots to reach deeper for moisture, building a stronger, more resilient plant. This approach is especially critical right after a professional garden installation or your own planting day, as it sets the stage for long-term success.
How Do You Know When It's Time? The Finger Test!
So, how often is "infrequently"? And how deep is "deeply"? It depends on your soil (remember that Embrun clay?), the weather, and the type of plant. There's no magic schedule like "water every Tuesday at 10 AM." Your best tool is right at the end of your arm: your finger!
- The Finger Test: Stick your index finger into the soil near the base of the plant, up to your second knuckle (about 2 inches deep).
- If the soil feels moist, hold off on watering. Your plant is likely fine.
- If it feels dry at that depth, it's probably time for a good soak.
- Small Trowel Check: You can also use a small hand trowel to gently dig down a few inches beside the plant (be careful not to damage major roots!) to visually inspect the moisture level.
Don't just rely on the surface appearance. The top layer of soil, especially if mulched, can look dry even when there's plenty of moisture underneath. Conversely, after a light rain, the surface might look wet, but the water may not have penetrated deeply enough to reach the roots. Always check below the surface!
Timing is Everything: Water in the Morning
The best time to water your plants is generally in the early morning. Why?
- Less Evaporation: Cooler morning temperatures mean less water is lost to evaporation compared to watering in the heat of the day. More water actually gets to the roots!
- Plant Preparedness: It allows the plants to absorb the moisture before the heat of the day sets in, helping them cope with potential afternoon stress.
- Disease Prevention: Watering in the morning allows the foliage (leaves) to dry off throughout the day. Wet leaves overnight can create a welcoming environment for fungal diseases, which no one wants! Avoid evening watering if possible.
Tools of the Trade: Choosing Your Watering Method
How you deliver the water matters too.
- Watering Can/Hose with Wand: Great for targeted watering of individual new plants or containers. Aim the water at the base of the plant, soaking the root zone, not just splashing the leaves.
- Soaker Hoses/Drip Irrigation: These are fantastic, efficient options, especially for garden beds or rows of shrubs. They deliver water slowly and directly to the soil surface or root zone, minimizing evaporation and runoff. This is where good mulching and edging techniques really pay off by keeping that slowly delivered moisture right where the roots can access it.
Uh Oh! Signs of Trouble: Too Much or Too Little?
Plants will often give you signals when their water situation isn't quite right. Learning to read them is key:
- Signs of Underwatering:
- Wilting or drooping leaves (often the first sign).
- Dry, brittle, or brown leaf edges.
- Slowed growth.
- Flowers may fade or drop prematurely.
- Signs of Overwatering (Yes, it's a thing!):
- Yellowing leaves, starting from the bottom of the plant and moving up.
- Wilting (confusing, right? But roots need air, and waterlogged soil suffocates them, leading to wilt).
- Soft, mushy stems or roots (root rot).
- Mold or algae growth on the soil surface.
- Stunted growth.
Think Goldilocks – not too wet, not too dry, but just right. Careful observation is your friend. Keeping the surrounding area clear, maybe through a regular city yard cleanup service, helps you spot issues like yellowing leaves or soil problems faster.
Ideal Soil Composition (Approx. Volume)
Listen to Mother Nature: Adjusting to Ottawa Weather
Watering needs change constantly based on our lovely, unpredictable Ottawa weather. Whether you're in Nepean, Barrhaven, or out towards the valley, pay attention!
- Rain: If you get a good, soaking rain (check the depth with your finger!), you can skip your next scheduled watering. A light sprinkle might not be enough, though.
- Heat Waves: During hot, dry, windy periods, plants lose moisture much faster. You'll need to check the soil more frequently and likely water more often (but still deeply!).
- Cooler Weather: In spring and fall, plants generally need less water than during the peak summer heat.
Water Wisely: Eco-Friendly Tips
Water is precious, so let's use it thoughtfully:
- Use a Rain Barrel: Collect rainwater from your downspouts – free water for your plants!
- Mulch, Mulch, Mulch: We mentioned it before, but a 2-3 inch layer of organic mulch is amazing for reducing evaporation from the soil surface.
- Water the Roots, Not the Pavement: Aim your water carefully.
- Group Plants Wisely: Place plants with similar water needs together (hydrozoning). Check resources like City of Ottawa water conservation for tips.
- Control Weeds: Don't water the weeds! Keeping beds tidy, perhaps with help from a Metcalfe garden clean up service or city garden cleanup service if needed, ensures water goes where it's meant to – your precious new plants.
Watering new plants doesn't have to be stressful. By understanding the 'deep and infrequent' principle, checking your soil consistently, watering at the right time, and adjusting for the weather, you'll give your leafy newcomers the best possible start. Patience and observation are key. Master this watering wisdom, and you're well on your way to achieving those beautiful landscape transformations you envisioned for your Ottawa-area yard! Happy watering!
Mulch & Munchies: Protecting and Nourishing Your New Arrivals

You've successfully navigated the planting process and mastered the art of watering – fantastic work! Your new plants are officially in the ground. Now, let's talk about giving them some cozy protection and the right kind of snacks (or "munchies"!) to help them truly settle in and flourish. We're talking about mulch and feeding – two key ingredients for happy plants in our unique Embrun and greater Ottawa conditions.
The Magic Blanket: Why Mulch is a Must-Have
Think of mulch as the superhero cape for your garden beds. It’s not just there to look pretty (though it certainly helps!); it performs several critical jobs, especially for new plants trying to establish roots in our often-clay soil.
Here’s why mulch is your garden’s best friend:
- Moisture Lock-In: Remember our chat about watering? Mulch acts like a lid on the soil, slowing down evaporation. This means the water you apply stays near the roots longer, reducing how often you need to water. Big win!
- Weed Warrior: A good layer of mulch blocks sunlight from reaching weed seeds, making it much harder for them to sprout and compete with your new plants for water and nutrients. Less weeding? Yes, please!
- Temperature Tamer: Mulch insulates the soil, keeping it cooler during scorching summer days and warmer during chilly nights. This buffer protects tender new roots from extreme temperature swings – something we definitely experience around Ottawa!
- Soil Spa Treatment (Organic Mulch): As organic mulches (like bark or wood chips) slowly break down, they add valuable organic matter to the soil, improving its structure and fertility over time. It’s like a slow-release treat for your soil microbes.
- Finishing Touch: Let’s be honest, a fresh layer of mulch gives your garden beds that clean, polished look. It’s the perfect way to finish off landscaping efforts, especially after a thorough city property cleanup service has tidied everything else up.
Choosing Your Mulch:
There are different types, but for garden beds with plants, organic mulches are usually the way to go because they improve the soil. Good options include:
- Shredded Bark or Wood Chips: Popular, readily available, and break down relatively slowly. Come in various colours and textures.
- Pine Straw: Lighter weight, good for acid-loving plants, breaks down nicely.
- Compost: Can be used as a top-dressing mulch, adding lots of nutrients (use a finer layer).
- Straw: Great for vegetable gardens, but can sometimes contain weed seeds.
Inorganic mulches like landscape fabric, stones, or rubber exist too. They last longer and suppress weeds well, but don't improve the soil and can sometimes overheat roots. Removing large areas of old stone or rubber mulch might even require professional property clean up due to the weight and volume.
Mulching Done Right: Avoid the Dreaded Volcano!
Applying mulch isn't rocket science, but there’s one crucial rule: Do not pile mulch directly against the plant stems or tree trunks! We call this mistake a "mulch volcano," and it's bad news. Piling mulch against the base traps moisture, inviting rot, disease, and even pests like rodents who like the cozy cover.
Here’s the right way:
- Apply 2-3 inches deep: Enough to suppress weeds and retain moisture, but not so thick that it prevents water and air from reaching the soil.
- Keep it Away: Leave a few inches of space clear around the base of each plant or tree trunk. Think "donut," not "volcano."
- Spread it Wide: Extend the mulch layer over the entire root zone, which usually means out to the drip line (the edge of the plant's widest branches) or at least covering the area you dug for planting.
Proper mulching is one of the simplest yet most effective best garden maintenance practices you can adopt.
Feeding Finesse: When and How to Offer Plant Munchies
Okay, what about fertilizer? Your new plants need nutrients, right? Yes, but timing is everything! Resist the urge to shower your newcomers with strong fertilizer right after planting.
Why wait?
- Root Focus: Right now, we want the plant to focus its energy on establishing a strong root system, not pushing out lots of leafy top growth. Too much nitrogen (common in many fertilizers) encourages leaves at the expense of roots.
- Risk of Burning: New, tender roots are sensitive and can easily be "burned" by strong chemical fertilizers.
- Soil Might Be Enough: If you amended the soil with compost when planting (as we recommended!), your plant already has access to gentle, slow-release nutrients.
So, when *do* you feed?
- Wait a Bit: Give your plants at least a few weeks, or even wait until the next growing season, to apply any significant fertilizer. Watch the plant – if it looks healthy and is putting out new growth (slowly at first is fine), it's likely doing okay.
- Go Organic: When you do decide to feed, opt for gentle, organic options. These feed the soil life, which in turn feeds your plants. Think:
- Top-dressing with Compost: Simply spread a thin layer (1/2 inch) of finished compost around the base of the plant (keeping it away from the stem!).
- Compost Tea: A liquid brew made from compost, teeming with beneficial microbes.
- Slow-Release Organic Fertilizers: Granular options derived from natural sources (like bone meal, blood meal, or alfalfa meal) release nutrients gradually. Follow package directions carefully.
Healthy, well-nourished plants contribute significantly to the overall appeal of your property, making the results of an impressive Ottawa property cleanup service even more striking.
Simple Seasonal Check-Ins:
Keep mulch and feeding on your radar with simple seasonal checks:
- Spring: As the ground thaws and warms (usually May around here), check your mulch depth. Has it decomposed or washed away? Replenish to that 2-3 inch level, keeping it away from stems. This is often a good time for general tidying; consider a Metcalf property cleanup service to get beds ready before mulching. Assess established plants – if they look pale or weak, a light feeding with organic fertilizer might be helpful. Hold off feeding brand new spring plantings for a few weeks.
- Summer: Keep an eye on mulch, making sure it hasn't compacted or thinned out too much. Fluff it gently with a rake if needed. Focus on consistent watering. Generally, no major feeding is needed unless a specific plant shows deficiency signs.
- Fall: This is key for new plants, especially perennials, shrubs, and trees planted this year in potentially colder spots like Manotick or Osgoode. Ensure a healthy 2-3 inch layer of mulch is in place *before* the ground freezes hard. This insulates the roots from harsh freeze-thaw cycles. *Avoid* fertilizing in late summer or fall – you don't want to encourage tender new growth that will just get zapped by winter frost.
Giving your new plants the protection of mulch and being thoughtful about when and how you provide "munchies" are simple steps that pay huge dividends. You're setting them up not just to survive their first year, but to thrive for many seasons to come in your beautiful Ottawa-area garden!
First Year Plant Care Timeline (Simplified)
Spring: Planting & Settling In
Plant after last frost (late May). Amend soil well. Water deeply. Apply initial mulch layer (donut method!).
Summer: Water & Observe
Monitor moisture using the 'finger test'. Water deeply when needed (morning is best). Watch for pests/disease. Minimal pruning (only dead/damaged).
Early Fall: Root Growth Focus
Continue watering as needed until ground freezes. Check mulch depth. Avoid late-season fertilizing.
Late Fall/Winter: Protection
Ensure 2-3" mulch layer is present before hard freeze. Consider burlap wrap or tree guards for vulnerable plants. Water evergreens well before freeze-up.
The First Year Frontier: Navigating Challenges & Troubleshooting
Welcome to the wild ride that is your new plant's first year! You've done the hard work of planting, watering, and mulching. Now, it’s mostly about observation and stepping in when your green friends need a little help settling into their new Ottawa home. Think of yourself as a friendly guide on their frontier adventure. Sometimes things go perfectly smoothly, other times... well, let's just say plants can be divas sometimes, especially when they're new in town!
Don't panic if you see a few bumps in the road. It's totally normal. Here’s how to tackle some common first-year challenges with a calm head and maybe a slightly muddy garden glove.
"Help! My Plant Looks Sad!" - Transplant Shock & Weather Tantrums
One of the most common sights with new plantings is a bit of transplant shock. Imagine being gently uprooted and moved to a completely new place – you’d probably feel a little droopy too!
- What it looks like: Wilting leaves (even if the soil is moist), some yellowing or dropping leaves (often lower ones first), or just a general lack of perkiness.
- Why it happens: The roots were disturbed during planting and haven't fully re-established their water-uptake network yet. It takes time!
- What to do: Patience is key! Ensure consistent watering (remember the finger test – moist, not soggy!), protect from harsh afternoon sun if possible for the first week or two (especially for perennials), and resist the urge to fertilize right away. Good planting technique and proper watering are your best defenses here.
Our wild Ottawa weather can also throw curveballs. Sudden heat waves can scorch tender leaves, unexpected late spring frosts can nip new buds (especially a risk in areas slightly further out like Manotick or Greely), and strong winds can dry plants out quickly. Keep an eye on the forecast and provide temporary shade during extreme heat or cover sensitive plants if frost threatens.
Uninvited Guests & Garden Grumbles: Pests & Diseases
Okay, nobody *likes* finding creepy crawlies munching on their prized plants or weird spots appearing on leaves. But it happens! The key is early detection and gentle action. We're big fans of Integrated Pest Management (IPM) – basically, using common sense and the least toxic methods first.
- Common Culprits:
- Aphids: Tiny pear-shaped insects, often green or black, clustered on new growth or undersides of leaves. They suck plant juices.
- Slugs/Snails: Slimy critters that chew ragged holes in leaves, especially hostas. Most active at night or after rain.
- Powdery Mildew: White, dusty-looking patches on leaves and stems, often happens in humid conditions with poor air circulation.
- Your IPM Toolkit (Eco-Friendly First!):
- Scout Regularly: Walk around your garden often and look closely at your plants. Catching problems early makes them much easier to handle. Visit our Google Business Profile for seasonal tips!
- Hand-Picking: For larger pests like slugs or caterpillars, the 'pick and plunk' method (into soapy water) is surprisingly effective, if a bit ick-factor-ish.
- Water Jet: A strong spray of water from the hose can dislodge aphids and spider mites.
- Insecticidal Soap/Horticultural Oil: These less-toxic sprays work by smothering soft-bodied insects like aphids. Follow label directions carefully and test on a small area first. Best applied in cooler parts of the day.
- Improve Airflow: Prune surrounding plants if needed to let air move freely, which discourages fungal diseases like powdery mildew. Sometimes just giving plants enough space when you plant them is the best prevention.
- Clean Up: Remove fallen diseased leaves promptly. A tidy yard also reduces hiding spots for pests like slugs, so regular upkeep, perhaps including an Ottawa property cleanup service, can actually be part of your IPM plan. Check out resources from organizations like the Master Gardeners of Ottawa-Carleton for local pest advice.
Winter is Coming: Tucking Plants In for the Cold
Our Ottawa winters (solidly Zone 5a, sometimes flirting with 4b) require some prep work, especially for plants in their first year. Their roots aren't as deep or extensive yet, making them more vulnerable.
- Water Until Freeze-Up: Keep watering your plants (especially evergreens and new trees/shrubs) whenever the ground isn't frozen, right up until it freezes solid (usually late November/early December). Winter winds can dry plants out (winter burn), and moist soil helps protect roots.
- Mulch is Mandatory: A 2-3 inch layer of mulch applied *after* the ground starts to get cold but *before* it freezes hard is crucial. It insulates the roots, preventing the damaging freeze-thaw cycles that can heave plants right out of the ground. Remember, strong roots developed through proper soil preparation are the plant's best defense against winter stress, and mulch adds extra insurance.
- Wrap it Up: Sensitive evergreens (like some cedars or dwarf Alberta spruce) or shrubs prone to winter burn, especially in exposed, windy locations perhaps like you might find in Osgoode or Richmond, benefit from a burlap wrap. Create a screen on the windiest side(s) or loosely wrap the entire plant, leaving the top open for air circulation. Remove it promptly in spring.
- Guard the Trunks: Young trees with smooth bark are a tasty winter snack for rabbits and voles. Protect their trunks with plastic tree guards extending above the expected snow line.
- Container Care: Perennials left in pots above ground are unlikely to survive our winters. Either move the pots into an unheated garage or shed, or bury the pots in the ground in a sheltered spot before deep winter hits.
Hold Your Clippers! First-Year Pruning Patience
Resist the urge to do major pruning on your new plants in their first year. They need all their leafy energy to focus on establishing strong roots underground.
- The 3 Ds Rule: The *only* pruning typically needed in year one is to remove stems that are clearly Dead, Damaged (broken), or Diseased. Use clean, sharp pruners for this.
- Wait for Shape: Let the plant settle in and show its natural form before you start thinking about major shaping or size control – that can usually wait until year two or three.
Listening to Your Leaves: Recognizing Stress Signals
Your plants will often tell you when something's not right. Learning to read the signs is a valuable gardening skill:
- Yellowing Leaves: Can mean overwatering (especially lower leaves), underwatering, nutrient deficiency, or sometimes just natural aging of older leaves. Check soil moisture first!
- Wilting: Usually means underwatering, but can *also* mean overwatering (drowned roots can't function), or transplant shock. Again, check that soil moisture deep down.
- Brown, Crispy Leaf Edges: Often a sign of underwatering, low humidity, or windburn.
- Spots on Leaves: Could be fungal disease (see IPM section), insect damage, or sometimes even water droplets acting like magnifying glasses on a sunny day.
- Stunted Growth: If the plant just isn't growing much (after the initial settling-in period), it could be lack of nutrients, compacted soil, not enough sun, or incorrect watering.
Observe carefully, consider the recent weather and your care routine, and try to connect the symptom to the likely cause before taking action. Sometimes, problems arise because the plant wasn't quite right for the specific spot or conditions – which is why careful material selection suited to Ottawa conditions is so important from the start.
Navigating the first year is mostly about observation and providing consistent basic care. Don't be discouraged by minor setbacks! If you're ever truly stumped by a plant problem, don't hesitate to ask experienced local gardeners, reputable nursery staff, or landscaping professionals for advice – you can learn more about us and our approach to creating healthy, thriving yards. Taking these troubleshooting steps shows you really care about your green investments. Your plants will surely show their appreciation for this extra care... think of it as their way of saying thank you with beautiful blooms or healthy growth next season! Check our privacy policy for how we handle your info.
HIGHLIGHT BOX: Embrun Plant Success Cheat Sheet
Okay, feeling a little overwhelmed by all the info? Totally understandable! Gardening in the Ottawa area, especially with our famous Embrun clay, has its quirks. Here are the absolute must-do things to remember for giving your new green buddies the best welcome party ever. Consider this your quick guide to plant happiness!
- Boost That Clay! Seriously, don't just plop plants into straight clay. Mix generous amounts of compost into the planting hole and surrounding soil. Think of it as giving your plants a comfy bed instead of a concrete slab. Healthy soil = happy roots!
- Plant High, Not Shy! Find the root flare – that spot where the main trunk or stem flares out to meet the roots. Make absolutely sure this spot sits slightly above the final soil level. Planting too deep is like giving your plant cement shoes. Not cool!
- Water Deeply, Then Chill. When you water, give 'em a really good, long soak so the moisture gets way down. Then, let the top inch or two of soil dry out before watering again. Use your finger to check – don't guess! This encourages deep, strong roots. Consistent care, especially in the first year, is vital. If life gets hectic, remember a reliable city garden maintenance service can help keep your garden thriving.
- Mulch Like a Pro (No Volcanoes!). A 2-3 inch layer of organic mulch (like bark chips) is your best friend. It holds moisture, smothers weeds, and looks great. Just please, keep it pulled back a few inches from the plant's stem or trunk. Think 'donut,' not 'volcano'! Tidy beds showcase your plants beautifully – similar to how a full Marionville property cleanup service makes the whole property shine.
- Pick Hardy Heroes! Make sure your new trees, shrubs, and perennials are rated for Ottawa's Plant Hardiness Zone 5a or colder (Zone 4 is even safer!). Check the plant tag! Choosing the right plant for the right place is half the battle. Smart material selection saves you heartache down the road. Planning a bigger landscaping project? Getting professional advice and reviewing estimate feedback can help ensure you pick winners for our climate.
Follow these tips, and you're well on your way to success! Remember, gardening involves Mother Nature, so results can vary. If you hire help for installation or maintenance, it's always a good idea to review the service provider's terms and conditions so everyone's on the same page. Happy planting!
FAQ: Your Embrun & Ottawa New Plant Questions Answered
Got questions about getting your new green friends settled in the Embrun or greater Ottawa area? You're not alone! Here are some common head-scratchers, answered with our local conditions in mind.
Spring (after the last frost, usually mid-to-late May) and early fall (late August to late September) are generally the sweet spots for planting in our Ottawa climate. Spring planting gives plants the whole growing season to establish roots before winter. Fall planting allows roots to grow in cooler soil, often with less watering stress than summer heat. Just be sure to plant fall additions at least 4-6 weeks before the ground freezes solid (usually happens in late November/early December) to give them a fighting chance. Avoid planting during the peak heat and potential drought of mid-summer if you can help it – it's just extra stress on the newbie plants!
Ah, the classic Ottawa Valley clay! The absolute best thing you can do is improve the soil structure right where the plant will live. When you dig the hole (remember, wider is better than deeper!), mix a generous amount of finished compost (like, 25-50% compost) into the soil you removed before backfilling around the roots. This simple step helps break up the heavy clay, improves drainage and moisture retention, and gives roots an easier time spreading out. Seriously, compost is like magic fairy dust for our clay soil. If you're planning a larger landscaping overhaul and rethinking your soil strategy entirely, reviewing feedback on estimates for landscaping projects can give you ideas on incorporating soil amendment costs effectively.
It's a common worry! Forget watering on a strict schedule. Your best tool is your finger. Stick it into the soil near the base of the plant, about 2 inches deep. If the soil feels damp, hold off. If it feels dry at that depth, it's time for a good, slow soak. Water deeply enough to reach the entire root zone, then let the top layer dry slightly before watering again. For new plants, check every couple of days initially, especially in hot weather. Over time, you'll get a feel for how quickly your specific soil dries out. Remember, consistently moist (like a wrung-out sponge) is the goal, not soggy or bone-dry.
First, take a deep breath – don't panic and grab the strongest spray! Often, simple steps work best. Identify the pest if you can (aphids and slugs are common culprits around here). A strong blast of water from the hose can dislodge many small insects like aphids. Slugs often hide in damp, dark places, so keeping the garden tidy helps. Removing debris and leaf litter reduces their hiding spots – think about how a thorough cleanup, like a professional Metcalfe yard cleanup service or a comprehensive Ottawa yard cleanup service, makes it harder for pests to thrive. Hand-picking slugs (early morning or evening) into soapy water is also effective, if a bit gross! Only resort to insecticidal soaps or other treatments if the infestation gets really bad, and always follow label instructions carefully. Need cleanup in Marionville, Ottawa, or the City? We can help!
It's smart to think ahead! Our winters can be tough. The two most crucial things for first-year plants (especially perennials, shrubs, and trees planted in areas like Manotick or Russell) are consistent watering right up until the ground freezes solid, and a good layer of mulch. Keep watering new additions deeply whenever the ground isn't frozen in the fall – this helps prevent winter drying (winter burn). Then, *after* the ground gets cold but *before* it freezes hard, apply a 2-3 inch layer of organic mulch (like shredded bark) over the root zone, keeping it away from the stem. This insulates the roots from harsh freeze-thaw cycles. For specific concerns about protecting delicate plants or tricky situations, feel free to contact us for tailored advice.
Conclusion: Grow On! Cultivating Your Green Oasis in Embrun
Whew! You made it through Plant Parenting 101, Embrun edition! See? With a little know-how about our local clay soil, our sometimes dramatic Ottawa weather, and the right techniques, you're totally equipped to help your new plants not just survive, but thrive. Remember the golden rules: amend that soil with compost goodness, plant them high (watch that root flare!), water wisely (deeply, not daily!), and tuck them in with a cozy mulch blanket (no volcanoes, please!). Choosing plants suited for Zone 5a sets you up for success right from the start.
Taking these steps turns your landscaping dreams into reality, creating a beautiful green space you can be proud of. It takes a little effort, sure, but seeing your plants flourish is incredibly rewarding – way better than watching paint dry, right? Go on, embrace your inner gardener and watch your Embrun oasis grow!
Feeling inspired but maybe a bit short on time or shovel-power? We get it! If you need a hand bringing your vision to life, from planting and mulching to full landscape transformations in Embrun, Greely, Manotick, and surrounding Ottawa areas, we're here to help. Whether it's regular maintenance or a large property clean up, we've got you covered.
- Ready for professional help? Give us a call or fill out our contact form to discuss your project!
- Want more tips and info? Dig deeper into our website for other helpful guides and service details.
- Stay connected! Follow us on social media for seasonal tips, inspiration, and updates.
Happy Gardening!
