
Post-Construction Garden Rehab: Healing Osgoode Soil
Quick Summary
- Construction damages soil through compaction, topsoil removal, contamination, and altered drainage.
- Assess damage visually and with simple tests (shovel, texture, drainage). Consider a professional soil test for specifics.
- Rehab involves clearing debris, decompacting soil (broadfork/aeration), adding abundant organic matter (compost!), and addressing drainage.
- Plant patiently, starting with cover crops or resilient native plants adapted to Ottawa conditions.
- Mulch and wise watering are key for long-term recovery.
Ready to transform your post-construction site into a thriving garden? Let Clean Yards help! Request a personalized quote today for soil assessment and rehabilitation services in the Osgoode area and beyond.
Introduction: From Construction Zone to Garden Oasis in Osgoode
So, the final nail is hammered, the last window is cleaned – your building project is complete! It’s a fantastic feeling… until you look down. Instead of the lush landscape you imagined, you’re often staring at what looks like a practice field for heavy machinery. Compacted soil, leftover building bits, and a general air of, well, *bleh*. If you're in Osgoode, you know the local soil can sometimes be a character – often clay-based and not exactly thrilled after being squashed flat. It’s a common scene across the Ottawa region, from Greely right over to Manotick too.
But hey, don't let that patch of sad dirt get you down! Transforming that construction aftermath into a beautiful garden oasis isn't just possible; it's a rewarding landscaping adventure. Think of it less as a chore and more as giving your property its happy ending. We’re here to walk you through it. This section focuses specifically on bringing your Osgoode soil back to life – think soil rehabilitation with practical tips you can actually use. We’ll cover everything from breaking up compaction to choosing plants that will thrive, turning that challenging plot into your personal slice of paradise through smart gardening. Let’s get digging!
The Dirt on Construction Damage: What Really Happened to Your Soil?
Alright, let’s talk turkey – or rather, soil. After the construction crews pack up, especially around areas like Osgoode or Winchester where properties might be larger, the ground left behind often looks less like a future garden and more like a pancake. So, what exactly did that whirlwind of building activity *do* to your precious patch of earth? It wasn't just messing things up; specific types of damage are pretty common.
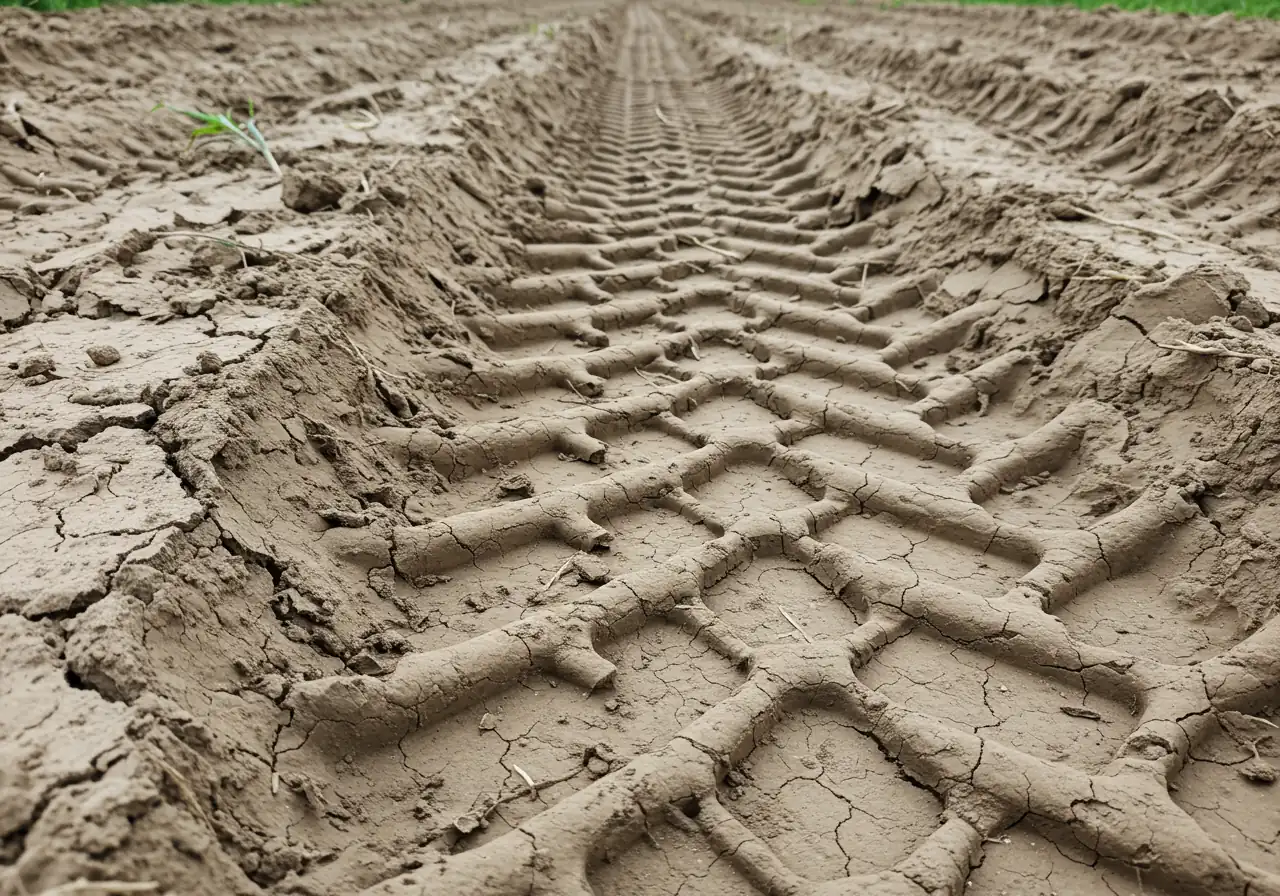
First up, the big one: Compaction. Imagine all those heavy trucks, excavators, and piles of materials constantly pressing down. This squishes the life out of your soil, squeezing out the air pockets that plant roots and water need. It’s like trying to grow a prize-winning rose in a brick. This is especially tough on the clay soils common in many parts of Ottawa, making it hard for roots to penetrate and water to drain. You can learn more about boosting plant roots even in tough conditions with techniques like using beneficial fungi to boost plant roots.
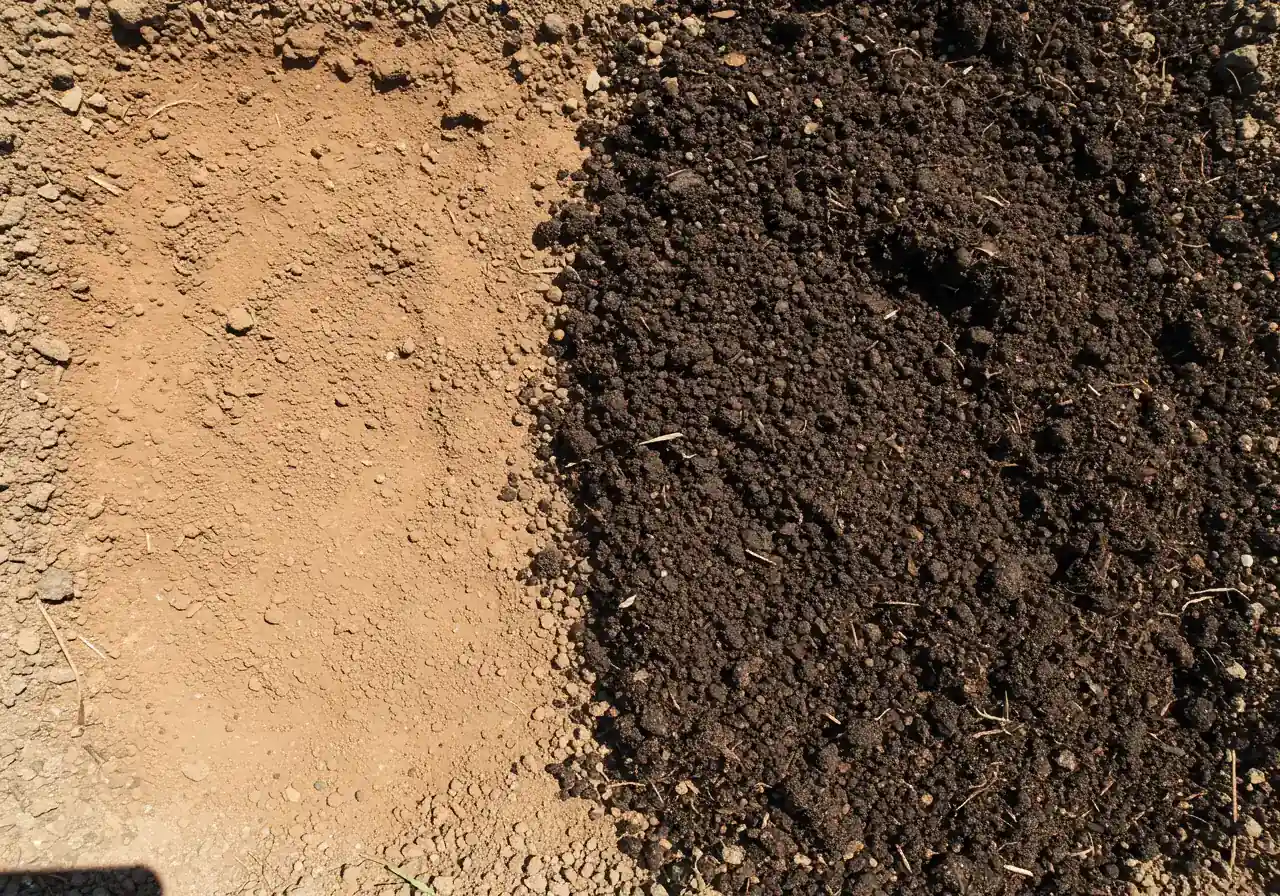
Then there’s Topsoil Stripping. Often, builders scrape off the good, nutrient-rich topsoil layer (the dark, crumbly stuff) to level the site or keep it "clean." Sometimes it's put back, sometimes... not so much, or it gets mixed with less desirable subsoil. Losing this layer means losing vital organic matter and the soil’s natural fertility. Your plants will definitely notice the difference! Effective soil preparation techniques can help mitigate this.
Don't forget Contamination. Construction sites can be messy. Leftover bits of drywall, paint spills, mortar mix, plastic scraps, or even vehicle fluids can get mixed into the soil. These aren't just ugly; they can change the soil's pH balance or introduce harmful chemicals, making it tough for plants to thrive. A thorough cleanup is essential, something like a detailed garden clean up service, especially relevant in busy areas like Barrhaven, can tackle this leftover debris. For larger areas, a comprehensive property clean up might be needed.
Finally, there’s Drainage Disruption. All that grading and ground-moving changes how water flows across your property. Areas that used to drain fine might now collect puddles, while others become oddly dry. This can happen anywhere, but the impact might feel different between, say, a larger lot in Metcalfe versus a tighter suburban space in Nepean where changes in slope affect neighbours more directly. Dealing with these issues might fall under general garden maintenance or require specific interventions.
Understanding these impacts is the first step. Sometimes, it's helpful to get a professional eye on things; consider a garden health assessment to spot problems early. Knowing the problem helps find the right solutions, whether it's deep aeration, adding compost, or thinking about long-term lawn health like you would during seasonal lawn preparation. Fixing the soil foundation is crucial before you dream of planting intricate designs like unique garden art forms. If it all feels overwhelming, remember there are various landscaping services available to help restore your yard.
Common Construction Soil Issues
| Cause | Effect | Common Indicator |
|---|---|---|
| Heavy Machinery Traffic | Compaction | Hard soil, poor drainage, stunted plant growth |
| Site Grading / Leveling | Topsoil Stripping / Mixing | Pale, uniform soil color, lack of organic matter |
| Building Activities | Contamination | Visible debris (plastic, concrete), unusual soil pH, plant die-off |
| Altered Ground Levels | Drainage Disruption | Puddles in new areas, unexpectedly dry zones |
Playing Detective: How to Assess Your Post-Construction Soil Scene
Alright, time to put on your detective hat (a gardening hat works too!) and investigate the state of your soil after the construction dust settles. Knowing what you're dealing with is the first step to transforming that compacted patch into a thriving garden, whether you're in Osgoode, Greely, or anywhere across Ottawa. Let's uncover some clues with simple DIY tests.
1. The Visual Stakeout:
First, just *look*. What do you see?
- Debris: Bits of wood, plastic, concrete chunks, mysterious unidentifiable objects? Construction leftovers are common culprits. Removing these is crucial. If it looks like a major job, consider a professional touch like an Ottawa property cleanup service to get a clean slate. For more suburban settings, a targeted approach like a city property cleanup service might be suitable, while larger lots might need something like a Marionville yard cleanup service or even a Metcalf property cleanup service.
- Surface Texture: Does it look like smooth, hard pavement or loose and crumbly? Hard surfaces scream compaction.
- Color: Is the soil uniformly pale or does it have darker patches (usually indicating more organic matter)? Post-construction soil often lacks that rich, dark topsoil layer.
- Puddles: After rain, does water sit around for ages? This points to poor drainage, often due to compaction.
2. The Shovel Shuffle:
Grab a sturdy shovel and try digging a small hole (about a foot deep).
- How hard is it? If you have to jump on the shovel like you're starting a stubborn lawnmower, you've got compaction. Good soil should be relatively easy to dig when moist.
- What do the layers look like? Can you see a distinct topsoil layer (darker) over subsoil (lighter)? Or is it all mixed up and uniform in color?
3. The Ribbon Roll (Texture Test):
Take a small handful of *moist* (not soaking wet) soil. Try rolling it into a ball, then gently squeeze it between your thumb and forefinger to form a ribbon.
- Forms a long, thin ribbon (over 2 inches)? High clay content. Common in parts of the Ottawa area, clay holds nutrients well but can compact easily and drain slowly.
- Feels gritty and won't form a ribbon? Sandy soil. Drains fast, maybe too fast, and doesn't hold nutrients well.
- Feels smooth/slippery like flour, forms a weak ribbon (1-2 inches)? Silty soil. Pretty decent, but can also compact.
- Feels slightly gritty, smooth, and forms a medium ribbon? Loam! The holy grail – a good mix of sand, silt, and clay.
4. The Percolation Probe (Drainage Test):
Dig a hole about 1 foot wide and 1 foot deep. Fill it with water and let it drain completely. Fill it again and time how long it takes for the water level to drop.
- Ideal Drainage: Drops about 1-2 inches per hour.
- Too Slow: Less than 1 inch per hour? Poor drainage, likely due to compaction or heavy clay.
- Too Fast: More than 3-4 inches per hour? Likely sandy soil; water (and nutrients) will run right through.
The Case for the Professionals (Soil Testing):
While these DIY tests give you valuable clues, they don't tell the whole story, especially after construction. You won't know the *specific* nutrient levels (Is it low in nitrogen? Phosphorus?) or the exact pH (too acidic? too alkaline?). Construction can also leave behind contaminants you can't see or smell.
Seriously consider getting a professional soil test. It’s like getting lab results back – precise and actionable. You send a sample to a lab (many reputable local labs serve the Ottawa area, like the A&L Canada Laboratories or services available through the Ontario Ministry of Agriculture, Food and Rural Affairs accredited list), and they provide a detailed report. This tells you exactly what amendments your soil needs (lime, specific fertilizers, compost) to bring it back to life. This knowledge is gold for effective Soil Preparation and ensures you’re not just guessing. It helps you choose the right plants that will actually *thrive* in your specific conditions and informs future care like proper Mulching and Edging techniques to retain moisture and improve soil health over time. Before engaging with any testing service, it's always wise to understand their process and reporting, much like you'd review our company's Terms and Conditions before starting a project.
Armed with info from your detective work and potentially a pro test, you're ready to plan your soil rescue mission!
Operation Soil Rescue: Your Step-by-Step Rehab Plan
Okay, team, we've done the detective work, and maybe the soil situation looks a bit grim. Fear not! Rehabilitating post-construction soil is totally doable. Think of it as giving your yard a spa day after a really rough week. It takes some effort, but the payoff – healthy soil ready for planting – is huge. Here’s your action plan to rescue that dirt, whether you’re in Manotick, Osgoode, or anywhere else facing construction aftermath in the Ottawa region.
Step 1: Operation Clean Sweep
First things first: get rid of the junk. We’re talking *all* of it. Surface debris like wood scraps, plastic, concrete chunks, and discarded Tim Hortons cups (hey, it happens!) needs to go. But don't stop there! Gently rake or lightly dig the top few inches to unearth hidden nasties like nails, buried bits of drywall, or plastic sheeting. You can’t heal the soil if it’s full of construction leftovers. This step is non-negotiable. If the mess looks more like an archaeological dig site than a backyard, getting professional help might be wise. Consider a thorough Ottawa property cleanup service to ensure you start with a truly clean slate. For properties further out, specialized services like a Metcalf yard cleanup service or Marionville property cleanup service can tackle large-scale debris removal.
Step 2: Busting Up the Hardpan (Decompaction)
Remember that compaction we talked about? Time to break it up! Squished soil has no room for air or water, which plant roots desperately need. How you tackle this depends on the severity and your area size:
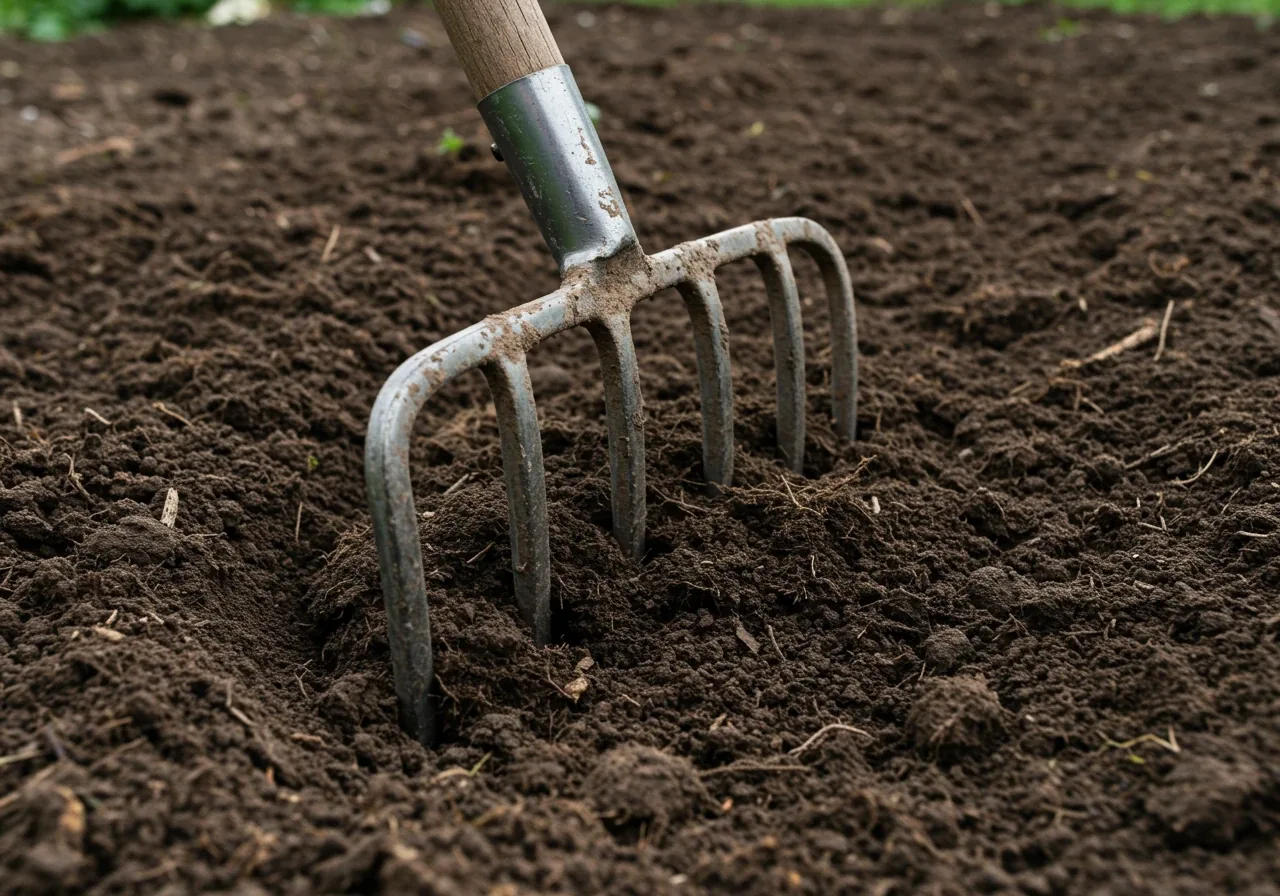
- Manual Labour of Love (Broadforking): For smaller areas or if you want to minimize soil structure disruption, a broadfork is your friend. You step on it, wiggle it, and it lifts and loosens the soil without flipping it over. It’s a workout, but very effective and soil-friendly.
- Mechanical Muscle (Aeration/Tilling): For larger zones or severe compaction, machines might be needed.
- Core Aeration: Pulls out small plugs of soil. Great for lawns, but can help surface compaction on bare soil too. Consider this as part of ongoing lawn care.
- Rototilling: This breaks up soil quickly and allows you to mix in amendments easily. *However*, use it cautiously! Over-tilling destroys soil structure, can bring dormant weed seeds to the surface, and create a new compacted layer below. Use it primarily for initial decompaction or incorporating large amounts of amendments.
Step 3: The Main Course - Feed Your Soil! (Amendments)
This is the *most crucial* step for long-term soil health, especially in our often clay-heavy Ottawa soils. Organic matter is the superhero here. It works miracles:
- Compost is King: Seriously, you can rarely add too much good quality compost. Spread a generous layer – 2 to 4 inches (5-10 cm) or more – *before* final tilling or digging it in. If using a broadfork or digging by hand, gently work it into the top 6-8 inches (15-20 cm).
- Other Goodies: Aged manure (well-rotted!), leaf mold, or green manure cover crops (like oats or clover) also boost organic matter. Proper material selection is key here.
- Targeted Fixes: If your soil test showed specific issues (pH, nutrients), add recommended amendments like lime or sulphur precisely now. This step is integral to proper soil preparation.
Think of amendments like this: Compost is your balanced meal, aged manure is a protein boost, and things like lime are specific vitamins needed only if the lab results say so.
Step 4: Smooth Operator (Addressing Drainage & Grading)
While adding organic matter improves drainage, you might still have low spots.
- Minor Regrading: Slightly move soil to create gentle slopes away from problem areas.
- Raised Beds: A great solution for persistent drainage issues, often included in garden install projects.
- Serious Solutions: French drains or swales might need professional design/installation. Be mindful of local bylaws regarding drainage changes, sometimes available on the City of Ottawa website.
Step 5: The Finishing Touch (Topsoil - Maybe)
Do you *need* to add new topsoil? Often, focusing on fixing the soil you *have* with deep decompaction and tons of organic matter (Steps 2 & 3) is more effective. Slapping topsoil onto compacted subsoil is like frosting on a brick.
However, if original topsoil was completely removed, adding a layer of *quality* screened topsoil *mixed with compost* (don’t just layer it!) can be beneficial *after* decompacting and amending the base. Aim for at least 4-6 inches (10-15 cm) for lawns and more for garden beds. This might be part of a larger sod installation project.
Phew! That’s the heavy lifting done. Your soil is now breathing, fed, and ready for the next phase. It might not look like the lush landscapes seen in some stunning garden transformations *immediately*, but you've laid the vital groundwork. Give the soil a little time to settle, then you can start planning your planting! Whether you're dreaming of a simple lawn or planning a full custom garden installation, this soil rescue mission is the key to success. And remember, keeping up with basic maintenance like seasonal cleanups ensures your hard work pays off long-term – something a regular Ottawa garden clean up service can help with. If it all feels like too much, don't hesitate to call in the pros for part or all of the process; a comprehensive Ottawa yard cleanup service often includes soil amendment as part of a larger restoration project.
Impact of Amendments on Soil Properties (Example)
*Illustrative values showing potential improvement percentages.
Planting for Patience & Resilience: Gardening in Recovering Soil

Okay, you’ve wrestled that tough soil into submission – bravo! It’s tempting to immediately rush out and plant everything you’ve ever dreamed of. But hold your horticultural horses just a moment! Planting in recovering soil is less of a sprint and more of a marathon. Think of it as building a relationship with your land; it needs time, understanding, and the *right* kind of encouragement. Patience isn't just a virtue here; it's a key ingredient for success, especially after the upheaval of construction. This phase is all about choosing plants and strategies that build resilience for the long haul.
Before you jump to prize roses, consider a "starter course" for your soil: cover crops. These are plants like oats, buckwheat, or clover that you grow temporarily, specifically to benefit the soil. Think of them as a green bandage that heals! They prevent erosion, suppress weeds, break up lingering compaction with their roots, and add valuable organic matter when you eventually turn them back into the soil. It's a fantastic way to let your soil rest and recuperate further, especially over an Ottawa winter.
When you *are* ready for permanent residents, lean into native plants. These are the local heroes, perfectly adapted to Ottawa’s climate swings and often more forgiving of less-than-perfect soil conditions. Plants like Purple Coneflower (Echinacea), Black-eyed Susan (Rudbeckia hirta), or even shrubs like Serviceberry not only survive but *thrive* here. They typically need less fussing, less water once established, and bonus – they support local wildlife! Choosing natives is a smart, resilient landscaping strategy, whether you're gardening in a newer development in Barrhaven or restoring a patch in older Nepean. Find out more about our philosophy on sustainable practices by checking out the Clean Yards About Us page. Resources like Ontario Native Plants or the Canadian Wildlife Federation provide great information on local species.
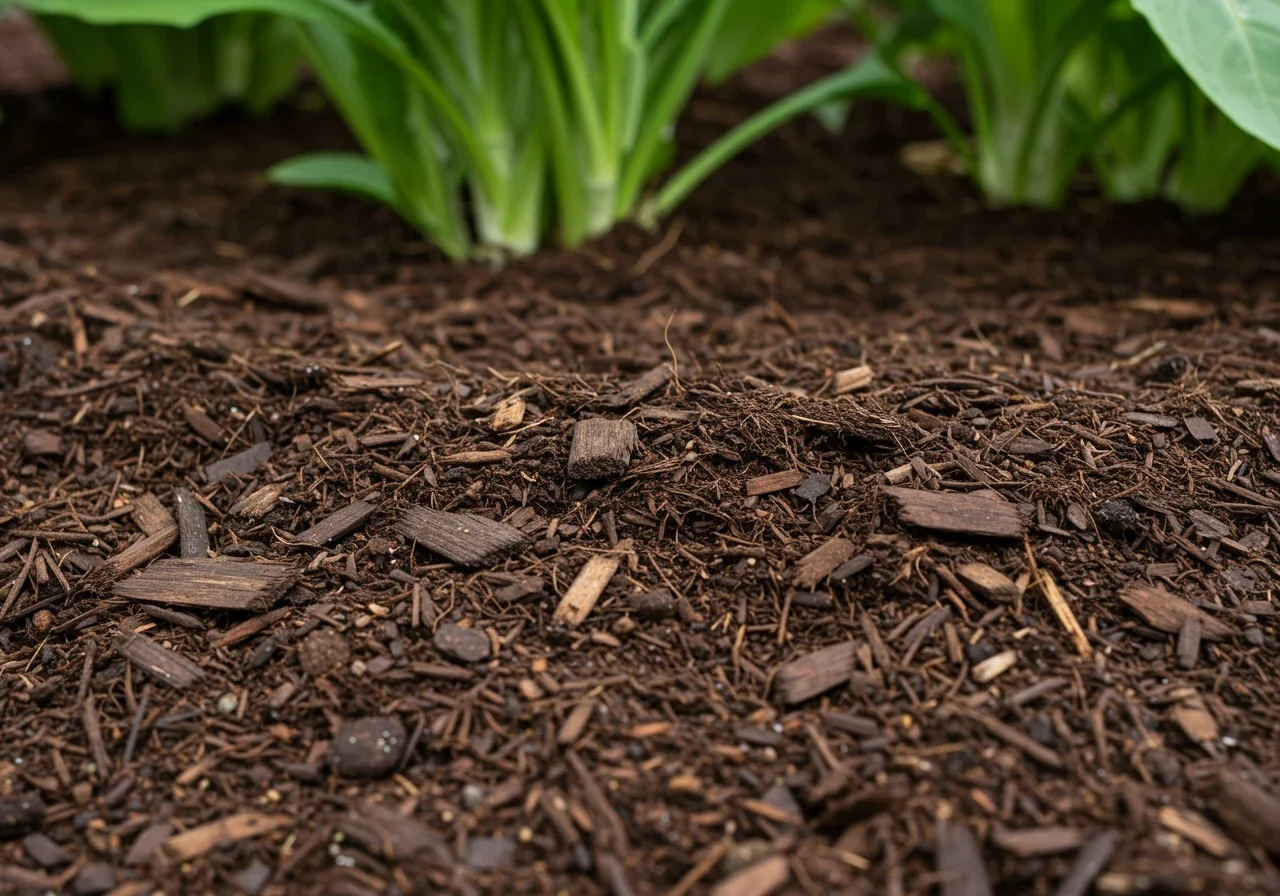
Two more secrets to success: mulch and smart watering. A good layer of mulch (2-3 inches of wood chips, straw, or shredded leaves) is like a cozy blanket for your soil. It keeps moisture in (meaning less watering for you!), smothers annoying weeds, and slowly breaks down, adding even *more* organic goodness. And when you do water, water *wisely*. Encourage deep roots by watering thoroughly but less frequently, rather than giving little daily sips. This helps plants become tougher and more drought-tolerant. Maintaining these practices is key; ongoing care like a seasonal city garden maintenance service often includes refreshing mulch. If you're aiming for a lawn eventually, remember that healthy soil is the foundation *before* considering sod installation options.
Remember, building truly healthy soil takes seasons, not days. Celebrate the small victories – the earthworms returning, the first native bloom! Don't be discouraged if things aren't perfect immediately. This gradual approach builds a truly resilient garden. If you ever need help tidying up between seasons, remember our city yard cleanup service is available. We truly appreciate you following along on this journey, and we hope these tips help - you can always send a little thank you note via our contact page if they do! And hey, if you've used our services before, letting us know how things are growing via our estimate feedback form helps us improve too! Your patience now will pay off with a beautiful, thriving landscape later.
Timeline: Your Garden's Recovery Journey
Phase 1: Assessment & Cleanup (Weeks 1-2)
Identify issues (compaction, debris), clear the site thoroughly. Consider a soil test. Engage cleanup services if needed.
Phase 2: Decompaction & Amendment (Weeks 2-4)
Loosen soil (broadfork/aerate). Add a thick layer of compost and other required amendments based on tests or observation. Explore soil preparation techniques.
Phase 3: Rest & Recover (Optional: 1 Season)
Plant cover crops to further improve soil structure and fertility. Allow soil biology to establish.
Phase 4: Patient Planting (Season 1-2)
Start with resilient native plants or tough perennials. Apply mulch. Water deeply but infrequently. Check out garden installation options.
Phase 5: Ongoing Care (Yearly)
Maintain mulch layer, continue adding organic matter annually, monitor plant health. Regular garden maintenance is key.
Highlight Box: Quick Tips for Osgoode Soil Success
- Test, Don't Guess: Find out what your specific Osgoode soil *actually* needs before adding anything; guessing wastes time and money, impacting your Material Selection. A simple soil test gives you a clear roadmap for amendments.
- Load Up on Compost: Seriously, pile it on! Compost is the superhero amendment for nearly all post-construction soil woes in the Ottawa area, improving structure and fertility; think of ongoing soil health as part of your regular Garden Maintenance.
- Break Up Compaction & Watch Water: Loosen that squashed soil (gently!) using a broadfork or aeration, and make sure water can drain away, preventing puddles that drown plant roots – sometimes big drainage jobs or core aeration are best handled by a City Garden Maintenance Service.
- Be Patient, Grasshopper: Healthy soil building takes time, often seasons, not days. Don't expect overnight miracles, even after a thorough initial cleanup like our Marionville Garden Clean Up Service provides for larger properties.
- Observe Like a Hawk: Keep an eye on things! Watch how water soaks in (or doesn't) after rain and how your first 'tough cookie' plants grow – this tells you what's working and what might need adjusting next season. Check our Google My Business page for reviews and tips from others.
- Go Low-Chem: Focus on feeding the soil naturally with organic matter. Healthy soil biology supports plants better, reducing the need for chemical quick fixes; let us know how your natural approach is working via our Estimate Feedback form.
FAQs: Your Osgoode Post-Construction Soil Questions Answered
Honestly? It depends. Think seasons, not weeks. If you had serious compaction and lost topsoil, giving it a full growing season (spring to fall) with amendments and maybe cover crops makes a huge difference. Minor issues might feel better sooner. You can *start* planting tougher things fairly quickly after initial rehab, but for truly rich, easy-to-work soil, patience is key! Using a professional city garden clean up service for the initial heavy lifting can speed up the start of the recovery process.
Not always! This is a common myth. Often, it's better (and cheaper!) to fix the soil you *already have* by breaking up compaction and adding tons of organic matter like compost. Just slapping topsoil on bad soil doesn't fix the underlying issue. Focus on amending first. A thorough initial property clean up to remove debris is more critical than immediately buying soil. Only add topsoil if yours was completely stripped *and* mix it well with compost and the existing layer.
Ottawa has many landscape suppliers and garden centres offering bagged or bulk compost, manure, and soil mixes. Look for compost that smells earthy (not sour or ammonia-like) and feels crumbly. For bulk deliveries, check reviews and ask about screening for debris. Ensure suppliers are reputable; dealing with companies involves exchanging information, so it's good practice to know how they handle your details, similar to how we outline ours in our Clean Yards Privacy Policy. Quality organic matter is your best investment.
Both have their challenges! Heavy clay, common around Osgoode and Greely, holds water and nutrients well but compacts easily and drains slowly. It needs lots of organic matter to improve structure. Sandy soil drains *too* fast and doesn't hold nutrients. It also needs heaps of organic matter to act like a sponge. So, neither is "harder," just different. The solution is often the same: compost, compost, compost!
Yes, absolutely! You generally can't change your property's grading in a way that negatively impacts your neighbours (like directing more water onto their land). Major landscaping changes, especially affecting water flow or near property lines, might require consultation or permits. It's wise to check the City of Ottawa website or consult a professional, particularly for larger properties like those sometimes found in Metcalfe where grading changes can have bigger effects; a Metcalf property cleanup service might even be needed before grading work.
Great question! Start with resilient local heroes. Consider Black-eyed Susans (Rudbeckia hirta), Wild Bergamot (Monarda fistulosa), or Pearly Everlasting (Anaphalis margaritacea) for sunny spots. For tougher, partly shaded areas, maybe Canada Anemone (Anemone canadensis). These natives are adapted to Ottawa conditions and are generally more forgiving. Give them a good start with some compost in the planting hole and consistent watering while they establish. Even tough plants benefit from a tidy space, like what's achieved with a dedicated Metcalf garden clean up service.
Conclusion: Cultivating Your Osgoode Dream Yard, From the Ground Up
So, you've journeyed from staring at a post-construction patch that looked more like a moonscape to envisioning your beautiful Osgoode dream yard! It might feel like a challenge, especially dealing with stubborn clay or leftover building souvenirs, but as we've walked through, rescuing your soil *is* achievable. Remember the path: playing soil detective, clearing the decks, loosening that compacted ground, feeding it generously with organic goodies like compost, and choosing tough, patient plants. Think of it as the ultimate glow-up for your property!
The payoff for this hard work? A vibrant, healthy foundation ready for years of gardening joy. Homeowners from Osgoode to nearby Vernon or Russell know our local Ottawa soils have personality, but they respond beautifully to the right care. Don't let the initial state dishearten you – every scoop of compost and every native plant chosen brings that dream yard closer.
Feeling ready to tackle it, but maybe want a personalized game plan? Contact us for a tailored post-construction soil assessment and rehab strategy. We offer a range of services to help, from full cleanups like our city garden clean up service to specialized soil preparation.
