Fixing Common Barrhaven Sprinkler Issues This Summer
Quick Summary:
- Regular sprinkler check-ups can prevent major system failures and water waste
- Common issues include clogged nozzles, broken heads, and low-head drainage
- Most clogged sprinkler heads can be fixed by cleaning or replacement
- Controller and valve problems often require specialized knowledge
- Early morning watering is most efficient for Ottawa’s clay soils
Having trouble with your sprinkler system? Our expert Barrhaven technicians can help!
Request a Quote TodayIntroduction: Summer Sprinkler Woes in Barrhaven? We’ve Got You Covered!
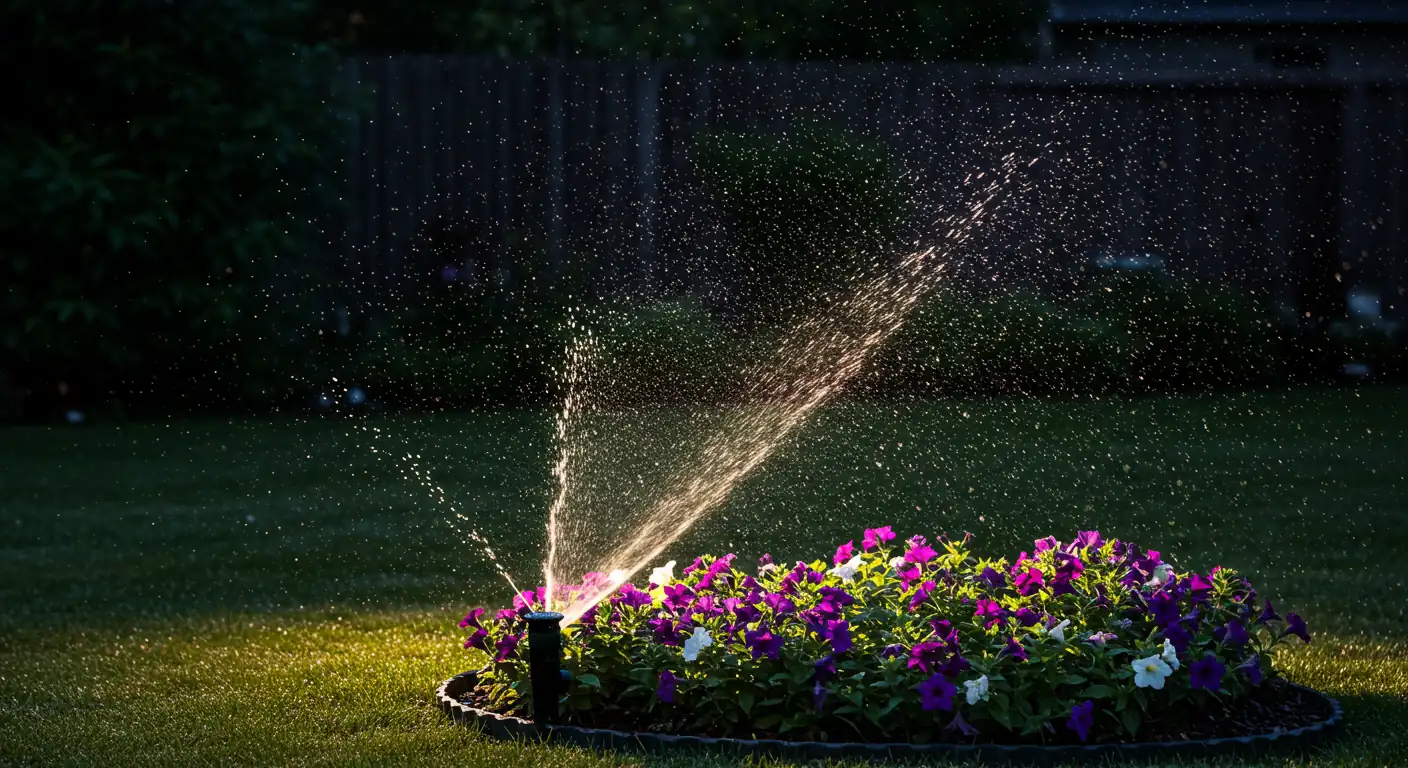
Picture this: It’s a gorgeous summer evening in Barrhaven. The BBQ is sizzling, the kids are chasing fireflies, and… hang on, is that Old Faithful erupting next to your prize-winning petunias? Or maybe one part of your carefully curated lawn looks suspiciously crispy while another resembles a swamp? Ugh. Ottawa summers, with their mix of scorching heatwaves and sudden thunderstorms, can really test our landscaping efforts. Keeping that lawn green and your garden beds happy often relies on a dependable sprinkler system.
But what happens when your irrigation system stops being dependable? A sputtering sprinkler head, a mysterious dry patch, or a leak that’s creating a mini-pond can really put a damper on enjoying your yard! Don’t sweat it! These common sprinkler woes happen, but help is here. This guide is designed to walk you through some simple DIY fixes you can try yourself to get things running smoothly again. We’ll also help you figure out when a problem might need a professional touch. Let’s get your Barrhaven yard back to being the envy of the neighbourhood, perfectly watered and ready for summer fun!
Step 1: The Annual Sprinkler Check-Up – Don’t Skip Leg Day for Your System!
Okay, let’s dive into the first crucial step for a happy sprinkler system!
Step 1: The Annual Sprinkler Check-Up – Don’t Skip Leg Day for Your System!
Think of your sprinkler system like an athlete. After a long, cold Ottawa winter slumber, it needs a proper warm-up and check-up before hitting the summer watering marathon. Skipping this step is like skipping leg day – things might look okay on the surface, but you risk poor performance or even injury (to your system, not your quads… probably). Our notorious freeze-thaw cycles here in places like Kars and Nepean can wreak havoc below ground, causing pipes to crack, heads to heave out of position, or valves to seize. So, before you unleash the H2O, let’s give your system some TLC.
Here’s your game plan for a basic spring inspection:
- Walk the Lines (Visually): Before even thinking about turning on the water, take a stroll around your property. Look closely at each sprinkler head.
- Are any obviously cracked, broken, or tilted at weird angles? Frost heave is a common culprit.
- Is grass or mulch burying any heads? They need clearance to pop up and spray properly. This is also a good time to see if heads are too close to delicate plantings or your fancy .
- Note any areas where digging happened over the winter – you’ll want to check these spots extra carefully for potential pipe damage. Maybe that project near your needs a second look.
- The Slow Turn-On: Head to your main sprinkler shut-off valve (often in the basement or a utility box outside). Turn the water supply on very slowly. Listen for any unusual noises and check the valve itself and the backflow preventer (usually located outside) for immediate leaks. A sudden gush can damage components.
- Zone by Zone Observation: Now, go to your controller. Manually turn on each zone, one at a time. Walk the area covered by that zone and watch:
- Heads Up! Do all the heads pop up fully? Are any stuck down or spitting weakly?
- Spray Patterns: Are they spraying evenly in their designed pattern (full circle, half circle, etc.)? Or are they wildly misdirected, watering the sidewalk more than the lawn? Obstructions or damage can cause this.
- Leaks & Geysers: Look for mini Old Faithfuls spurting from heads or bases. Check for soggy spots or pooling water around heads or between them, indicating an underground leak. Good drainage is key, especially if you’re battling clay; you might find tips on improving your beds in this guide to .
- Coverage Check: Are there dry spots? Maybe a head is clogged, needs adjustment, or isn’t reaching far enough. For tricky spots like raised beds, sometimes supplementing with makes sense.
- Controller Check: Once you’ve run through all zones, give your controller timer a quick review. Ensure the date and time are correct, and check the watering schedules. Adjust run times for spring conditions – plants need less water now than in the peak of summer heat.
Performing this annual check-up helps catch small problems before they become big, expensive headaches (or swampy messes). It ensures efficient watering, saving water and money. If you spot major issues like persistent leaks, zones not working, or low pressure across the system, or if you just feel overwhelmed after your inspection, don’t hesitate to call in the pros. Check out our range of Clean Yards Landscaping Services for expert help. And hey, while you’re thinking about spring readiness, consider a general tidy-up with our Kars Yard Cleanup Service to get your whole property looking sharp!
Need help with your annual sprinkler system check-up? Our technicians are irrigation experts!
Get Professional Help With Your Sprinkler SystemDiagnosing the Drips and Duds: Common Barrhaven Sprinkler Problems & Fixes
Okay, so you’ve done your annual sprinkler check-up, but despite your best efforts, things aren’t quite right. Maybe one sprinkler head is acting more like a garden hose left on full blast, or another seems to be on permanent vacation. Don’t worry! Many common sprinkler hiccups in Barrhaven and surrounding areas like Manotick are surprisingly easy to fix yourself. Let’s diagnose some of those pesky drips and duds.
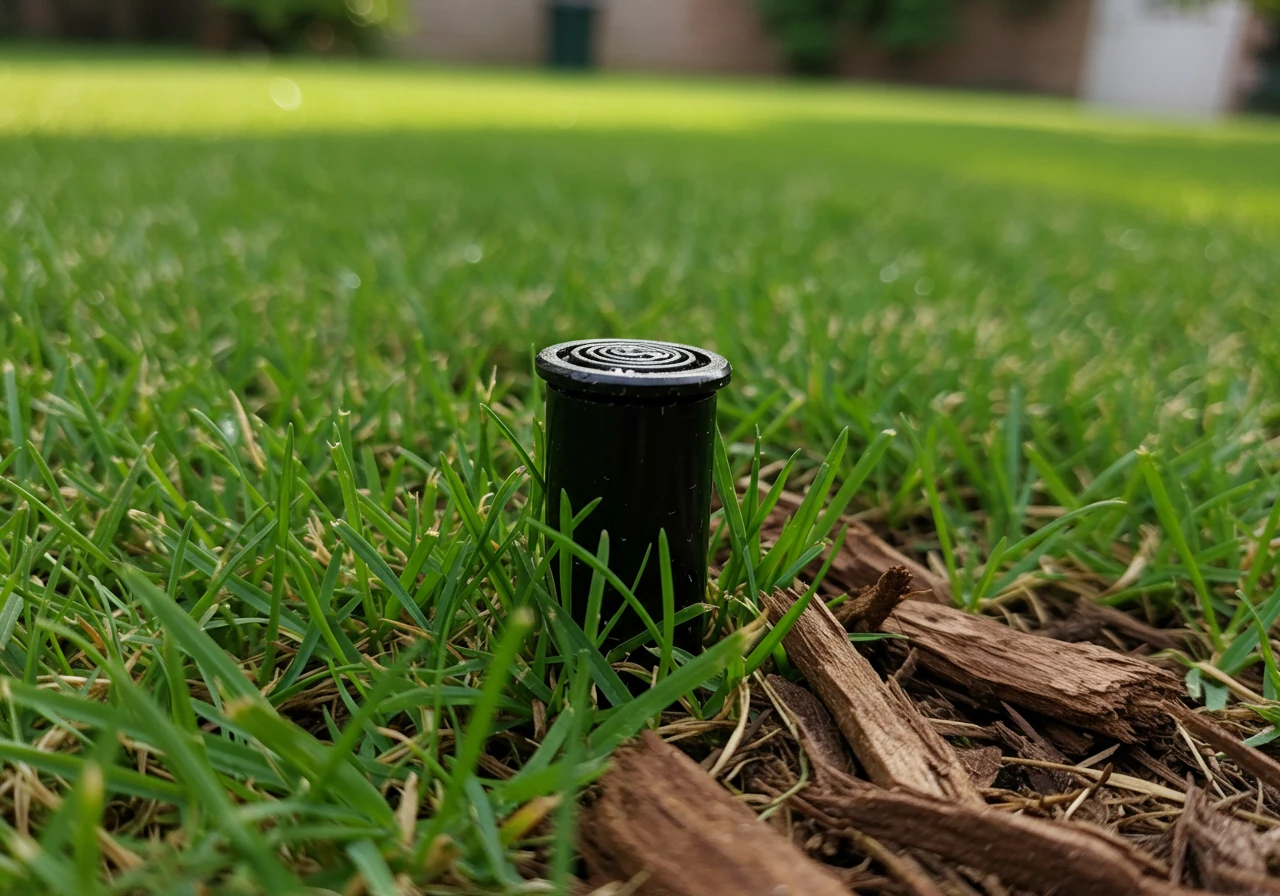
Problem 1: The Clogged Crusader (Head Not Spraying Right)
Symptoms: Instead of a nice, even spray, the sprinkler head might sputter, dribble, spray unevenly, shoot a weak stream, or not pop up all the way. You might see dry patches in the area it’s supposed to cover.
Common Causes: Dirt, sand, lawn debris, or even mineral buildup from Ottawa’s sometimes hard water can get lodged in the small filter screen inside the head or block the nozzle opening. This is especially common after winter or if digging happened nearby. Keeping the area clear is part of good lawn care.
DIY Fix: This is usually a straightforward fix!
- Turn off the water to that specific zone at your controller. You don’t want an unexpected shower!
- Pull up the sprinkler head’s riser (the part that pops up) gently. Most heads have a small lip you can grip. Sometimes you need to turn the zone on briefly to locate it easily, then turn it off again.
- Hold the riser firmly and unscrew the nozzle (the very top part) counter-clockwise. Be careful, there might be a small filter screen inside!
- Remove the filter screen (often cylindrical, sitting just below the nozzle). It might need a gentle pry with a small tool or tweezers.
- Rinse the nozzle and the screen thoroughly under running water. Use an old toothbrush or pin to carefully dislodge stubborn debris from the nozzle opening, but don’t enlarge the hole.
- Flush the line (optional but recommended): With the nozzle and screen still off, turn the water zone on for just a few seconds to flush out any debris sitting in the pipe below the head. Stand back!
- Reassemble: Put the clean screen back in place, screw the nozzle back onto the riser finger-tight, and gently lower the riser.
- Test: Turn the zone back on and check the spray pattern. Adjust the nozzle’s arc or radius if needed (consult the manufacturer’s instructions, often found online).
Problem 2: The Broken Brawler (Cracked or Damaged Head)
Symptoms: This one’s usually obvious! You might see water gushing or bubbling excessively around the base of the sprinkler head, the head might be physically cracked or broken (often thanks to a lawnmower or rogue snowball), tilted awkwardly, or completely missing its top.
Common Causes: Frost heave during our tough winters, accidental damage from lawn equipment, cars driving over them (if near a driveway), or simply old age causing the plastic to become brittle. Sometimes nearby work, like a new garden bed installation project, can accidentally damage underground components if care isn’t taken.
DIY Fix: Replacing a head is manageable for most homeowners.
- Turn off the water to the system.
- Dig carefully around the broken head with a small trowel, exposing the sprinkler body and the fitting it screws into (usually connected to a pipe called a ‘riser’ or directly to the lateral line). Make the hole wide enough to work comfortably.
- Unscrew the entire broken sprinkler body counter-clockwise from the fitting below. Be careful not to let dirt fall into the open pipe!
- Take the broken head (or just the model number/brand) to your local hardware or irrigation supply store to get an identical replacement. Using the same type ensures matching spray patterns and precipitation rates.
- Screw the new sprinkler body onto the fitting clockwise, hand-tightening firmly.
- Flush (optional but smart): Before attaching the new nozzle, briefly turn on the water to flush out any dirt that might have entered the line.
- Attach the nozzle to the new head.
- Backfill the soil around the head, ensuring it’s vertical and sitting at the correct height (usually flush with the soil level). Tamp the soil gently.
- Test: Turn the zone on, check for leaks, and adjust the spray pattern as needed.
Problem 3: The Leaky Laggard (Water Pooling Around Heads)
Symptoms: After the sprinklers finish running, you notice water continuing to seep or puddle around one or more low-lying heads in a zone. It’s not a geyser like a broken head, just a persistent wet spot.
Common Causes: This is often due to “low head drainage.” When a zone shuts off, water remaining in the pipes can drain out through the lowest heads due to gravity. This is common in yards with slopes, like some areas in Greely or Barrhaven. While not always a major problem, it wastes water and can create soggy spots favouring fungal growth.
DIY Fix: Installing check valves can solve this.
- Identify the leaky heads: Run the zone, shut it off, and see which lowest heads continue to leak.
- Purchase sprinkler heads with built-in check valves or separate check valve inserts designed for your specific sprinkler model. These act like one-way doors, preventing water from flowing out of the head when the system is off.
- Turn off the water to the system.
- Dig out the offending sprinkler head(s) as described in Problem 2.
- Unscrew the old head.
- Install the new head with the built-in check valve, OR if using an insert, install the check valve into the bottom fitting according to its instructions before screwing the original head (or a new standard head) back on.
- Backfill and test as before.
DIY vs. Calling the Pros: Quick Guide
Sometimes, a problem is beyond a simple fix. Here’s a quick rundown:
| Problem | DIY Friendly? | When to Call a Pro |
|---|---|---|
| Clogged Head/Nozzle | Yes – Usually easy cleaning. | If cleaning doesn’t work, or unsure how to disassemble. |
| Broken/Damaged Head | Yes – Straightforward replacement. | If multiple heads are broken, unsure of replacement type. |
| Leaky Head (Low Drainage) | Yes – Installing check valves is feasible. | Uncomfortable digging/unscrewing, unsure of parts. |
| Misaligned/Tilted Head | Yes – Gentle digging and repositioning. | If head keeps shifting, underlying pipe issue suspected. |
| One Zone Not Working | Maybe – Check controller, wiring at valve box. | Faulty valve solenoid, wiring issues, controller failure. |
| Low Pressure (Whole System) | Maybe – Check main valve, backflow preventer. | Main line leak, faulty backflow, water supply issue. |
| Persistent Wet Spots | Maybe – Check for obvious head leaks first. | Suspected underground pipe leak (requires locating/digging). |
| Controller Issues | Maybe – Check settings, power, manual start. | Controller replacement, complex wiring problems. |
Dealing with sprinkler issues can sometimes feel like a puzzle. If you encounter major leaks, zones that won’t turn on or off, widespread low pressure, or complex electrical issues, it’s often best to call in professional help. Trying to fix major underground leaks or electrical faults yourself can lead to bigger problems or wasted time and money. For larger repairs or if you simply prefer an expert eye, don’t hesitate to reach out. You can share details about your issue and even photos using our estimate and feedback form to get started. We respect your data; you can review our privacy policy anytime.
Remember, keeping your sprinkler system in top shape involves more than just fixing problems. Regular checks and ensuring heads aren’t blocked by overgrown grass or plants is key. This ties into overall yard care, like ensuring beds are tidy – something often covered during ongoing garden maintenance. And if debris like fall leaves or spring branches are cluttering things up, consider a thorough spring property clean up or a specific service like our Kars Yard Cleanup Service to clear the way before tackling sprinkler work. A happy sprinkler system means a happy lawn and garden!
Beyond the Heads: Troubleshooting Controller and Zone Glitches
Okay, so we’ve tackled the leaky heads and the ones doing a poor imitation of a fountain. But what happens when the problem isn’t at the sprinkler head itself? Sometimes, the issue lies deeper – either with the controller (the brains of the operation) or the zone valves (the gatekeepers for each section). Let’s put on our detective hats and investigate these behind-the-scenes glitches.
When the Brain Box Goes Bonkers: Controller Troubleshooting
Your sprinkler controller is usually reliable, but like any electronic gadget, it can have its moments. If nothing’s happening, or things are happening at weird times, start here:
- No Power? Elementary, My Dear Watson! Is the controller screen blank? Don’t panic! First, check if it’s plugged in securely. Seems silly, but it happens! Next, check the outlet – it might be a GFCI outlet (the kind with test/reset buttons) that has tripped. Push the reset button. Still nothing? Check your home’s circuit breaker panel for a tripped breaker labeled “sprinklers,” “garage,” or similar.
- Mixed-Up Messages: Programming Problems: If the system runs, but at the wrong times or not on the scheduled days, double-check the controller’s programming. Ensure the current date and time are correct (daylight saving time trips people up!). Review the start times, run durations, and watering days for each zone. Maybe a program got accidentally turned off?
- Rain Sensor Rebellion: Many Ottawa systems have a rain sensor to prevent watering when it’s wet. Awesome for saving water! But sometimes, these sensors get stuck “on” (especially if dirty or blocked by debris), telling the controller not to water even when it’s dry. Check the sensor outside for obstructions. Most controllers also have a switch or setting to bypass the sensor temporarily – try that to see if the system runs. A good controller setup complements a dedicated lawn care program by ensuring water is delivered efficiently.
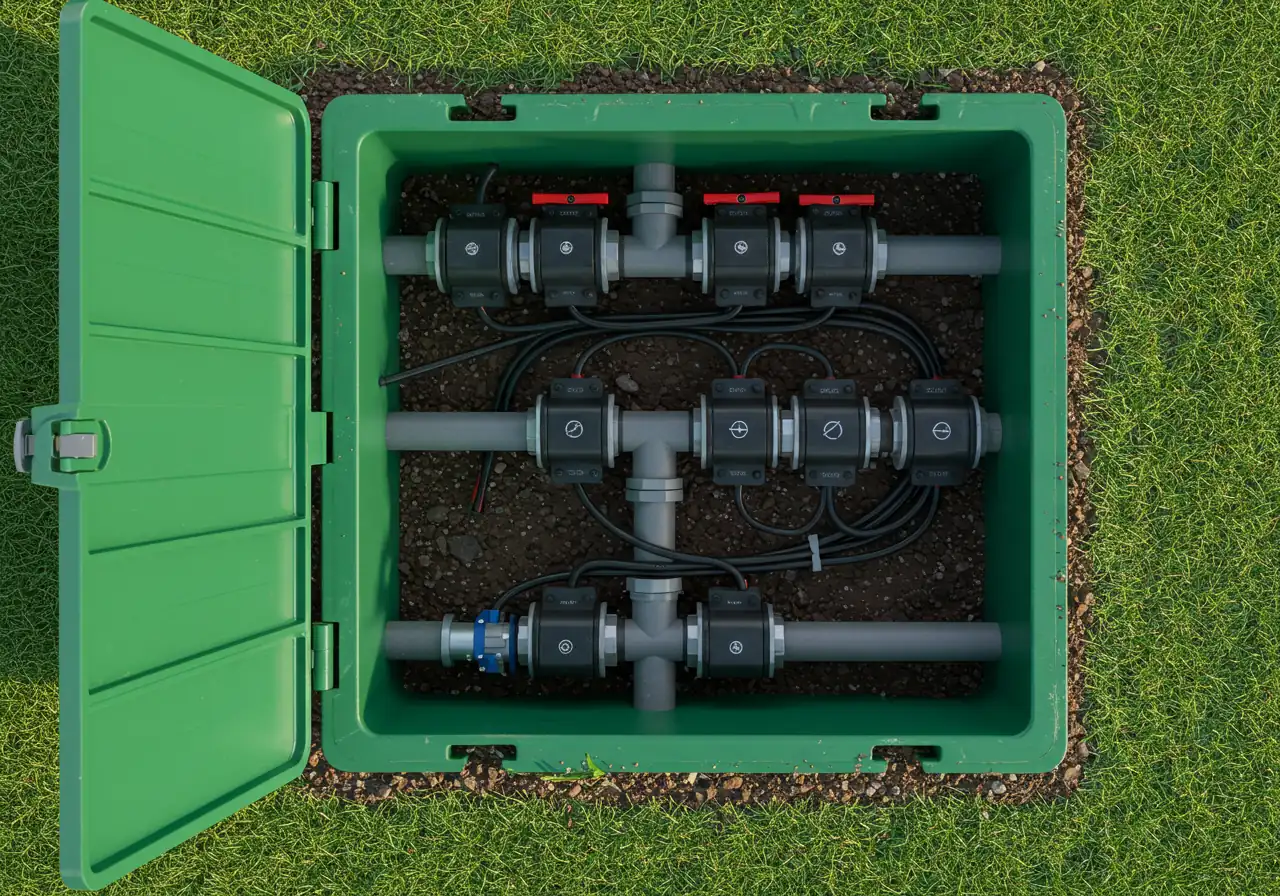
Zone Gone Rogue: Valves and Wiring Woes
If your controller seems fine, but one specific zone isn’t behaving, the issue likely involves the valve for that zone or the wiring connecting it.
- Zone Won’t Turn On: You tell Zone 3 to start, the controller says it’s running, but… nothing.
- Check the Controller Wiring: Open the controller panel. Is the wire for the non-working zone securely connected to its terminal? Wires can sometimes wiggle loose.
- Suspect the Valve: Each zone has an underground valve, usually grouped together in a green plastic box buried somewhere in your yard (often near the water source). Finding these boxes sometimes requires a bit of searching, especially if they’ve become buried over time – a thorough comprehensive property clean up can help locate them. The problem could be the solenoid (the small electrical part on top of the valve) which might have failed, or the valve itself could be stuck closed.
- Wiring Worries: The low-voltage wire running from the controller to the valve could be damaged. This is more common after digging projects. Careful planning during proper soil preparation for new beds can prevent accidental cuts. Critters sometimes chew wires too!
- Zone Won’t Shut Off: This is the opposite problem – a zone keeps running long after it should have stopped, or even starts randomly!
- Valve Villain Again: This is almost always a valve problem. Debris (like a small pebble or sand) might be caught inside the valve, preventing it from closing fully. Alternatively, the internal diaphragm (a rubbery seal) might be worn out or torn. You might need to shut off the main water to the system to stop the rogue zone.
Old vs. New: Barrhaven vs. Greely Considerations
While problems can happen anywhere, older systems, perhaps more common in established areas like Greely or parts of Manotick, might be more prone to valve failures due to age or wiring degradation. Newer installations, common in expanding areas like Barrhaven, might face issues related to initial installation quality or damage from ongoing landscaping work as the property matures. Major landscaping transformations often involve digging, increasing the risk of wire damage if the irrigation lines aren’t carefully marked or worked around.
Troubleshooting valves and wiring involves digging and potentially working with electrical components (low voltage, but still!). If you’re not comfortable tracing wires or taking valves apart, or if these basic checks don’t solve the issue, it’s wise to call in the professionals. They have tools to locate wire breaks and diagnose faulty valves quickly. While they’re there, maybe ask about enhancing your beds with professional mulching and edging services for a complete look! If you’re out towards the countryside, know that expert help like our yard cleanup service in Metcalfe often includes technicians familiar with rural irrigation setups.
Having trouble with your controller or valve system? Our technicians are just a call away!
Get Professional Help With Your Irrigation SystemWater Smarter, Not Harder: Eco-Friendly Sprinkling in the Ottawa Region
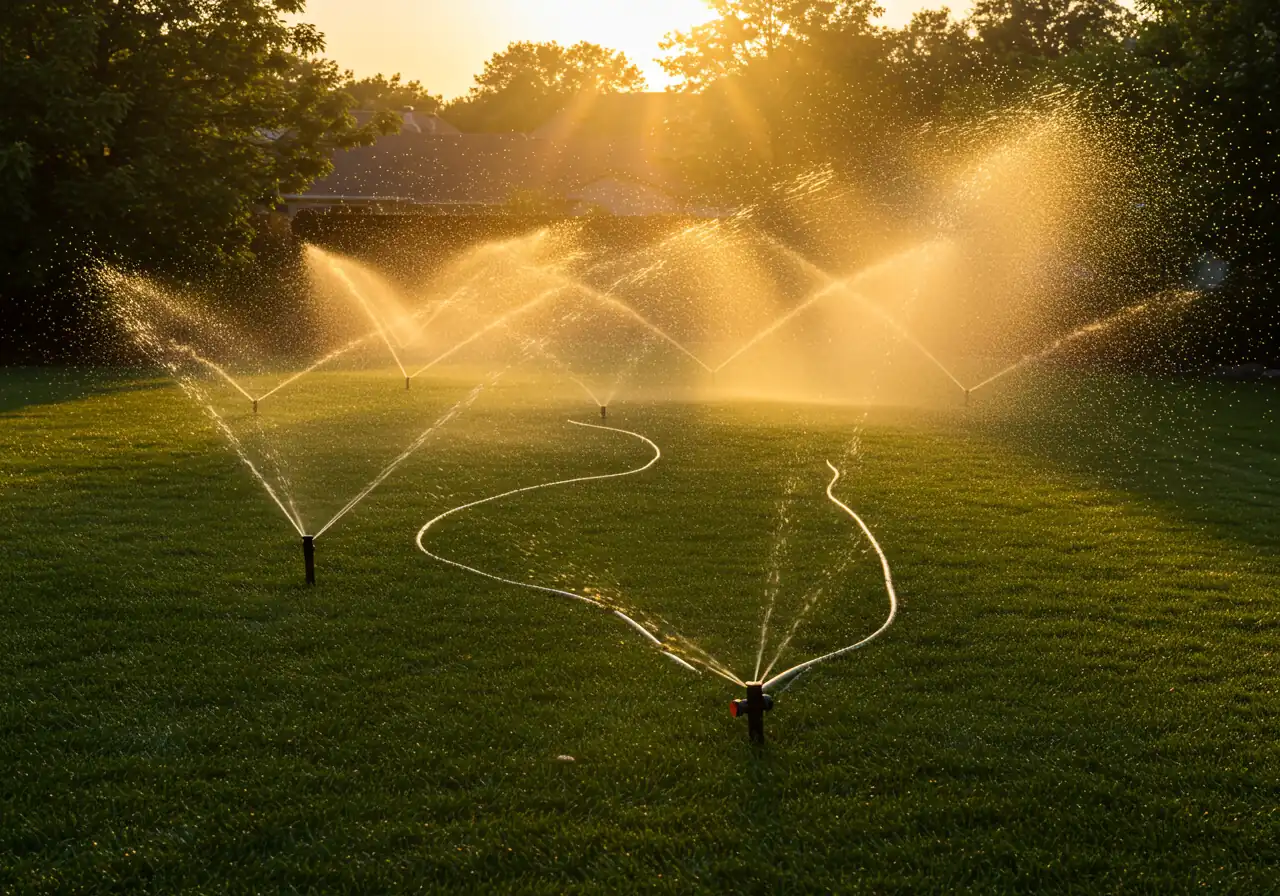
Keeping your lawn looking lush and your garden vibrant doesn’t have to mean draining the Rideau River (figuratively speaking, of course!). Especially here in the Ottawa region, where summers can swing from soggy to scorching, watering efficiently is key. It saves water, saves money, and is kinder to our local environment. Let’s talk about how to water smarter, not harder!
Timing is Everything:
Forget watering during the blazing midday sun – most of that precious water just evaporates! And while evening watering seems convenient, it can leave foliage wet overnight, inviting fungal diseases. The best time to water your lawn and garden beds is in the early morning, ideally between 4 AM and 9 AM. Why? The air is cooler, there’s usually less wind, and the water has time to soak into the soil and be absorbed by the roots before the heat of the day kicks in.
Cycle and Soak for Clay Soils:
Many areas around Ottawa, including parts of Greely and Manotick, have heavy clay soil. Water doesn’t soak into clay quickly. If you run your sprinklers for a long time all at once, much of that water can simply run off the surface, especially on slopes. This wastes water and doesn’t do your plants much good!
The solution? Try the “cycle and soak” method. Instead of watering for, say, 30 minutes straight, split it into shorter cycles. Water for 10-15 minutes, wait an hour or so for it to soak in, then water for another 10-15 minutes. Most modern controllers allow you to program multiple start times for the same zone to make this easy. This gives our clay soil time to absorb the moisture deeply, encouraging stronger roots.
Tech to the Rescue:
Modern sprinkler tech can be your best friend for water conservation:
- Rain Sensors: Honestly, these are a must-have (and required by City of Ottawa bylaw for new installations!). A rain sensor detects rainfall and automatically tells your controller to skip the scheduled watering. No more watering in the rain! Simple, effective, and saves water without you lifting a finger.
- Smart Controllers: These controllers go a step further. They connect to Wi-Fi and adjust your watering schedule automatically based on local weather forecasts, temperature, humidity, and even your specific soil type and plant needs. Talk about smart!
Water Usage By Sprinkler Type
Beyond the Sprinkler:
Eco-friendly watering pairs perfectly with other smart landscaping choices. Choosing native or drought-tolerant plants suited to our climate reduces the overall need for supplemental watering once established. Applying a good layer of organic mulch through Proper mulching and edging around trees, shrubs, and in garden beds works wonders for retaining soil moisture, reducing evaporation, and keeping roots cool. While establishing new sod installation requires consistent watering initially, a well-maintained, established lawn watered deeply but infrequently is more resilient.
Simple Seasonal Sprinkler Checklist:
Keep your system happy year-round with these key tasks:
| Season | Key Sprinkler Tasks |
|---|---|
| Spring | Perform annual check-up (see Step 1!), turn water on slowly, check heads/zones, clean filters, adjust controller schedule. Clear debris from heads – an annual Ottawa yard cleanup service can help! |
| Summer | Monitor performance, adjust run times based on weather (increase in heat, decrease after rain), check for leaks/damage, ensure heads aren’t blocked. |
| Fall | Crucial: Winterize the system! Blow out all water from pipes and components to prevent freeze damage. Best left to professionals. Consider a final cleanup, like our yard cleanup service near Marionville if you’re in that area, before winter sets in. |
By adopting these smarter watering habits and keeping your system maintained, you’ll enjoy a beautiful, healthy landscape while conserving water – a win-win for your yard and the Ottawa environment! Need help managing your services or scheduling maintenance? It’s easy to do through our customer portal.
Highlight Box: Barrhaven Sprinkler Quick Wins
Keep your Barrhaven sprinklers smiling (and your lawn looking sharp!) with these quick wins:
- Check Yearly: Give heads a quick once-over each spring; clean filters and nozzles. Need expert guidance? Learn more About Us.
- Water Early: Run sprinklers before 9 AM in Ottawa to beat evaporation and save water. Smart watering pairs well with other thoughtful landscaping choices, including careful material selection.
- DIY Fixes First: Try cleaning clogged nozzles or replacing obviously broken heads yourself. Ensure the work area is clear, aiming for the tidiness seen after a Metcalf garden clean up service.
- Know When to Call: Big leaks, zones refusing to work, or persistent wet spots? Sometimes expert diagnosis is needed, tackling issues common across the region, whether it’s covered by our Metcalf property cleanup service or further out with the Marionville property cleanup service.
FAQs: Your Barrhaven & Ottawa Sprinkler Questions Answered
Yes, absolutely! The City of Ottawa often puts summer watering restrictions in place, usually based on an odd/even calendar day system depending on your address. This helps manage water usage during peak demand. It’s super important to check the City of Ottawa’s website each spring for the current year’s rules, as they can change. Using a smart controller or rain sensor helps automate this and prevents accidental watering on the wrong day or when it’s raining. Keeping your garden beds healthy with services like an Ottawa garden clean up service can also reduce overall water needs.
Oh yes, 100%! Think about our crazy freeze-thaw cycles. Any water left sitting in your sprinkler pipes, valves, or heads over the winter will freeze, expand, and likely cause cracks or burst components. It’s like leaving a pop can in the freezer – messy results! Properly blowing out the system with compressed air each fall is crucial preventative maintenance. It saves you from potentially costly repairs come springtime. It’s as vital as a final fall tidy-up, like the Marionville garden clean up service clears things before the snow flies.
Good question! Yes, typically you do need a permit from the City of Ottawa to install a new irrigation system. This is because it involves connecting to the municipal water supply and requires specific plumbing work, including the installation of an approved backflow prevention device. This device is critical to protect the city’s drinking water supply from contamination. Always confirm the latest requirements with the City before starting installation. If you’re considering professional installation and have questions, feel free to contact us for guidance.
Definitely! While sprawling lawns in areas like Manotick certainly benefit, sprinkler systems are fantastic for yards of all sizes, including typical Barrhaven lots. The key is proper design. A well-planned system ensures even watering for your specific lawn and garden shape, preventing dry spots and wasted water spraying onto driveways or fences. Plus, think of the time you save not having to drag hoses around! Check out our gallery to see landscaping results on various property sizes.
While some very handy homeowners tackle DIY installation, hiring a professional usually pays off in the long run. They understand hydraulics, proper head spacing for overlapping coverage (no dry doughnuts!), zoning based on sun/shade and plant types, and importantly, Ottawa’s specific permit and backflow prevention requirements. A pro install ensures efficiency, water conservation, and fewer headaches down the road. Before hiring anyone, it’s always wise to review their company’s Terms and Conditions so you know what to expect.
Conclusion: Keep Your Barrhaven Lawn Lush and Your Water Bill Happy!
Okay, let’s put a bow on this! Keeping your Barrhaven sprinkler system humming along doesn’t have to feel like wrestling an octopus in the dark. As we’ve covered, a simple annual check-up is your best friend, and many common hiccups – like grumpy clogged nozzles or a head that unfortunately met the lawnmower (oops!) – are often easy DIY fixes you can tackle yourself. Remember those smart watering tips too! Watering early in the morning and efficiently (especially with our local clay soil!) means a gorgeous, healthy lawn and a happier water bill. That’s a landscaping win-win!
So, feel empowered to use this guide and try those smaller sprinkler repairs yourself. You might just surprise yourself! But hey, if you’ve got a persistent puddle turning your yard into a mini-Manotick marsh, a zone playing hide-and-seek, or you’d simply rather leave it to the experts, don’t sweat it! Our friendly, professional team offers reliable sprinkler repair, maintenance, and other landscaping services across the Ottawa region, including right here in Barrhaven, Nepean, and surrounding communities.
Ready for that lush lawn without the irrigation irritation?
- Dive back into this guide for step-by-step help on specific issues.
- Contact us today for prompt, professional sprinkler service!
- Explore our website for even more landscaping and gardening tips tailored for Ottawa homeowners.
Ready to take the hassle out of sprinkler maintenance? Our specialists are irrigation experts!
Book a Professional Sprinkler Service TodayCheck out our Google reviews to see what your neighbors are saying!
Spring System Check
Perform full system inspection when temperatures are consistently above freezing
Early Summer Adjustments
Fine-tune water schedules and fix any heads that need adjustment
Mid-Summer Monitoring
Increase watering during hot periods, check for dry spots
Early Fall Preparation
Begin reducing watering times as temperatures cool
Winterization
Schedule professional winterization before first frost (usually mid-October)