Osgoode Garden Maintenance: Expert Spring Care Tips
Spring Garden Care Key Points
- Post-winter garden assessment is crucial to identify damage and soil issues
- Spring cleaning tasks include debris removal, pruning, and bed preparation
- Soil rejuvenation with compost and proper fertilization sets the foundation for healthy growth
- Early lawn care (dethatching, aerating, overseeding) ensures a lush green lawn all season
- Follow Ottawa-specific planting timelines to avoid frost damage and maximize growing season
Need professional help with your spring garden maintenance? Contact us today for a personalized quote!
Request a Free QuoteIntroduction: Welcoming Spring to Your Osgoode Garden
Spring in Osgoode – isn’t it glorious? After those long, chilly Ottawa winters (and the occasional snow squall that thinks it’s still February in April!), we finally get to shed the extra layers and embrace the warmer weather. And what better way to celebrate than by getting our hands dirty in the garden? Whether you’re in the heart of Osgoode, or out in a neighbouring community like Manotick or Metcalfe, spring garden maintenance is absolutely crucial for a thriving landscape all year round. Think of it like this: it’s the foundation upon which your summer blooms and autumn harvests will be built.
The Ottawa region’s climate presents some unique challenges – and opportunities! – for gardeners. We have a relatively short growing season, punctuated by those intense temperature swings. One day you’re bundled up, the next you’re sweating in your t-shirt. This means that spring is prime time to get your soil, plants, and overall landscape ready to handle whatever Mother Nature throws their way.
Ignoring spring cleanup is a bit like skipping breakfast – you might get by for a while, but you’ll definitely feel the effects later on. A neglected garden in spring can lead to all sorts of problems, from pesky weeds taking over, to diseases spreading amongst your plants, and ultimately, a less vibrant and healthy garden throughout the summer and fall. We’re speaking from experience – we’ve seen a few gardens in Nepean that looked more like weed patches by July because of missed spring tasks!
But don’t worry, it’s not all doom and gloom! Spring gardening is actually incredibly rewarding. It’s a chance to reconnect with nature, get some fresh air and exercise, and set your garden up for success. In the following sections, we’ll walk you through essential spring gardening tasks, from assessing your soil and cleaning up debris, to pruning, fertilizing, and planning your planting schedule. We’ll provide practical tips and actionable advice, specifically tailored to the Osgoode and greater Ottawa area, to help you create the beautiful, flourishing garden you’ve always dreamed of. So, let’s roll up our sleeves and get started!
Assessing Your Osgoode Garden: Post-Winter Inspection
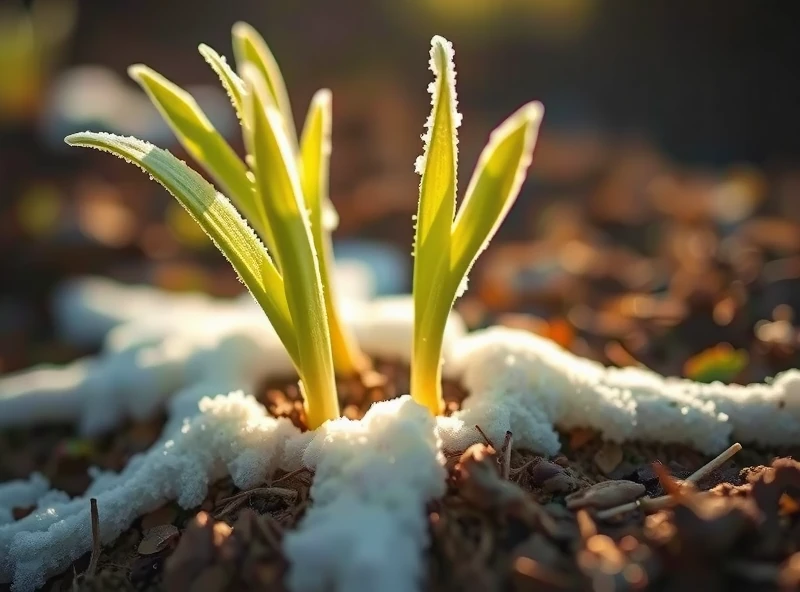
Okay, spring has (hopefully!) sprung, the snow has (mostly!) melted, and it’s time to give your garden a thorough check-up. Think of this as your garden’s annual physical. It’s crucial to catch any potential problems early on, before they snowball into bigger headaches later.
The Great Thaw Reveal:
First, take a good, long walk around your entire property. Don’t just glance; really look. You might be surprised by what the winter has left behind. It’s like that feeling when you finally clean under the couch – except hopefully with fewer dust bunnies and more interesting (though potentially concerning) discoveries.
Here’s what to look for (and how to deal with it):
-
Winter Damage to Plants:
- Broken Branches: Snow and ice can be heavy, especially on evergreens. Carefully prune any broken or damaged branches back to a healthy bud or branch union. For larger branches, you might want to consult a professional arborist. Don’t just leave them dangling – they’re an open invitation to pests and diseases.
- Frost Heave: This is where plants, especially perennials, are pushed up out of the soil by the freezing and thawing cycles. Gently push them back into the ground and add a layer of mulch to help protect them from future temperature fluctuations.
- Salt Damage: If you live near a road that gets salted in winter (and who in Osgoode or Greely doesn’t?), look for signs of salt damage on plants near the road – browning needles on evergreens, or stunted growth. A good spring rain will usually help flush the salt out of the soil, but you can also water deeply to speed up the process.
-
Soil Sleuthing:
- Compaction: The weight of snow and ice, plus foot traffic, can really compact your soil, especially if you have that classic Ottawa clay. Compacted soil means poor drainage, which can suffocate plant roots. Gently poke around with a garden fork or trowel. If it’s hard to penetrate, you’ve got compaction. To combat this, consider amending your soil with organic matter like compost. If you’re dealing with particularly dense clay, you might be interested in learning more about .
- Erosion: Check for areas where soil has washed away, especially on slopes. You may need to add more soil or consider building retaining walls or terraces to prevent further erosion.
- Drainage Issues: Look for areas where water is pooling or standing for long periods after rain. This indicates poor drainage. You may need to amend the soil, install a drainage system, or even consider creating a rain garden. If you have raised beds, can help manage water levels and prevent overwatering.
-
Hardscape Check-Up:
- Patios, Walkways, and Driveways: Inspect for cracks, heaving, or shifting caused by the freeze-thaw cycle. Address these issues promptly to prevent further damage and tripping hazards.
- Fences and Walls: Check for leaning, rotting, or damaged sections. Repair or replace as needed.
- Garden Edging: Inspect your garden’s edging. The constant freezing and thawing of our Ottawa winters can move things around. If you are interested in redesigning or need new edging, you can read this artlce on DIY rock garden edging in Ottawa.
-
Early Pest and Disease Detection:
- Look closely at your plants for any signs of overwintering pests or diseases, such as egg masses, fungal growth, or unusual discoloration. Early detection is key to effective control. If you do not catch the pests early enough, they might impact your shade gardens. You may want to look at ideas for .
-
Assessing your Lawn:
- Look at your lawn. Note any areas that seem thin or are bare patches. If you have dog, not any urine spots. Check for snow mould.
The Bottom Line:
This post-winter inspection is about being proactive. By taking the time to assess your garden’s condition now, you can address any issues early on and set your plants up for a healthy and beautiful growing season. Don’t be afraid to get your hands dirty – that’s part of the fun! And remember, even the most experienced gardeners face challenges. It’s all part of the learning process. Happy gardening!
Spring Cleaning: Essential Tasks for a Healthy Start

Okay, so you’ve done your detective work and assessed your garden’s winter woes. Now it’s time to roll up your sleeves and get to the real work: spring cleaning! Think of it as giving your garden a fresh, clean slate for the growing season. It’s a bit like spring cleaning your house, but instead of dust bunnies, you’re dealing with leaves, twigs, and maybe the occasional rogue garden gnome that got blown over in a winter storm.
Step-by-Step Spring Cleaning Guide:
-
Debris Removal: The Big Sweep:
- What to do: This is your first line of attack. Remove all fallen leaves, twigs, dead plants, and any other debris that’s accumulated over the winter. A leaf rake works well for lawns, while a smaller hand rake is perfect for garden beds. Don’t forget to check under shrubs and in those hard-to-reach corners – debris loves to hide! You might even find that lost trowel you thought you’d misplaced last fall.
- Why it’s important: Debris suffocates plants, prevents sunlight from reaching the soil, and provides a breeding ground for pests and diseases. Plus, a clean garden just looks better. It’s like the difference between a messy bedroom and a freshly made bed – instantly more inviting.
- Tips for Efficiency: Use a tarp or large garden bag to collect the debris as you go. This will save you time and effort in the long run. If you have a lot of leaves, consider using a leaf blower (but be mindful of your neighbors in places like Osgoode or Kars – early morning leaf blowing isn’t always appreciated!). And if you require assistance, we also offer Osgoode garden clean up service.
-
Pruning Power: Shaping Up Your Plants:
- What to do: Pruning is like giving your plants a haircut – it encourages healthy growth and improves their overall appearance. But it’s not a one-size-fits-all approach. Different plants require different pruning techniques.
- Dead, Damaged, or Diseased Wood: Remove any branches that are clearly dead, broken, or showing signs of disease. Cut back to healthy wood, just above a bud or branch union.
- Shrubs: For flowering shrubs that bloom on new wood (like hydrangeas), prune them back in early spring to encourage new growth and lots of flowers. For shrubs that bloom on old wood (like lilacs), prune them after they finish flowering.
- Perennials: Cut back most perennials to just above the ground level. This will remove old, dead foliage and make way for fresh, new growth.
- Roses: Prune roses in early spring, removing any dead or crossing canes. Cut back the remaining canes to an outward-facing bud.
- Why it’s important: Pruning improves air circulation, reduces the risk of disease, and encourages vigorous growth. It also helps shape your plants and prevents them from becoming overgrown and unruly.
- Tips for Efficiency: Use sharp, clean pruning shears or loppers. Make clean cuts at a 45-degree angle. And if you’re unsure about how to prune a particular plant, do a little research or consult a gardening expert. We’re happy to offer landscaping services if you are looking for help.
- What to do: Pruning is like giving your plants a haircut – it encourages healthy growth and improves their overall appearance. But it’s not a one-size-fits-all approach. Different plants require different pruning techniques.
-
Edging Your Garden Beds: Creating Crisp Lines:
- What to do: Edging creates a clean, defined border between your garden beds and your lawn (or other areas). Use a sharp spade or edging tool to create a crisp edge. You can choose a simple straight edge or a more decorative curved edge.
- Why it’s important: Edging not only looks great, but it also prevents grass from creeping into your garden beds and keeps mulch contained. It’s like the finishing touch that pulls the whole garden together.
- Tips for Efficiency: Use a string line to guide you if you’re creating a straight edge. For curved edges, use a garden hose to lay out the curve before you start digging.
-
Weeding:
- What to do: Get rid of any weeds that are visible.
- Why it is Important: Weeds compete with your plants for nutrients, sunlight and water.
- Tips for efficiency: Pull weeds when the ground is wet. Make sure to pull the entire root system.
-
Tool Maintenance: Keeping Your Gear in Tip-Top Shape:
- What to do: Spring cleaning isn’t just for your garden; it’s for your tools, too! Clean your tools with soap and water, sharpen any blades, and oil any moving parts.
- Why it’s important: Sharp, clean tools are more efficient and easier to use. They also reduce the risk of spreading diseases between plants.
- Tips for Efficiency: Store your tools in a dry place to prevent rust. Invest in a good sharpening tool and learn how to use it properly.
By following these essential spring cleaning tasks, you’ll be well on your way to a healthy, thriving garden that you can enjoy all season long. And remember, gardening is a journey, not a destination. There’s always something new to learn and discover. So embrace the process, have fun, and don’t be afraid to get your hands dirty! And remember to check our privacy policy regarding how we handle your information if you reach out.
Need help with your spring garden cleanup?
Get Professional Help With Your Garden CleanupSoil Rejuvenation: Feeding Your Osgoode Garden

After a long Ottawa winter, your garden soil is probably feeling a little… depleted. Think of it like a bank account after a spending spree – it needs replenishing! Soil rejuvenation is absolutely crucial for a healthy, thriving garden, especially in the Osgoode area, where we face unique soil challenges. We often see similar soil conditions in places like Nepean and Barrhaven – a mix of sandy soils, heavy clay, and everything in between. So, let’s get down to the dirt (pun intended!) and learn how to feed your garden for success.
Why is Soil Rejuvenation So Important?
Healthy soil is the foundation of a healthy garden. It’s not just “dirt”; it’s a complex ecosystem teeming with life – bacteria, fungi, earthworms, and other organisms that work together to provide nutrients to your plants. Over time, these nutrients get used up, and the soil structure can degrade, especially with our freeze-thaw cycles. Rejuvenating your soil improves:
- Nutrient Availability: Plants need a balanced diet of macronutrients (nitrogen, phosphorus, potassium – NPK) and micronutrients (like iron, zinc, and manganese). Healthy soil provides these nutrients in a form that plants can easily absorb.
- Drainage and Aeration: Good soil structure allows water to drain properly (avoiding soggy roots) and air to circulate (allowing roots to breathe).
- Water Retention: Healthy soil acts like a sponge, holding onto moisture that plants can access during dry spells.
- Disease and Pest Resistance: Plants growing in healthy soil are better equipped to fight off diseases and pests.
Step 1: The Soil Test – Know What You’re Working With
Before you start adding anything to your soil, it’s a good idea to get a soil test. This is like getting a blood test for your garden – it tells you exactly what nutrients are lacking and what the pH level is. You can purchase a DIY soil test kit at most garden centers, or you can send a sample to a professional lab for a more detailed analysis.
- What a Soil Test Tells You:
- pH Level: This measures the acidity or alkalinity of your soil. Most plants prefer a slightly acidic to neutral pH (around 6.0 to 7.0). Ottawa-area soils can vary widely, so testing is key!
- Nutrient Levels: The test will show you the levels of essential nutrients (NPK) and often micronutrients as well.
- Organic Matter Content: This indicates the amount of decomposed plant and animal material in your soil, which is crucial for soil health.
Step 2: Amending with Organic Matter – Nature’s Miracle Worker
Adding organic matter is arguably the single most important thing you can do to rejuvenate your soil. It’s like giving your garden a superfood smoothie! Organic matter improves soil structure, drainage, water retention, and nutrient availability.
- Great Options for Organic Matter:
- Compost: This is the gold standard! Homemade compost from your kitchen scraps and yard waste is fantastic, or you can purchase compost from a garden center.
- Well-Rotted Manure: Aged manure (from cows, horses, chickens, etc.) is a great source of nutrients. Make sure it’s well-rotted to avoid burning your plants.
- Leaf Mold: This is simply decomposed leaves. It’s a great soil conditioner, especially for improving water retention.
- Peat Moss: This is good for acidic-loving plants, but it is not renewable. Use Sparingly.
- How to Apply: Spread a 2-4 inch layer of organic matter over your garden beds and work it into the top 6-8 inches of soil using a garden fork or tiller.
Step 3: Choosing the Right Fertilizer – Targeted Nutrition
Once you know your soil’s needs (from your soil test), you can choose a fertilizer that provides the specific nutrients that are lacking. Fertilizers are labeled with three numbers representing the NPK ratio (Nitrogen-Phosphorus-Potassium).
- Understanding NPK:
- Nitrogen (N): Promotes leafy green growth.
- Phosphorus (P): Encourages root development and flowering/fruiting.
- Potassium (K): Supports overall plant health and disease resistance.
- Types of Fertilizers:
- Granular Fertilizers: These are slow-release and provide nutrients over time.
- Liquid Fertilizers: These are fast-acting and great for giving plants a quick boost.
- Organic Fertilizers: These are derived from natural sources (like bone meal, blood meal, and seaweed) and are generally slower-release and gentler on the environment.
- Specific Recommendations:
- Vegetable Gardens: Often benefit from a balanced fertilizer (like 10-10-10) or one with slightly higher phosphorus for root and fruit development.
- Flower Gardens: A fertilizer with higher phosphorus can promote abundant blooms.
- Lawns: Typically need a fertilizer with higher nitrogen for lush green growth. For help with any lawn problems, be sure to contact us. You can reach us easily at our contact us page.
- Acid-Loving Plants (like blueberries and rhododendrons): Use a fertilizer specifically formulated for acid-loving plants.
- Applying fertilizers:
- Apply in early spring, ideally before planting. Follow the instructions carefully. More is not better!
Important Considerations:
- Don’t Over-Fertilize: Too much fertilizer can burn plant roots and harm beneficial soil organisms. Always follow the instructions on the fertilizer package.
- Water After Fertilizing: Water helps the fertilizer dissolve and reach the plant roots.
- Consider Soil Type: Sandy soils drain quickly and may need more frequent fertilization than clay soils.
- If you run into questions or require additional assistance, please don’t hesitate to reach out. Our Metcalfe property cleanup service is ready to assist. You can schedule a visit or give us a call, and we’ll be happy to help you get your garden back on track.
By following these steps, you’ll be giving your Osgoode garden the nourishment it needs to thrive. Remember, healthy soil is a long-term investment, and the rewards are a beautiful, bountiful garden year after year. We are dedicated to transparency and ethical practices. Please review our privacy policy to understand how we protect your personal information. And, after you’ve successfully rejuvenated your garden, we’d love for you to visit our thank you page and let us know about your experience!
Lawn Care Revival: Getting Your Grass Greener in Osgoode
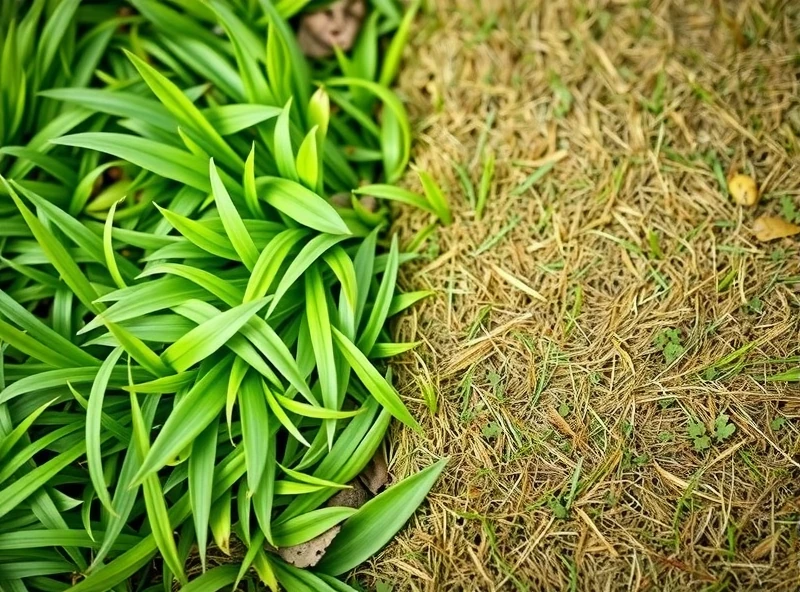
Okay, Osgoode (and neighboring towns like Winchester and Russell!), let’s talk lawns. After that brutal Ottawa winter, your grass is probably looking a little…rough. Don’t despair! With some TLC, you can bring it back to its former glory – that lush, green carpet you can be proud of. Think of this as your lawn’s spring awakening, a chance to shake off the winter blues and get ready for a season of barefoot bliss (or at least, a season of admiring it from your patio).
Why is Spring Lawn Care So Important?
Spring is the critical time for lawn care in our region. The actions you take now will determine how your lawn performs throughout the entire growing season. A healthy lawn isn’t just aesthetically pleasing; it also:
- Prevents Weeds: A thick, dense lawn crowds out weeds, preventing them from taking root.
- Reduces Soil Erosion: Grass roots hold soil in place, especially important on slopes.
- Filters Pollutants: Healthy grass acts as a natural filter, removing pollutants from rainwater runoff.
- Provides a Cooling Effect: Lawns can be significantly cooler than paved surfaces, making your outdoor space more comfortable.
The Four Pillars of Spring Lawn Revival:
-
Dethatching: Removing the Build-Up
- What is Thatch? Thatch is a layer of dead and living organic matter (grass stems, roots, and leaves) that accumulates between the soil surface and the green grass blades. A little thatch is okay, but a thick layer (over ½ inch) can suffocate your lawn, preventing water, air, and nutrients from reaching the roots.
- How to Dethatch: You can use a dethatching rake (for smaller lawns) or a power dethatcher (for larger lawns). Dethatching is best done when the soil is moist, but not soggy. Go over your lawn in several directions to remove as much thatch as possible.
- When to Dethatch: Early spring (before the grass starts actively growing) is ideal.
- If you have questions about this process, please visit our about us page to learn more about our expertise.
-
Aeration: Letting Your Lawn Breathe
- What is Aeration? Aeration involves creating small holes in the soil, either by using a core aerator (which removes small plugs of soil) or a spike aerator (which pokes holes). This improves air circulation, water infiltration, and nutrient uptake. It’s especially crucial for compacted soils, which are common in the Ottawa area.
- How to Aerate: Core aeration is generally more effective than spike aeration. Rent a core aerator from a local garden center or hire a professional. Aerate when the soil is moist.
- When to Aerate: Early spring or fall are the best times for aeration.
-
Overseeding: Filling in the Gaps
- What is Overseeding? Overseeding is simply spreading grass seed over your existing lawn to fill in bare patches, thicken the turf, and improve its overall density. This is especially important after a harsh winter, which can cause thinning and winterkill.
- Choosing the Right Grass Seed: Select a grass seed mix that’s suitable for the Ottawa climate and your specific lawn conditions (sun or shade, amount of foot traffic, etc.). Here are some good options:
- Kentucky Bluegrass: A classic choice for sunny areas, providing a fine-textured, dark green lawn. It’s relatively cold-hardy but can be slow to establish.
- Perennial Ryegrass: Germinates quickly and provides good wear tolerance. Often used in mixes with Kentucky Bluegrass.
- Fine Fescue: A good choice for shady areas or low-maintenance lawns. It’s drought-tolerant and requires less fertilizer.
- Creeping Red Fescue: A type of fine fescue that spreads by rhizomes, helping to fill in bare spots.
- How to Overseed: After dethatching and aerating, spread the grass seed evenly over your lawn using a spreader. Lightly rake the seed into the soil and water thoroughly.
- When to Overseed: Early spring (after the last frost) or early fall are the best times.
-
Fertilization: Feeding Your Hungry Lawn
- Why Fertilize? Just like your garden plants, your lawn needs nutrients to thrive. Spring fertilization provides a boost of nitrogen for green growth and helps the grass recover from winter stress.
- Choosing the Right Fertilizer: Look for a slow-release fertilizer with a higher nitrogen content (the first number in the NPK ratio). A soil test (as mentioned in the previous section) can help you determine the specific nutrient needs of your lawn.
- How to Fertilize: Use a spreader to apply the fertilizer evenly according to the package instructions. Water thoroughly after fertilizing.
- When to Fertilize: The first application is best applied in Late Spring.
Common Spring Lawn Problems in the Ottawa Region (and Solutions):
- Snow Mold: A fungal disease that appears as circular, grayish or pinkish patches on the lawn after the snow melts.
- Conventional Solution: Apply a fungicide labeled for snow mold.
- Eco-Friendly Solution: Improve air circulation by dethatching and aerating. Avoid excessive nitrogen fertilization in the fall.
- Grubs: White grubs are the larvae of beetles (like Japanese beetles) that feed on grass roots, causing brown patches.
- Conventional Solution: Apply a grub control product containing a chemical insecticide.
- Eco-Friendly Solution: Apply beneficial nematodes (microscopic worms that prey on grubs) to the soil. Milky spore is another option, but it’s specific to Japanese beetle grubs.
- Dog Urine Spots: Brown, dead patches caused by the high nitrogen content in dog urine.
- Conventional Solution: Re-seed the affected areas.
- Eco-Friendly Solution: Train your dog to urinate in a designated area. Water the affected areas immediately after your dog urinates to dilute the nitrogen.
- Weeds:
- Solution: Pre-emergent weed control is crucial. This is applied to the surface and it prevents weeds from breaking through.
- Eco-Friendly Solution: Hand pull weeds.
Recommended Spring Lawn Care Schedule for Osgoode:
- Late April/Early May: Dethatch, aerate (if needed), and overseed.
- Late May: First application of fertilizer, weed control.
- Throughout the Season: Water deeply and regularly (especially during dry spells), mow at the correct height (usually 2.5-3 inches), and monitor for pests and diseases.
Remember, a healthy lawn is a long-term commitment. By following these steps and being consistent with your lawn care, you’ll be rewarded with a beautiful, green space that you can enjoy all summer long. Be sure you completely understand our terms and conditions before using any of our services or information.
Planting for Success: Spring Planting Guide for Ottawa Gardens

Spring in Ottawa – it’s a time of great anticipation and, let’s be honest, a little bit of gambling with the weather! One day you’re basking in sunshine, the next you’re wondering if you should have kept those snow shovels handy. But fear not, fellow gardeners of Ottawa, Manotick, and even up to Embrun! With a little planning and the right know-how, you can have a thriving garden, even with our unpredictable spring climate. This guide is all about planting for success, maximizing your chances of a beautiful and productive garden.
Choosing the Right Plants: Ottawa-Friendly Options
Not all plants are created equal, especially when it comes to surviving our sometimes-frosty springs. Choosing cold-hardy varieties and understanding what can handle a bit of a chill is key.
- Cool-Season Vegetables: These are your spring superstars! They thrive in cooler temperatures and can even tolerate a light frost.
- Leafy Greens: Lettuce, spinach, kale, Swiss chard, arugula. These can be planted directly in the ground as soon as the soil can be worked.
- Root Vegetables: Radishes, carrots, beets, turnips, parsnips. Also direct-sow these early.
- Brassicas: Broccoli, cauliflower, cabbage, Brussels sprouts. These are best started indoors and transplanted out after the risk of hard frost has passed (more on that later!).
- Peas: Another early planting favorite. Provide a trellis for climbing varieties.
- Onions: Start onion sets (small, immature onions) early.
- Cold-Hardy Flowers: Add some early color to your garden with these beauties:
- Pansies and Violas: These cheerful flowers can handle frost and come in a wide range of colors.
- Primroses: Another early bloomer that prefers cool, moist conditions.
- Sweet Alyssum: A fragrant, low-growing annual that tolerates light frost.
- Calendula: Bright orange and yellow blooms that are also edible!
- Snapdragons: While they prefer warmer weather, snapdragons can tolerate light frost, especially if hardened off properly.
- Perennials: While many perennials are best planted in the fall, some can be planted in spring, especially if they are well-established plants from a nursery. Always check the specific planting instructions for each perennial.
- Avoid These Until Later: Warm-season crops like tomatoes, peppers, cucumbers, squash, and beans are very sensitive to frost. Don’t even think about planting these outside until after the last expected frost date (typically around mid-May in Ottawa, but it can vary!).
Ottawa Spring Planting Calendar (Approximate Dates):
Remember, these are guidelines, not hard-and-fast rules. Pay attention to the weather forecast and adjust accordingly. A late frost can sneak up on you, even in late May! Always remember to check the long-range forecast before making final decisions.
- Late March/Early April: Start seeds indoors for cool-season vegetables like broccoli, cauliflower, and cabbage. Direct sow hardy vegetables like lettuce, spinach, and radishes outdoors if the soil can be worked (meaning it’s not frozen or too wet).
- Mid-April: Continue direct sowing hardy vegetables. Plant onion sets and potatoes.
- Late April/Early May: Transplant hardened-off cool-season vegetable seedlings outdoors. Plant cold-hardy annual flowers like pansies and violas.
- Mid-May (After Last Frost): This is the big one! Plant warm-season vegetables like tomatoes, peppers, and beans. Plant most annual flowers.
- Late May/Early June: Continue planting warm-season vegetables and flowers. This is also a good time to plant many perennials.
Proper Planting Techniques: Setting Your Plants Up for Success
Even the hardiest plants need a good start. Here’s how to plant like a pro:
- Prepare the Soil: As we discussed in the “Soil Rejuvenation” section, healthy soil is crucial. Amend your soil with compost and other organic matter before planting. If you’re looking to add structure and beauty to your garden, you might consider mulching and edging.
- Dig the Right Hole: The hole should be twice as wide as the root ball of the plant and just as deep.
- Gently Remove the Plant: If the plant is in a pot, gently squeeze the sides of the pot to loosen the root ball. Turn the pot upside down and tap the bottom to release the plant. Avoid pulling the plant by the stem.
- Handle Roots with Care: If the roots are tightly circling the root ball (root-bound), gently loosen them with your fingers before planting.
- Plant at the Right Depth: Plant the seedling or transplant at the same depth it was growing in its original container. For seeds, follow the planting depth instructions on the seed packet.
- Water Thoroughly: Water deeply after planting to settle the soil and help the roots establish.
- Mulch (Optional but Recommended): Add a layer of mulch (straw, wood chips, or shredded leaves) around the plants to conserve moisture, suppress weeds, and regulate soil temperature.
- Space Appropriately: Be sure to follow the spacing guidelines on the plant label or seed packet.
Hardening Off Seedlings: Toughening Up Your Plants
If you’ve started seeds indoors (which is highly recommended for many plants in Ottawa), you must harden them off before transplanting them outdoors. This process gradually acclimates the seedlings to the harsher outdoor conditions (sun, wind, temperature fluctuations) and prevents transplant shock.
- The Hardening-Off Process:
- Start 7-10 Days Before Transplanting: Begin by placing the seedlings outdoors in a sheltered location (protected from wind and direct sun) for a couple of hours each day.
- Gradually Increase Exposure: Over the next week, gradually increase the amount of time the seedlings spend outdoors and expose them to more sunlight.
- Reduce Watering Slightly: This helps toughen up the plants.
- Protect from Frost: Bring the seedlings indoors if frost is predicted.
- Transplant on a Cloudy Day (Ideally): This reduces stress on the plants.
Dealing with Unexpected Frosts:
Even with careful planning, late frosts can happen in Ottawa. Be prepared to protect your plants!
- Cover Your Plants: Use row covers, blankets, sheets, or even overturned buckets to protect plants from frost. Make sure the cover doesn’t touch the foliage directly.
- Water Before a Frost: Moist soil retains heat better than dry soil.
- Mulch: Mulch helps insulate the soil and protect roots.
New Lawn Considerations
If you decide that your lawn is beyond repair, or that you want to add new lawn to your property, spring is an ideal time to do this. Make sure you prepare the area properly, and the soil is healthy. If you are not comfortable doing this work yourself, you can always get a professional to do it for you. We offer sod installation.
By following these tips, you’ll be well on your way to a successful spring planting season in Ottawa. Remember, gardening is a learning process, and even experienced gardeners face challenges. Don’t be afraid to experiment, learn from your mistakes, and most importantly, have fun!
Eco-Friendly Landscaping Practices in Osgoode
Want a gorgeous garden that’s also kind to the planet? You’ve come to the right place! Eco-friendly landscaping, sometimes called “green gardening,” isn’t just a trend; it’s a responsible and rewarding way to create a beautiful outdoor space. It’s about working with nature, not against it. And it’s totally achievable, whether you’re in Osgoode, tucked away in a quiet corner of Richmond, or right in the bustling heart of Ottawa. The benefits go way beyond just feeling good – you’ll also save money, create a healthier environment for yourself and your family, and attract beneficial wildlife to your yard. Sounds pretty good, right?
1. Composting: Turning Waste into “Black Gold”
Composting is like nature’s recycling program, but way cooler. Instead of throwing your kitchen scraps and yard waste into the trash (where they end up in landfills), you transform them into nutrient-rich compost – often called “black gold” by gardeners. This amazing stuff is a natural fertilizer and soil conditioner.
- What to Compost:
- Fruit and vegetable scraps (peels, cores, etc.)
- Coffee grounds and tea bags (remove staples)
- Eggshells (crushed)
- Grass clippings (untreated with chemicals)
- Leaves
- Shredded paper and cardboard (non-glossy)
- Wood ash (from untreated wood)
- What Not to Compost:
- Meat, fish, or dairy products (attract pests and create odors)
- Oily or greasy foods
- Diseased plants
- Pet waste (except for herbivore manure, like rabbit droppings)
- Weeds that have gone to seed
- How to Compost:
- Choose a Composter: You can buy a ready-made compost bin or build your own. There are many styles, from tumbling bins to stationary bins.
- Layer Your Materials: Alternate “green” materials (nitrogen-rich, like kitchen scraps and grass clippings) with “brown” materials (carbon-rich, like leaves and shredded paper).
- Keep it Moist: The compost pile should be about as damp as a wrung-out sponge.
- Turn it Regularly: This aerates the pile and speeds up decomposition. You can use a pitchfork or a compost aerator.
- Be Patient: It takes time for the materials to break down into finished compost – anywhere from a few months to a year, depending on the conditions.
- Using Compost: Add compost to your garden beds, around trees and shrubs, or mix it into your potting soil. It’s like giving your plants a super-vitamin boost! If you need help adding compost, or would like assistance with a full garden install, we can help.
2. Water Conservation: Every Drop Counts
Water is a precious resource, especially during those hot, dry Ottawa summers. Conserving water in your landscape is not only environmentally responsible, but it can also save you money on your water bill.
- Water Wisely:
- Water Deeply and Less Frequently: This encourages deep root growth, making plants more drought-tolerant.
- Water Early in the Morning: This reduces water loss due to evaporation.
- Use a Soaker Hose or Drip Irrigation: These deliver water directly to the roots, minimizing waste.
- Check for Leaks: Regularly inspect your hoses, faucets, and irrigation system for leaks.
- Collect Rainwater: Use rain barrels to collect rainwater from your roof. This free, soft water is perfect for watering plants.
- Choose Drought-Tolerant Plants: Select plants that are adapted to drier conditions. Native plants are often a great choice (more on that later!).
- Mulch, Mulch, Mulch: A layer of mulch helps retain soil moisture, reducing the need for watering.
3. Organic Pest and Disease Control: Protecting Your Plants Naturally
Instead of reaching for harsh chemical pesticides and herbicides, try a more natural approach. Organic pest control focuses on preventing problems before they start and using natural methods to manage pests and diseases.
- Healthy Plants are More Resistant: The best defense is a good offense! Healthy, well-nourished plants are better able to resist pests and diseases.
- Encourage Beneficial Insects: Many insects, like ladybugs, lacewings, and parasitic wasps, are natural predators of garden pests. Attract them to your yard by planting flowers they love (like dill, fennel, and yarrow) and providing a source of water.
- Use Physical Barriers: Row covers, netting, and copper tape can protect plants from pests.
- Handpick Pests: For larger pests, like slugs and caterpillars, handpicking is often the most effective method.
- Use Organic Sprays (Sparingly): If necessary, use organic sprays like insecticidal soap, neem oil, or horticultural oil. Always follow the instructions carefully and use them as a last resort.
4. Native Planting: Choosing Plants That Belong Here
Native plants are those that have evolved in a particular region over thousands of years. They are perfectly adapted to the local climate, soil, and wildlife. Planting native species in your Osgoode garden has numerous benefits:
- Low Maintenance: Native plants require less water, fertilizer, and pesticides.
- Support Wildlife: They provide food and shelter for native insects, birds, and other animals.
- Preserve Biodiversity: Planting natives helps maintain the natural ecosystem.
- Beautiful and Diverse: There are many beautiful native plants to choose from, offering a wide range of colors, textures, and forms.
- Examples of Ottawa-Area Native Plants:
- Flowers: Black-Eyed Susan, Purple Coneflower, Wild Bergamot, Butterfly Weed, Goldenrod
- Shrubs: Red Osier Dogwood, Serviceberry, Common Elderberry, Ninebark
- Trees: Sugar Maple, Red Maple, White Pine, White Spruce, Eastern White Cedar
- Where to Find Native Plants: Many local nurseries specialize in native plants. You can also find them at native plant sales and swaps.
5. Reducing Chemical Use: Protecting Our Water and Soil
Synthetic fertilizers, pesticides, and herbicides can harm beneficial insects, pollute waterways, and disrupt the soil ecosystem. By reducing or eliminating their use, you’re creating a healthier environment for yourself, your family, and the planet.
- Use Compost Instead of Synthetic Fertilizers: Compost provides a slow, steady release of nutrients and improves soil health.
- Practice Integrated Pest Management (IPM): This approach focuses on preventing pest problems and using the least toxic methods possible.
- Tolerate Some Imperfection: A few holes in your leaves or a few weeds are not the end of the world! Remember, a perfectly manicured lawn is not necessarily a healthy lawn.
By embracing these eco-friendly landscaping practices, you can create a beautiful and sustainable garden that benefits both you and the environment. It’s a win-win situation! Remember, if you ever get stuck or need a hand with your spring garden tasks, you can always access your account through our convenient customer portal. You can also schedule our Ottawa yard cleanup service to help with some of the larger tasks. Happy (and green!) gardening!
Spring Garden Maintenance Calendar: A Month-by-Month Guide
Spring in Ottawa is a glorious, yet sometimes frantic, time for gardeners. This calendar will help you stay on track, whether you’re in a sheltered Barrhaven garden or facing the windswept fields of Vernon. Remember, these are guidelines, and you should always adjust based on the actual weather conditions (because Ottawa weather loves to keep us guessing!).
March: The Tease of Spring (But Still Mostly Winter)
This month is all about preparation and patience. Don’t jump the gun, even if you get a few warm days. The ground is often still frozen or too wet to work effectively.
Indoor Seed Starting:
- Start seeds indoors for warm-season vegetables like tomatoes, peppers, and eggplants. Use a good quality seed-starting mix and provide plenty of light (grow lights are highly recommended).
- Start seeds for cool-season crops that need a longer growing season, like broccoli, cauliflower, and cabbage.
- Check your seed packets for specific timing recommendations.
Tool Maintenance:
- Sharpen and clean your pruning shears, loppers, and other tools.
- Inspect your garden hoses and irrigation systems for leaks.
- Make sure your lawnmower is in good working order (sharpen the blade, change the oil, etc.).
Planning and Ordering:
- Plan your garden layout. Decide what you’re going to plant and where.
- Order seeds, plants, and supplies online or from local nurseries.
- If you’re planning any major landscaping projects, start getting quotes from contractors.
Outdoor Tasks (Weather Permitting):
- Remove winter protection (mulch, burlap, etc.) from around sensitive plants gradually, as the weather warms up. Don’t do it all at once!
- Prune any broken or damaged branches on trees and shrubs.
- If the ground is thawed and workable, you can start to gently clean up garden beds, removing any remaining leaves and debris. But be careful not to disturb emerging perennials.
- Inspect the edges of your gardens. If the freeze/thaw cycle has moved rocks, etc., you can carefully put them back. If you are looking to refresh your gardens this year, here is a great article to read: DIY rock garden edging in Ottawa.
Lawn Care:
- Remove any debris, such as twigs and leaves.
April: The Real Start (Maybe!)
April is when things start to get real in the Ottawa garden. The snow is (usually) gone, the soil is starting to warm up, and you can finally get your hands dirty. But be prepared for setbacks – late frosts are still a possibility.
Continue Indoor Seed Starting:
- Continue starting seeds indoors, following the recommended timing for each plant.
Direct Sowing Outdoors:
- As soon as the soil can be worked (meaning it’s not frozen or too wet), direct sow hardy vegetables like lettuce, spinach, kale, radishes, carrots, beets, and peas.
- Plant onion sets and potatoes.
Hardening Off Seedlings:
- If you’ve started seeds indoors, begin hardening them off (gradually acclimating them to outdoor conditions) towards the end of the month, if the weather is cooperating.
Garden Bed Preparation:
- Continue cleaning up garden beds, removing any remaining debris and weeds.
- Amend the soil with compost and other organic matter.
- Edge your garden beds to create clean lines.
Pruning:
- Prune spring-flowering shrubs (like forsythia) after they finish blooming.
- Prune roses.
Planting Cold-Hardy Annuals:
- Plant pansies, violas, and other cold-hardy annuals for early color.
Lawn Care:
- Apply a crabgrass preventer if this is a persistent problem.
- Once your lawn starts actively growing, do a light raking.
- If needed, start dethatching and aerating your lawn (see the “Lawn Care Revival” section for details).
- Overseed bare patches.
May: The Planting Frenzy
May is the month for planting in Ottawa. The risk of frost has (usually) passed by mid-May, and you can finally get those warm-season plants in the ground.
Transplanting Seedlings:
- After the last expected frost (typically around mid-May in Ottawa, but check the forecast!), transplant your hardened-off seedlings (tomatoes, peppers, broccoli, etc.) outdoors.
- Plant warm-season vegetables like beans, cucumbers, squash, and corn.
Planting Annuals and Perennials:
- Plant the rest of your annual flowers.
- Plant perennials.
Watering:
- Water deeply and regularly, especially newly planted plants.
- Install soaker hoses or drip irrigation systems to conserve water.
Mulching:
- Apply a layer of mulch around your plants to conserve moisture, suppress weeds, and regulate soil temperature.
Pest and Disease Control:
- Monitor your plants regularly for pests and diseases.
- Use organic methods to control pests and diseases as needed.
Lawn Care:
- Mow your lawn regularly at the correct height (usually 2.5-3 inches).
- Fertilize your lawn (see the “Lawn Care Revival” section for details). A late May/early June fertilizer application is important for maintaining healthy growth through the summer.
- Continue to monitor for weeds and address them promptly.
- If you need assistance with lawn care or garden maintenance, consider scheduling a visit from our Marionville yard cleanup service.
Early June: Finishing Touches and Ongoing Care
Early June is about finishing up any remaining planting, providing ongoing care, and enjoying the fruits (and vegetables!) of your labor.
Continue Planting (if needed):
- You can still plant warm-season vegetables and flowers in early June, especially if you’ve had a cool spring.
Watering, Weeding, and Mulching:
- Continue to water deeply and regularly, especially during dry spells.
- Weed your garden beds regularly to prevent weeds from competing with your plants.
- Replenish mulch as needed.
Pest and Disease Control:
- Continue to monitor your plants for pests and diseases.
- Take action promptly if you spot any problems.
Supporting Plants:
- Stake or cage tall plants like tomatoes and peppers.
- Provide trellises for climbing plants like peas and beans.
Lawn Care:
- Continue lawn maintenance as described above.
Enjoy Your Garden!
- Take time to relax and enjoy your beautiful, thriving garden. Harvest vegetables and herbs as they become ready. Deadhead flowers to encourage more blooms.
Remember, this calendar is a guide, not a rigid schedule. Observe your garden, pay attention to the weather, and adjust your tasks accordingly. Ottawa’s microclimates can vary significantly – a garden in a sheltered downtown location will warm up faster than one in a more exposed rural area like Kenmore or Greely. Embrace the challenges and enjoy the rewards of gardening in our unique climate! You can find a showcase of successful gardens and landscaping projects in our gallery. For additional assistance with cleaning and tidying up your property, check out our comprehensive Ottawa property cleanup service.
Highlight Box: Top 5 Spring Gardening Mistakes to Avoid in Ottawa
Top 5 Spring Gardening Mistakes to Avoid in Ottawa
Here’s a quick rundown of the five biggest spring gardening blunders we see homeowners make in Ottawa, and how to easily sidestep them:
-
Starting Too Early (or Too Late!): Ottawa’s weather is a rollercoaster. Planting tender seedlings before the last frost is a recipe for disaster, while waiting too long shortens your growing season.
- Avoid it: Pay close attention to the long-range forecast and average last frost dates (mid-May is a good guideline, but it varies!). Start seeds indoors for warm-season crops, and don’t rush to put them outside. Use the planting calender above!
-
Ignoring Soil Preparation: Jumping straight to planting without amending your soil is like building a house on a weak foundation. Ottawa’s soil often needs a boost after winter.
- Avoid it: Test your soil! Amend with compost and organic matter to improve drainage, aeration, and nutrient levels. A healthy foundation is the key and if you have any questions, you can book an estimate with an expert to discuss your needs.
-
Improper Pruning: Hacking away at shrubs and trees at the wrong time (or in the wrong way) can damage plants and reduce flowering.
- Avoid it: Know when and how to prune different plants. Spring-flowering shrubs should be pruned after they bloom, not before. Remove dead, damaged, or diseased wood first.
-
Neglecting Lawn Care Fundamentals: Skipping essential spring lawn tasks like dethatching, aerating, and overseeding leads to a thin, weedy lawn.
- Avoid it: Dethatch to remove built-up organic matter, aerate to improve air and water flow to the roots, and overseed to fill in bare patches. A little effort in spring pays off big time.
-
Poor Material Selection: Choosing the wrong materials is a common pitfall in landscape design. It’s crucial to pick options that suit your specific site conditions, maintenance preferences, and budget, or your project might not deliver the desired results.
- Avoid it: Careful material selection is essential for success. For instance, opting for locally sourced, durable materials not only supports the local economy but also ensures that your landscaping choices are sustainable and well-suited to Ottawa’s climate.
Frequently Asked Questions (FAQs) about Spring Gardening in Osgoode
Here are some of the questions we hear most often about spring gardening in the Osgoode and greater Ottawa area:
Ah, the million-dollar question! While the “official” last frost date is often quoted as mid-May, it’s best to be cautious. I’ve seen surprise frosts even in late May, especially in low-lying areas or out in places like Metcalfe or Osgoode. A good rule of thumb is to wait until the nighttime temperatures are consistently above 10°C (50°F). Keep an eye on that long-range forecast, and be prepared to cover your plants if a late frost is predicted. Better safe than sorry!
Frost protection is a must-have skill for Ottawa gardeners! There are a few options. You can use row covers (a lightweight fabric that traps heat), blankets, sheets, or even overturned buckets or plastic containers. The key is to make sure the cover doesn’t directly touch the foliage, as this can cause damage. You can also water your plants thoroughly before a predicted frost, as moist soil retains heat better than dry soil.
That’s a fantastic goal! Planting native species is the best way to attract local wildlife. For butterflies, consider plants like Butterfly Weed (Asclepias tuberosa), Purple Coneflower (Echinacea purpurea), and Black-Eyed Susan (Rudbeckia hirta). For birds, try Serviceberry (Amelanchier canadensis), Red Osier Dogwood (Cornus sericea), and various conifer trees for shelter. You can also supplement with bird feeders and a birdbath.
Grubs can be a real pain, but there are eco-friendly solutions! Beneficial nematodes are microscopic worms that parasitize grubs. You apply them to the soil, and they go to work. Milky spore is another option, specifically for Japanese beetle grubs. The key is timing – apply these treatments when the grubs are young and actively feeding, usually in late summer or early fall. For spring issues, focus on creating a healthy, thick lawn that’s less susceptible to grub damage. Lawn care is an essential part to preventing grub problems.
Ah, the classic Ottawa clay! Don’t despair; it’s workable. The best thing you can do is add organic matter – and lots of it! Compost, well-rotted manure, leaf mold, and even shredded leaves will all help improve the structure, drainage, and fertility of clay soil. Work it into the top 6-8 inches of soil. You can also consider adding some gypsum, which can help break up clay particles. It’s a long-term process, but consistent amendment will make a huge difference. For some gardens you may want to completely replace it, and that is fine too! We offer Metcalf garden clean up service and can help with the work.
That’s a common challenge! It’s best to choose plants specifically for each area, rather than trying to find one-size-fits-all solutions. For the sunny area, you have tons of options – most vegetables and many flowering annuals and perennials love full sun. For the shady area, consider hostas, ferns, bleeding hearts, astilbe, and impatiens. There are some plants that tolerate a range of conditions, like certain varieties of hydrangeas, but even those will usually perform best with at least some morning sun. The key is to research the specific light requirements of each plant before you buy it.
Conclusion: Enjoying a Beautiful and Thriving Osgoode Garden
So, there you have it! We’ve covered a lot of ground, from assessing winter damage and tackling spring cleaning to soil rejuvenation, lawn care revival, and planting for success. We’ve even touched on eco-friendly practices and a month-by-month guide to keep you on track. Spring garden maintenance in the Ottawa area, with all its quirks and challenges, might seem daunting at first, but it’s truly the cornerstone of a beautiful and thriving landscape throughout the entire year. Think of it as an investment – a little effort now yields HUGE rewards later, whether you have a compact garden in Osgoode, or a sprawling property out towards Embrun.
Remember, a healthy garden isn’t just about aesthetics. It’s about creating a vibrant ecosystem, supporting local wildlife, and enjoying the numerous benefits of spending time outdoors, connected to nature. By following the tips and advice we’ve shared, you’re well-equipped to tackle spring gardening with confidence. Don’t be afraid to experiment, learn from your experiences, and adapt your approach as needed. Every garden is unique, and every gardener is on a continuous learning journey.
Ready to take the next step and create the Osgoode garden of your dreams? Let our experts help you!
Get Professional Help With Your Spring Garden MaintenanceCheck out our reviews on Google
If you’re feeling overwhelmed or simply don’t have the time to tackle all these tasks yourself, we’re here to help! CleanYards offers a full range of landscaping and garden maintenance services throughout Osgoode and the surrounding areas, including Embrun. We can assist with everything from spring cleanups and soil preparation to lawn care, planting, and ongoing maintenance. Marionville garden clean up service and Metcalf yard cleanup service are also available to residents in these areas. Don’t forget to check out our Ottawa garden clean up service for more information, and please feel free to provide us with your estimate feedback to help us improve our services.