
Kenmore: Prevent Drip Clogs This Fall, Save Spring Hassle
Quick Fall Drip Prep Guide:
- Why Bother? Prevent costly spring repairs and ensure healthy plants by avoiding freeze damage and clogs from fall debris.
- Key Steps: Shut off water, disconnect components, clean the filter, flush/drain all lines thoroughly (gravity or low-pressure air), store sensitive parts indoors.
- Timing: Act after the last watering but before the first hard freeze (late Oct/early Nov in Ottawa).
Ready to tackle fall yard work but need a hand? Get a free, no-obligation quote for your Kenmore property today!
Request Your Free QuoteIntroduction: Fall Colours are Great, Clogged Emitters Aren't!
Ah, Ottawa in the fall! It's hard to beat the spectacular show of colours, isn't it? Those fiery reds, oranges, and golds lighting up the trees from the quiet streets of Kenmore all the way to the bustling neighbourhoods of Barrhaven are a true highlight of our landscaping year. But while we're busy admiring the beautiful leaves drifting down onto our lawns and gardens, those very same leaves, plus tiny bits of soil and other debris, can be plotting a sneaky invasion of your drip irrigation system.
Fast forward to spring, you turn on the water, expecting happy plants, but instead... clogged emitters! It's a frustrating discovery and a real headache when your garden needs that water most. Those little drips are crucial for healthy roots, and blockages mean some plants might miss out entirely.
The good news? This springtime hassle is totally avoidable with a little fall maintenance. Taking a few simple steps now to prepare your drip lines before the freeze sets in is the secret weapon against those pesky clogs. Let's dive into how you can ensure a smooth, trouble-free start to your next gardening season! Think of it as tucking your irrigation system safely into bed for the winter.
Why Your Drip System Holds a Grudge (Especially After an Ottawa Fall)
So, you turn on your drip irrigation come springtime, ready to give your thirsty garden beds a drink, and... nothing? Or maybe just a pathetic dribble from a few emitters? It feels personal, doesn't it? Like your system is holding a grudge after being ignored all winter. Well, you're not entirely wrong! That Ottawa fall, with its beautiful chaos, sets the stage for springtime irrigation drama.
Think about what happens here, from Manotick to Greely, when autumn arrives. Leaves, glorious leaves, rain down everywhere. Along with those leaves come twigs, seeds, dust, and bits of soil kicked up by wind and rain. Your drip irrigation system, with its tiny emitters (those little holes where the water comes out) and narrow tubing, is like a magnet for this stuff.
Here’s the breakdown of the usual suspects causing those grudges, err, clogs:
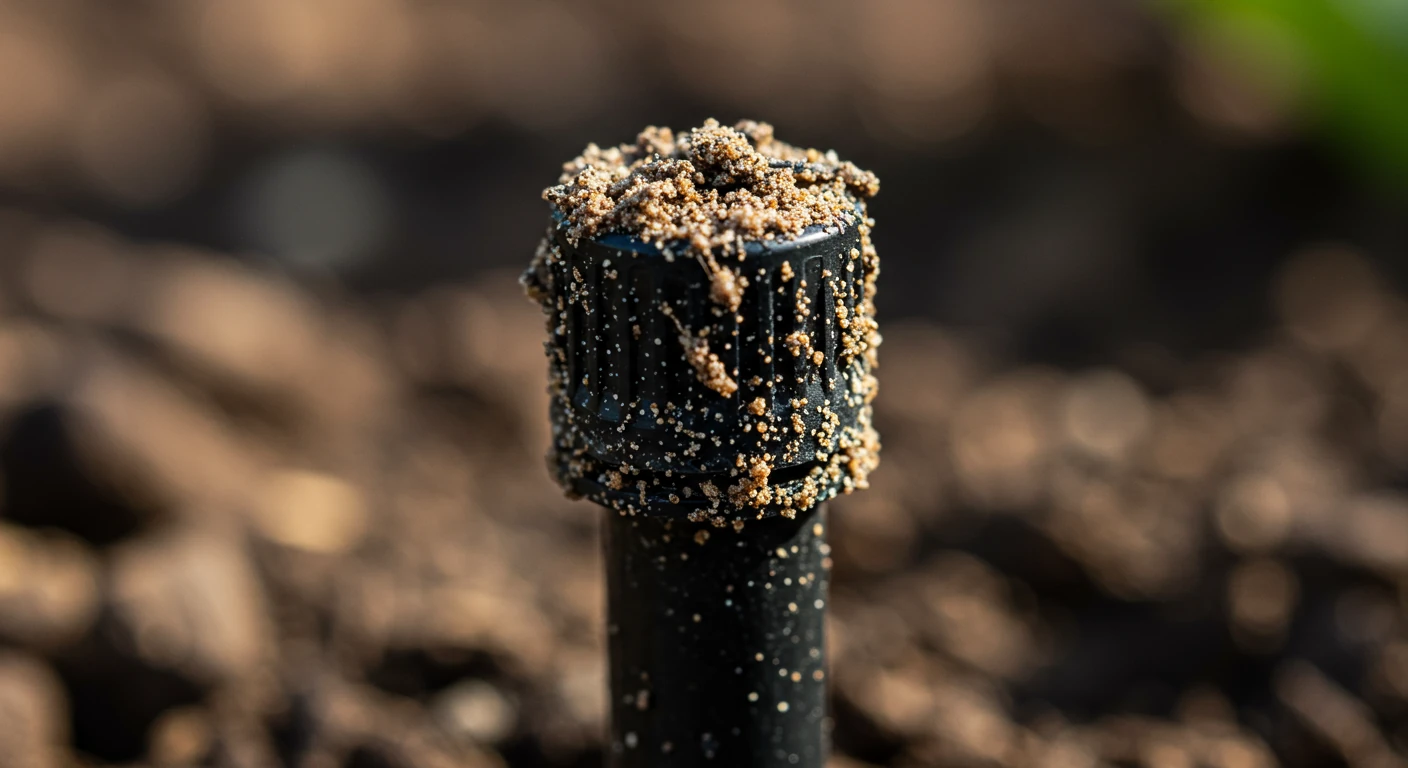
- Physical Blockages: This is the most common culprit after fall.
- Debris: Tiny particles of leaves, dirt, sand, and even small insects get washed or blown into the openings of your system – the ends of lines or directly into emitters if they're exposed. Heavy fall rains can easily wash soil into poorly placed lines. Proper fall cleanup is essential; neglecting it means asking for trouble. You wouldn't skip raking, so don't skip system prep! Getting leaves off the garden beds helps immensely, which is why a thorough fall effort, like the service offered by Kenmore Yard Cleanup Service, can make a big difference. Check out our Google My Business page for local reviews.
- Freeze-Thaw Cycles: Ottawa’s specialty! As the ground freezes and thaws repeatedly through late fall and early spring, soil particles can be pushed into buried or low-lying drip lines and emitters. Water freezing inside the lines can also sometimes shift debris into blocking positions.
- Biological Gunk: If water sits in the lines over winter (even small amounts), it's party time for algae and bacteria.
- Algae: Needs light and water. If parts of your system are exposed, algae can grow near openings and get washed in.
- Bacterial Slime: Even in dark tubes, bacteria can feed on tiny organic particles or minerals in the water, creating a gross slime that plugs emitters faster than you can say "unhappy petunias." This unseen gunk is a major reason for poor performance and can lead to plant stress, similar to issues highlighted in the Kenmore Summer Plant Check Garden Loss guide.
- Chemical Culprits: This is more of a slow burn, but winter makes it worse.
- Mineral Buildup: Water, especially harder water which can sometimes be found in our region (check City of Ottawa water quality reports for details), contains dissolved minerals like calcium and iron. When water sits stagnant in the lines over winter, or evaporates at the emitter tips, these minerals can precipitate out, forming scale – like the limescale in your kettle, but microscopic and ready to block tiny emitter openings. Fertilizers injected through the system (fertigation) can sometimes contribute if not flushed properly.
Essentially, the beautiful, messy Ottawa fall provides the physical debris, and the subsequent freezing temperatures and downtime provide the perfect conditions for biological growth and chemical settling. Taking steps in the fall, like flushing the system and performing a detailed Kenmore Fall Plant Check Saves Money, is key. It’s all part of smart preventative garden care. Embracing Kenmore Preventative Garden Care Saves Money principles means fewer headaches later.
Come spring, as you're getting ready for other tasks like those mentioned in the Kenmore Lawn Care Spring Fertilizing Guide, discovering clogged emitters is frustrating. Understanding why they clog helps you prevent it. If tackling irrigation maintenance feels daunting, remember that professional help is available through various landscape maintenance providers listed under Our Services.
Overwhelmed by fall prep? Let the pros handle your irrigation winterization and yard cleanup.
Get Professional Help With Your Fall CleanupYour Step-by-Step Guide: Fall Flushing & Filter Finesse
Okay, deep breaths! Flushing your drip irrigation system might sound complicated, but it’s mostly about rinsing and draining. Think of it like giving your garden's plumbing a gentle spa day before its long winter nap. Here’s how to tackle it step-by-step, ensuring those emitters are ready for spring, whether you're in bustling Nepean or quiet Vernon.
What You'll Need (Nothing Too Fancy!):
- An old toothbrush or small scrub brush
- A bucket (optional, for catching water/parts)
- Maybe pliers (if end caps are stubborn)
- Access to your main water shut-off for the system
- Possibly compressed air (canned air for electronics works, or an air compressor *set to low pressure* – think 30 PSI or less – *safety glasses required!*)
Let's Get Flushing!
- Turn Off the Water: This is Step Zero, the most important one! Find the shut-off valve specifically for your irrigation system (often near the outdoor faucet it connects to) and turn it completely off. No soggy surprises, please!
- Disconnect the System: Gently unscrew the main tubing line from your faucet, timer, or backflow preventer. Let any immediate water drain out.
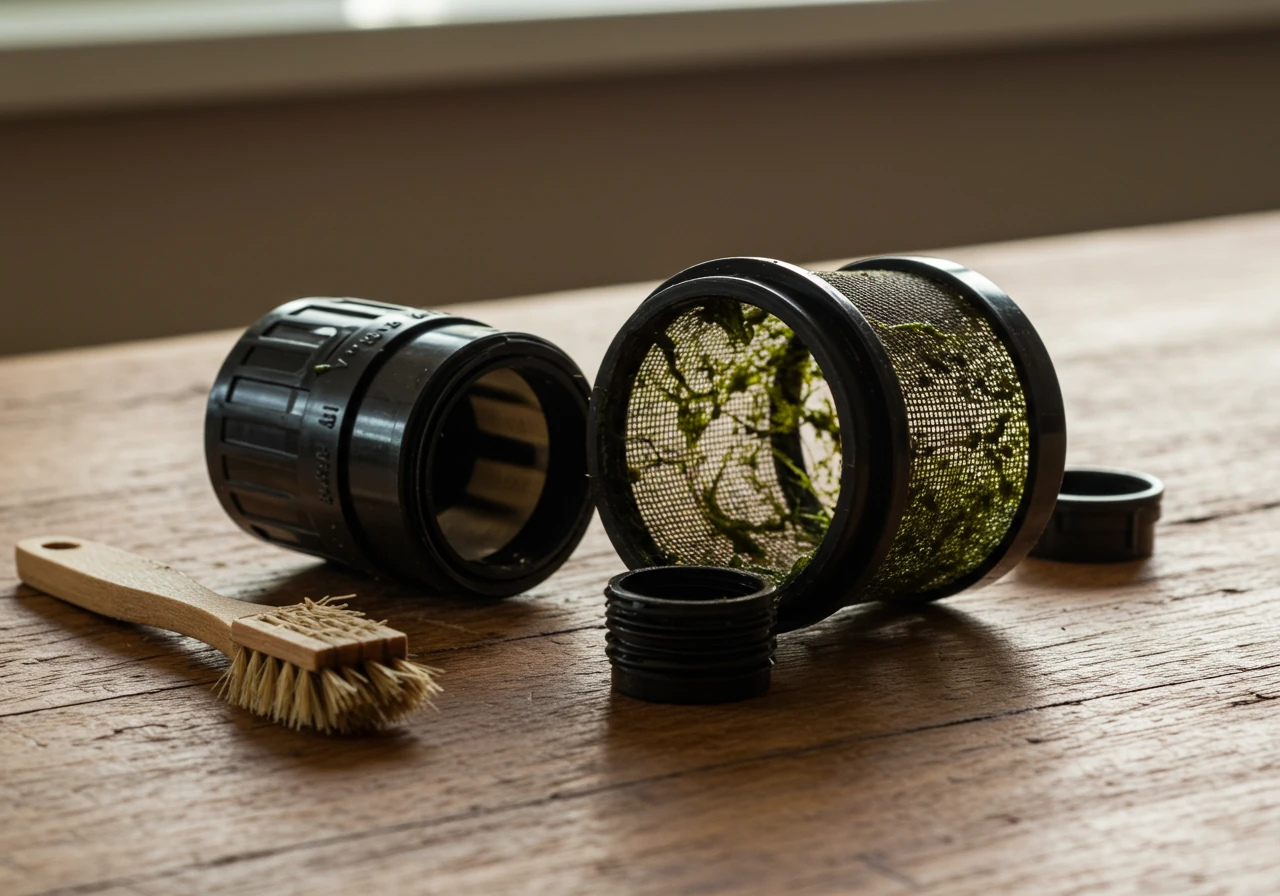
- Filter First! (The System's Bodyguard): Near where you just disconnected, you'll find the filter. It's usually a cylindrical housing.
- Carefully unscrew the filter cover (it might twist off or have a clamp). Keep track of any rubber O-rings – they're important for sealing!
- Slide out the filter screen or discs. See any gunk? That's what we want to remove!
- Rinse the filter thoroughly under running water (or swish it in your bucket). Use your old toothbrush to *gently* scrub away any stubborn bits of algae or sediment. Look closely for any tears or holes – a damaged filter needs replacing.
- Once clean and inspected, put the filter back together, ensuring the O-ring is seated correctly, and screw the housing back on snugly.
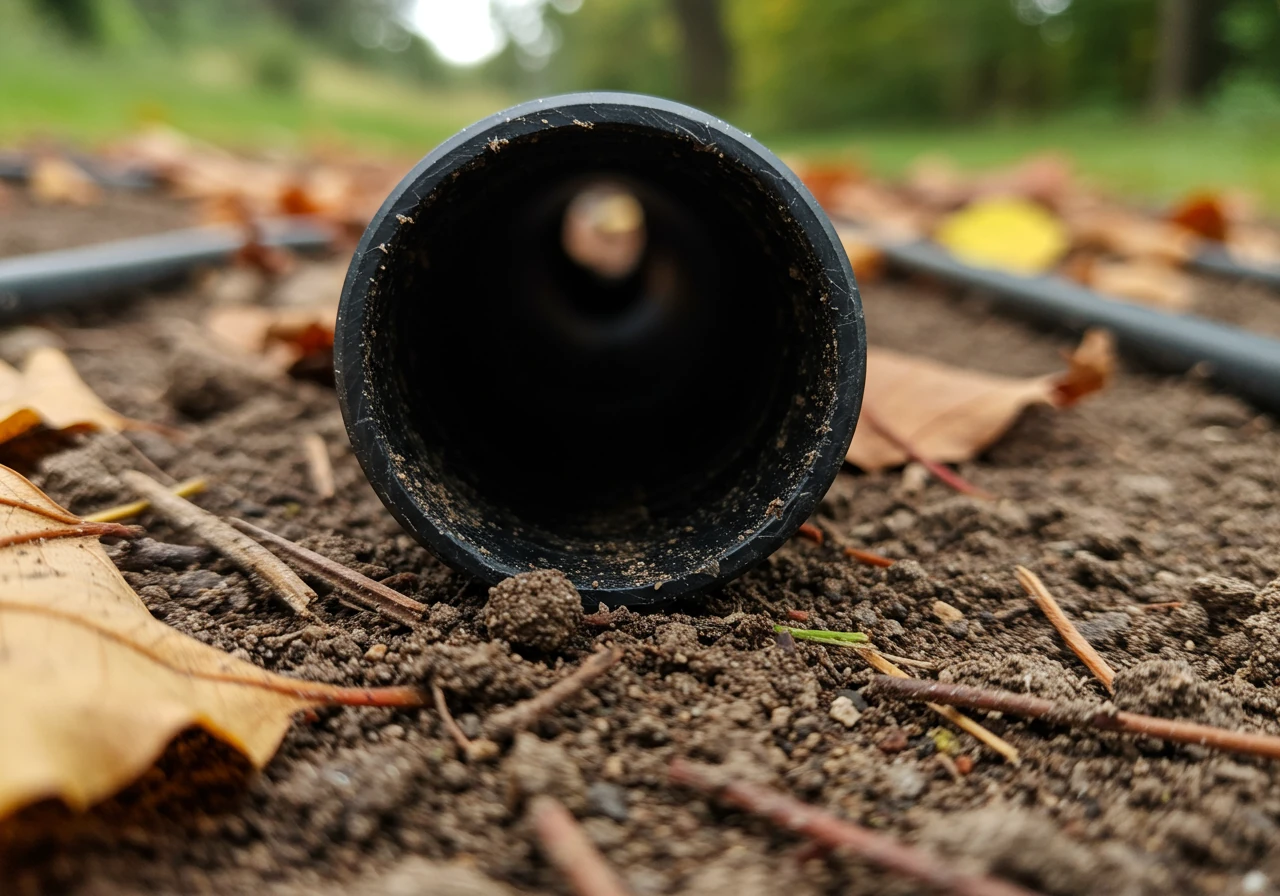
- Open the Floodgates (Well, Drip Gates): Go to the very ends of your main drip lines and any major offshoots (lateral lines). Remove the end caps or undo the figure-8 closures. This is where the flushed-out gunk will exit. Place your bucket underneath if you want to see what comes out (sometimes it's surprisingly gritty!).
- The Great Drain: Now we get the water *out*.
- Gravity Method (Simplest): If your lines are laid out with a slight slope, gravity might do most of the work. Lift and gently shake sections of tubing, working from the filter end towards the open ends, encouraging water to flow out.
- Compressed Air Assist (Optional but Effective): *Safety glasses on!* Using canned air or an air compressor on a *very low setting* (under 30 PSI), blow short bursts of air into the opening where you disconnected the system from the faucet. This pushes remaining water and loose debris out the open ends. *Don't use high pressure*, as it can damage emitters or blow fittings apart!
- Check for Drips (The Good Kind): Make sure water has stopped draining from the open ends. Walk the lines one last time, lifting any low spots to drain residual puddles inside the tubing. The goal is *empty* tubes to prevent ice damage. This step is crucial for surviving an Ottawa winter freeze. Even systems part of a recent new garden installation setup need this careful draining.
- Button Up (Loosely): You have two choices for the open ends:
- Loosely replace the end caps/closures. This helps keep bugs and dirt out over winter but isn't airtight, allowing any final condensation to escape.
- Leave them off, store the caps somewhere safe (label a bag!), and maybe cover the openings loosely with plastic bags secured by rubber bands to prevent infestation. Just *remember* where you put the caps for spring!
Eco-Friendly Touch: If you did use a little water for rinsing the filter or lines, catch it in your bucket! It’s perfect for giving your thirsty houseplants or container mums one last drink. Compost any leaves or organic debris you cleaned out. Keeping the garden area generally tidy also helps; consider how comprehensive fall strategies, like those offered by the Marionville yard cleanup service, reduce the amount of debris that can even get near your system.
Timing is Key: Aim to do this after your plants have slowed their growth for the season but *before* the ground freezes solid – typically late October or early November around here.
And that’s it! Your drip system is now winter-ready. Seems manageable, right? Taking these steps now saves you so much potential hassle (and replacement costs!) come spring.
We hope this guide helps! If you have more complex systems, encounter stubborn clogs, or just prefer leaving it to the pros, don't hesitate to reach out. You can learn more about our comprehensive garden maintenance plans which can include irrigation winterization, or simply contact us for specific tasks. We sincerely appreciate you considering our advice; thank you!
Winterizing Approaches Compared
Gravity Draining
Pros: No special equipment needed, simple process, safe for system components.
Cons: May not remove all water, especially in low spots or on uneven terrain. Less effective against stubborn debris.
Best For: Simple, relatively level layouts where thoroughness is less critical or combined with careful line lifting.
Compressed Air Blow-Out (DIY)
Pros: Most thorough method for removing water, helps clear minor debris.
Cons: Requires air compressor with regulator, RISK OF DAMAGE if pressure is too high (>30-40 PSI), requires safety precautions (eye protection).
Best For: Experienced DIYers with proper equipment and understanding of pressure limits, complex or sloped systems.
Professional Winterization Service
Pros: Ensures thorough draining (usually includes blow-out), done correctly with proper equipment, saves you time and hassle, peace of mind.
Cons: Cost involved.
Best For: Complex systems, those uncomfortable with DIY, ensuring the job is done right, busy homeowners. Check our Ottawa yard cleanup service options which can include this.
Winter is Coming: Properly Shutting Down Your Drip System in Ottawa
Alright folks, let's face it, Ottawa winters don't mess around! While we're cozying up indoors, any water left lurking in your drip irrigation system is plotting a frozen, potentially pipe-cracking rebellion. Properly winterizing your system isn't just a good idea, it's essential maintenance to avoid costly repairs come spring. Think of it as tucking your garden's watering buddy safely into bed for its long, cold nap.
Here’s how to give your drip system the winter TLC it needs:
- Cut the Flow (Seriously, All of It!)
First things first: shut off the water supply *dedicated* to your irrigation system. This is usually a valve located near your main outdoor faucet or sometimes inside your basement along the pipe leading outside. Turn that valve completely off. If you have an indoor shut-off valve for that outdoor faucet line, close that too for double protection against frozen pipe bursts inside your walls. No ifs, ands, or frozen buts about this step!
- Drain Like You Mean It
Water expands when it freezes, and plastic tubing and delicate emitters *hate* that. We need to get as much water out as possible.
- Disconnect: Unscrew the timer, pressure regulator, and filter assembly from the faucet. If you leave a timer attached, trapped water can freeze and crack the housing.
- Backflow Preventer: If your system has a backflow preventer (that gizmo that stops irrigation water from flowing back into your drinking water – important!), it also needs draining. These often have small drain screws or test cocks. Open them carefully according to the manufacturer's instructions to let trapped water escape.
- Open the Ends: Go to the ends of all your main drip lines and lateral tubes. Remove the end caps or undo the figure-8 closures.
- Gravity is Your Friend: Starting near the faucet end, lift sections of the tubing and walk towards the open ends, gently guiding any remaining water out. Pay attention to low spots where water might pool.
- The Blow-Out Option: Use Air Power (Carefully!)
For the most thorough draining, especially on uneven ground like you might find around Osgoode or hilly parts of Nepean, using compressed air is the gold standard. *However*, this comes with a big caution sign.*
- Why Air? It forces out stubborn water droplets gravity might miss.
- The Risk: Using *too much pressure* (anything over 30-40 PSI is risky for most drip systems) can literally blow your emitters off, split tubing, or damage internal components. *Always wear safety glasses* when working with compressed air!
- Our Advice: Unless you have an air compressor with a reliable pressure regulator and know *exactly* what you're doing, we strongly recommend hiring a professional for this step. It's much cheaper than replacing damaged system parts. Consider bundling this with a general fall cleanup; many providers like the Ottawa yard cleanup service offer irrigation winterization. You can also look into specialized cleanups like the Metcalf garden clean up service or broader options like the Ottawa property cleanup service.
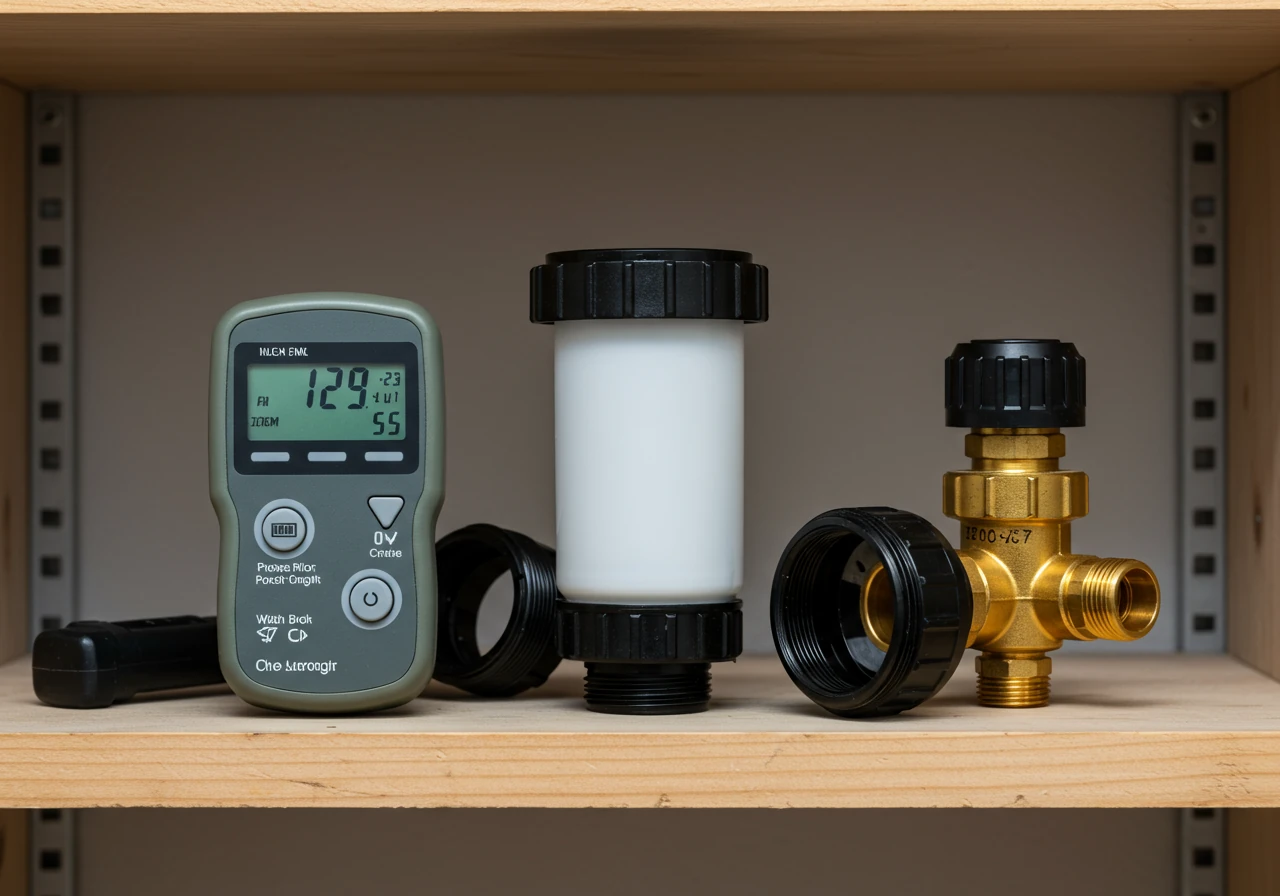
- Stash the Sensitive Stuff
Your timer, filter assembly, and pressure regulator are the brains and heart of the operation. They don't like freezing temperatures.
- Bring 'Em In: Once disconnected, bring these components inside for the winter. A basement or heated garage is perfect. Store filter parts disassembled so they can fully dry. Even the best components chosen during material selection benefit from this protection.
- Tubing Care: Leave the end caps off the tubing or replace them very loosely to allow drainage of any condensation. If parts of your tubing are exposed, consider covering them with a layer of mulch or soil for minor insulation and protection from physical damage, especially after a thorough cleanup removes protective leaf litter. Ensuring the surrounding area is clear, perhaps with help from a Marionville yard cleanup service, also reduces tripping hazards over the winter. Preparing the whole property with something like a Marionville property cleanup service ensures everything is tidy before the snow flies. For city dwellers, a city property cleanup service might be relevant.
- Timing is Everything in Ottawa
Aim to shut down your system *after* your garden's final watering needs are met (usually late September or early October) but *well before* the first hard freeze hits, which is typically late October or early November in our region. Don't wait until the ground is frozen solid! For reference on local weather patterns, check resources like Environment Canada Ottawa.
Taking these steps protects your investment and ensures your drip system is ready to roll come springtime, saving you hassle and money. If it feels like a lot, remember that comprehensive help is available.
Potential Spring Issues Prevented by Fall Maintenance
*Illustrative percentages based on common issues.
Beyond Clogs: Eco-Friendly Practices for Ottawa Gardeners
So, you're already using drip irrigation – high five! You're saving water compared to sprinklers that water the sidewalk more than your petunias. But why stop there? Being an eco-conscious Ottawa gardener goes beyond just efficient watering. Let's dig into some simple ways to give Mother Nature an extra nod, whether you're tending a balcony box in Barrhaven or a sprawling backyard oasis.
First up, double down on water smarts. Besides your trusty drip system, consider installing a rain barrel (or two!). Collecting rainwater for your garden reduces runoff and cuts down on tap water use. Local resources like the Rideau Valley Conservation Authority sometimes have programs or information related to water conservation. Also, think about plant choices. Selecting native species or drought-tolerant varieties suited to our sometimes-wild Ottawa climate means less watering overall once they're established. They're tough cookies!
Healthy soil is happy soil! Instead of bagging up all those leaves and clippings, start composting. Turning yard waste into "black gold" feeds your soil naturally, reducing the need for chemical fertilizers and improving soil preparation for next season. When you schedule a fall tidy-up, like using a thorough city garden clean up service, ask about composting options for the debris. Even general yard maintenance, like that offered by the dependable city yard cleanup service, helps prevent unwanted debris from washing into storm drains. Services like the Marionville garden clean up service also focus on responsible disposal. And don't forget the magic of mulch! Applying a good layer through professional mulching and edging conserves soil moisture (less watering!), suppresses weeds, and breaks down to enrich the soil.
Think about the bigger picture too. When adding features like pathways or raised beds, consider sustainable options discussed in eco-friendly material selection guides. Every little bit helps! Keeping your green space thriving sustainably can be part of regular upkeep; explore options for ongoing professional city garden maintenance service that aligns with eco-friendly goals.
Being an eco-friendly gardener isn't about perfection; it's about making small, thoughtful changes that add up to a healthier environment for everyone in Ottawa. Happy gardening!
Highlight Box: Your Fall Drip System Cheat Sheet
Feeling overwhelmed by fall chores? We get it! Prepping your Ottawa garden for winter can feel like a marathon. But don't let your drip irrigation system become a springtime casualty! Here’s a super-quick cheat sheet to save your system from icy doom and annoying clogs. Think of this as the cliff notes version to avoid springtime headaches, whether you're in Metcalfe or anywhere else nearby.
- Shut It Down Tight: First things first – turn off the main water supply valve dedicated *only* to your irrigation system. Find it, turn it off completely. This is non-negotiable!
- Disconnect & Store the Good Stuff: Unscrew your timer, filter assembly, and pressure regulator from the faucet. These bits hate the cold! Bring them inside to a frost-free spot (basement, garage) for the winter. Keeping these safe avoids costly replacements and maintains the look of your garden, preventing the need for drastic landscape makeovers later.
- Clean That Filter: Remember that filter you just brought inside? Take it apart (carefully!) and give the screen or discs a good rinse. Scrub gently with an old toothbrush if needed. A clean filter now means fewer clogs later. This is a key part of any thorough fall prep, complementing a good tidy-up like an Ottawa garden clean up service.
- Drain Those Lines (Water Out!): Open the ends of all your drip lines (remove end caps or undo closures). Lift and gently shake the tubing, working from the faucet end towards the open ends, to let gravity drain the water. For a super-thorough job, especially on uneven ground, compressed air (LOW pressure ONLY, <30 PSI, safety glasses!) helps, but *consider professional help* for this step to avoid damage. Making sure the area around the lines is clear, possibly via a dependable Metcalf property cleanup service, makes accessing and draining them easier.
- Leave Ends Open (or Loose): Don't seal the drip line ends tightly. Either leave the end caps off (store them safely!) or put them back on very loosely. This allows any sneaky condensation to escape and prevents critters from moving in. Keeping the whole area tidy with a reliable city yard cleanup service also minimizes places for pests to hide near your system.
- Timing is Key: Do this *after* your plants are done needing water but *before* the first hard freeze hits Ottawa (usually late October/early November). Don't wait! It's a crucial step often included in detailed fall maintenance, similar to what's offered by the expert Metcalf yard cleanup service.
Follow these steps, and your drip system will thank you with happy, hydrated plants next spring!
Fall Drip Winterization Timeline
Step 1: Shut Off & Disconnect
Turn off the dedicated water valve. Disconnect timer, filter, and regulator from the faucet.
Step 2: Clean Filter
Disassemble the filter housing. Rinse or gently scrub the filter screen/discs clean. Reassemble.
Step 3: Open Ends & Drain
Remove end caps/closures. Use gravity (lift/shake lines) or low-pressure air to force water out the open ends.
Step 4: Store Components
Bring the disconnected timer, filter, and regulator indoors to a dry, frost-free location.
Step 5: Secure Lines
Loosely replace end caps or cover open ends to keep debris/pests out while allowing drainage.
FAQs: Your Ottawa Drip Irrigation Questions Answered
Ah, if only! Ottawa winters, even the milder ones, pack enough freeze-thaw punches to wreck your system. Water left inside expands like crazy when it freezes, cracking tubing, popping emitters, and potentially damaging your filter or timer. It's much easier (and cheaper!) to drain it properly in the fall than deal with soggy surprises and repairs come spring. Think of it as essential gardening prep!
Pretty important, unfortunately! Even small amounts of trapped water can freeze, expand, and cause hairline cracks or blockages in those tiny emitter pathways. Repeated freeze-thaw cycles, common here, worsen the damage. Proper draining ensures your landscaping investment is protected and ready to go when your plants wake up thirsty. Taking the time now saves headaches later.
We wouldn't recommend it! Filters trap tiny gunk – fine sediment, algae bits – that might not be obvious at first glance. Leaving it uncleaned allows this stuff to dry and harden over winter, making spring clogs more likely. Taking 5 minutes to rinse it now is way easier than troubleshooting poor water flow in your Nepean garden next season. Proper maintenance supports healthy lawn care and garden beds.
Brace yourself! You could face cracked tubing, burst filters, damaged timers, and tons of clogged emitters. Best case? You spend hours in spring flushing and fixing. Worst case? You might need significant repairs or even replacements. Consider bundling winterization with a fall property clean up service to ensure it gets done right and avoid the hassle.
Absolutely! If you're short on time or just not feeling the DIY vibe, hiring a professional is a smart move. We, and other reputable companies, offer irrigation winterization services. You can learn more about us and our approach. Getting it done professionally ensures it's thorough and often includes the air blow-out, giving you peace of mind through the freeze. Check reviews or estimate feedback when choosing a provider. See our Privacy Policy and Terms and Conditions for service details.
Aim for late October to early November in Ottawa, after your plants are mostly done for the season but *before* the ground freezes hard. Yes, even brand-new systems need winterizing! Water freezes in new pipes just as easily as old ones. Protecting your investment from the start ensures it works perfectly for your garden next spring and beyond, complementing any recent soil preparation work.
Conclusion: Set Up Your Spring Garden for Success, Starting Now!
Well, there you have it! Putting your drip irrigation system properly to bed for an Ottawa winter might seem like just another chore on the fall to-do list, but trust us, your future self will thank you profusely next spring. Think of it as giving your garden's watering system a cozy blanket against the freeze, ensuring it wakes up refreshed and ready to work, not grumpy and clogged! Taking these simple steps now saves you time, money, and the sheer frustration of troubleshooting blocked emitters when your plants are desperately thirsty.
A little preventative landscaping maintenance in autumn truly sets the stage for a vibrant, hassle-free spring gardening season, whether you're tending flower beds in Manotick or veggie patches across the city. You’ve got the know-how to protect your investment and ensure those first signs of green get the hydration they need, right on schedule. So go forth and conquer that fall prep – your future flourishing garden depends on it!
Ready to ensure a smooth spring startup?
Let Clean Yards handle your fall irrigation winterization and other cleanup needs professionally.
Schedule Your Fall Service Explore All Our Services